Phone:
(848)318-7679
Physical address:
954 Vaughn Ave, Toms River 08753

Phone:
(848)318-7679
Physical address:
954 Vaughn Ave, Toms River 08753
Project story
A clearer route around the house, from the side gate and stair landing to the rear patio. Spaced square stepping stones follow the curve of the side yard. See the original ground, the base and bedding work, and the completed route in both directions.
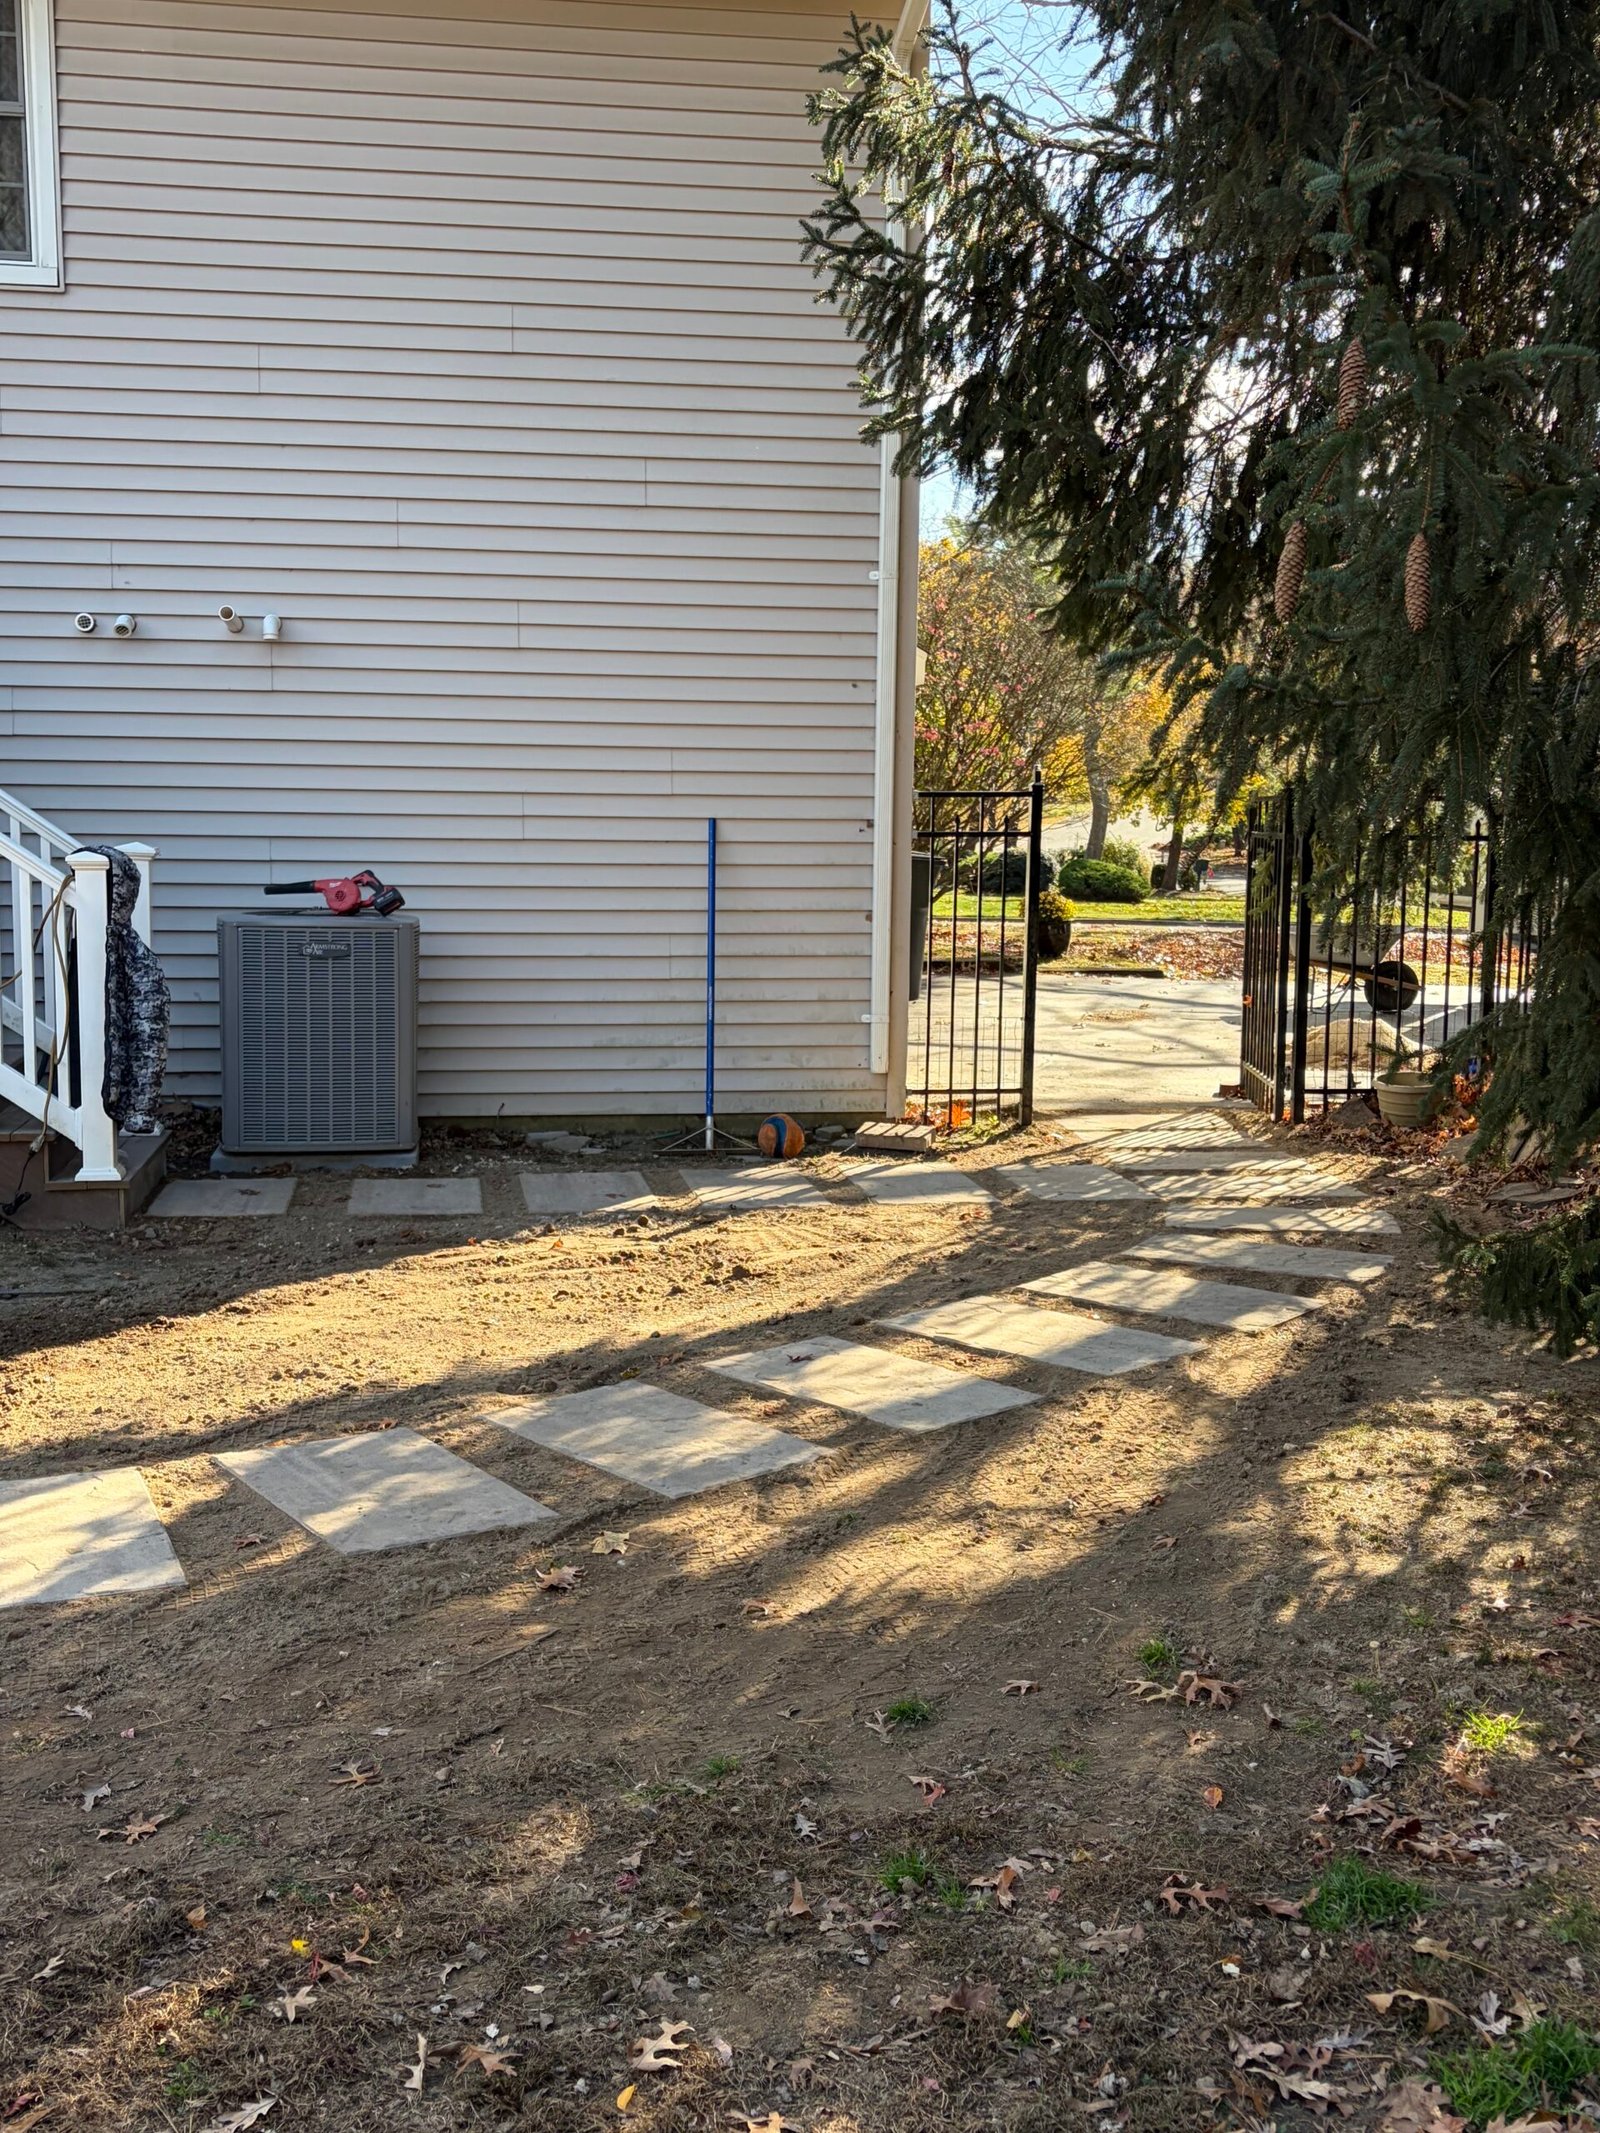 AFTER
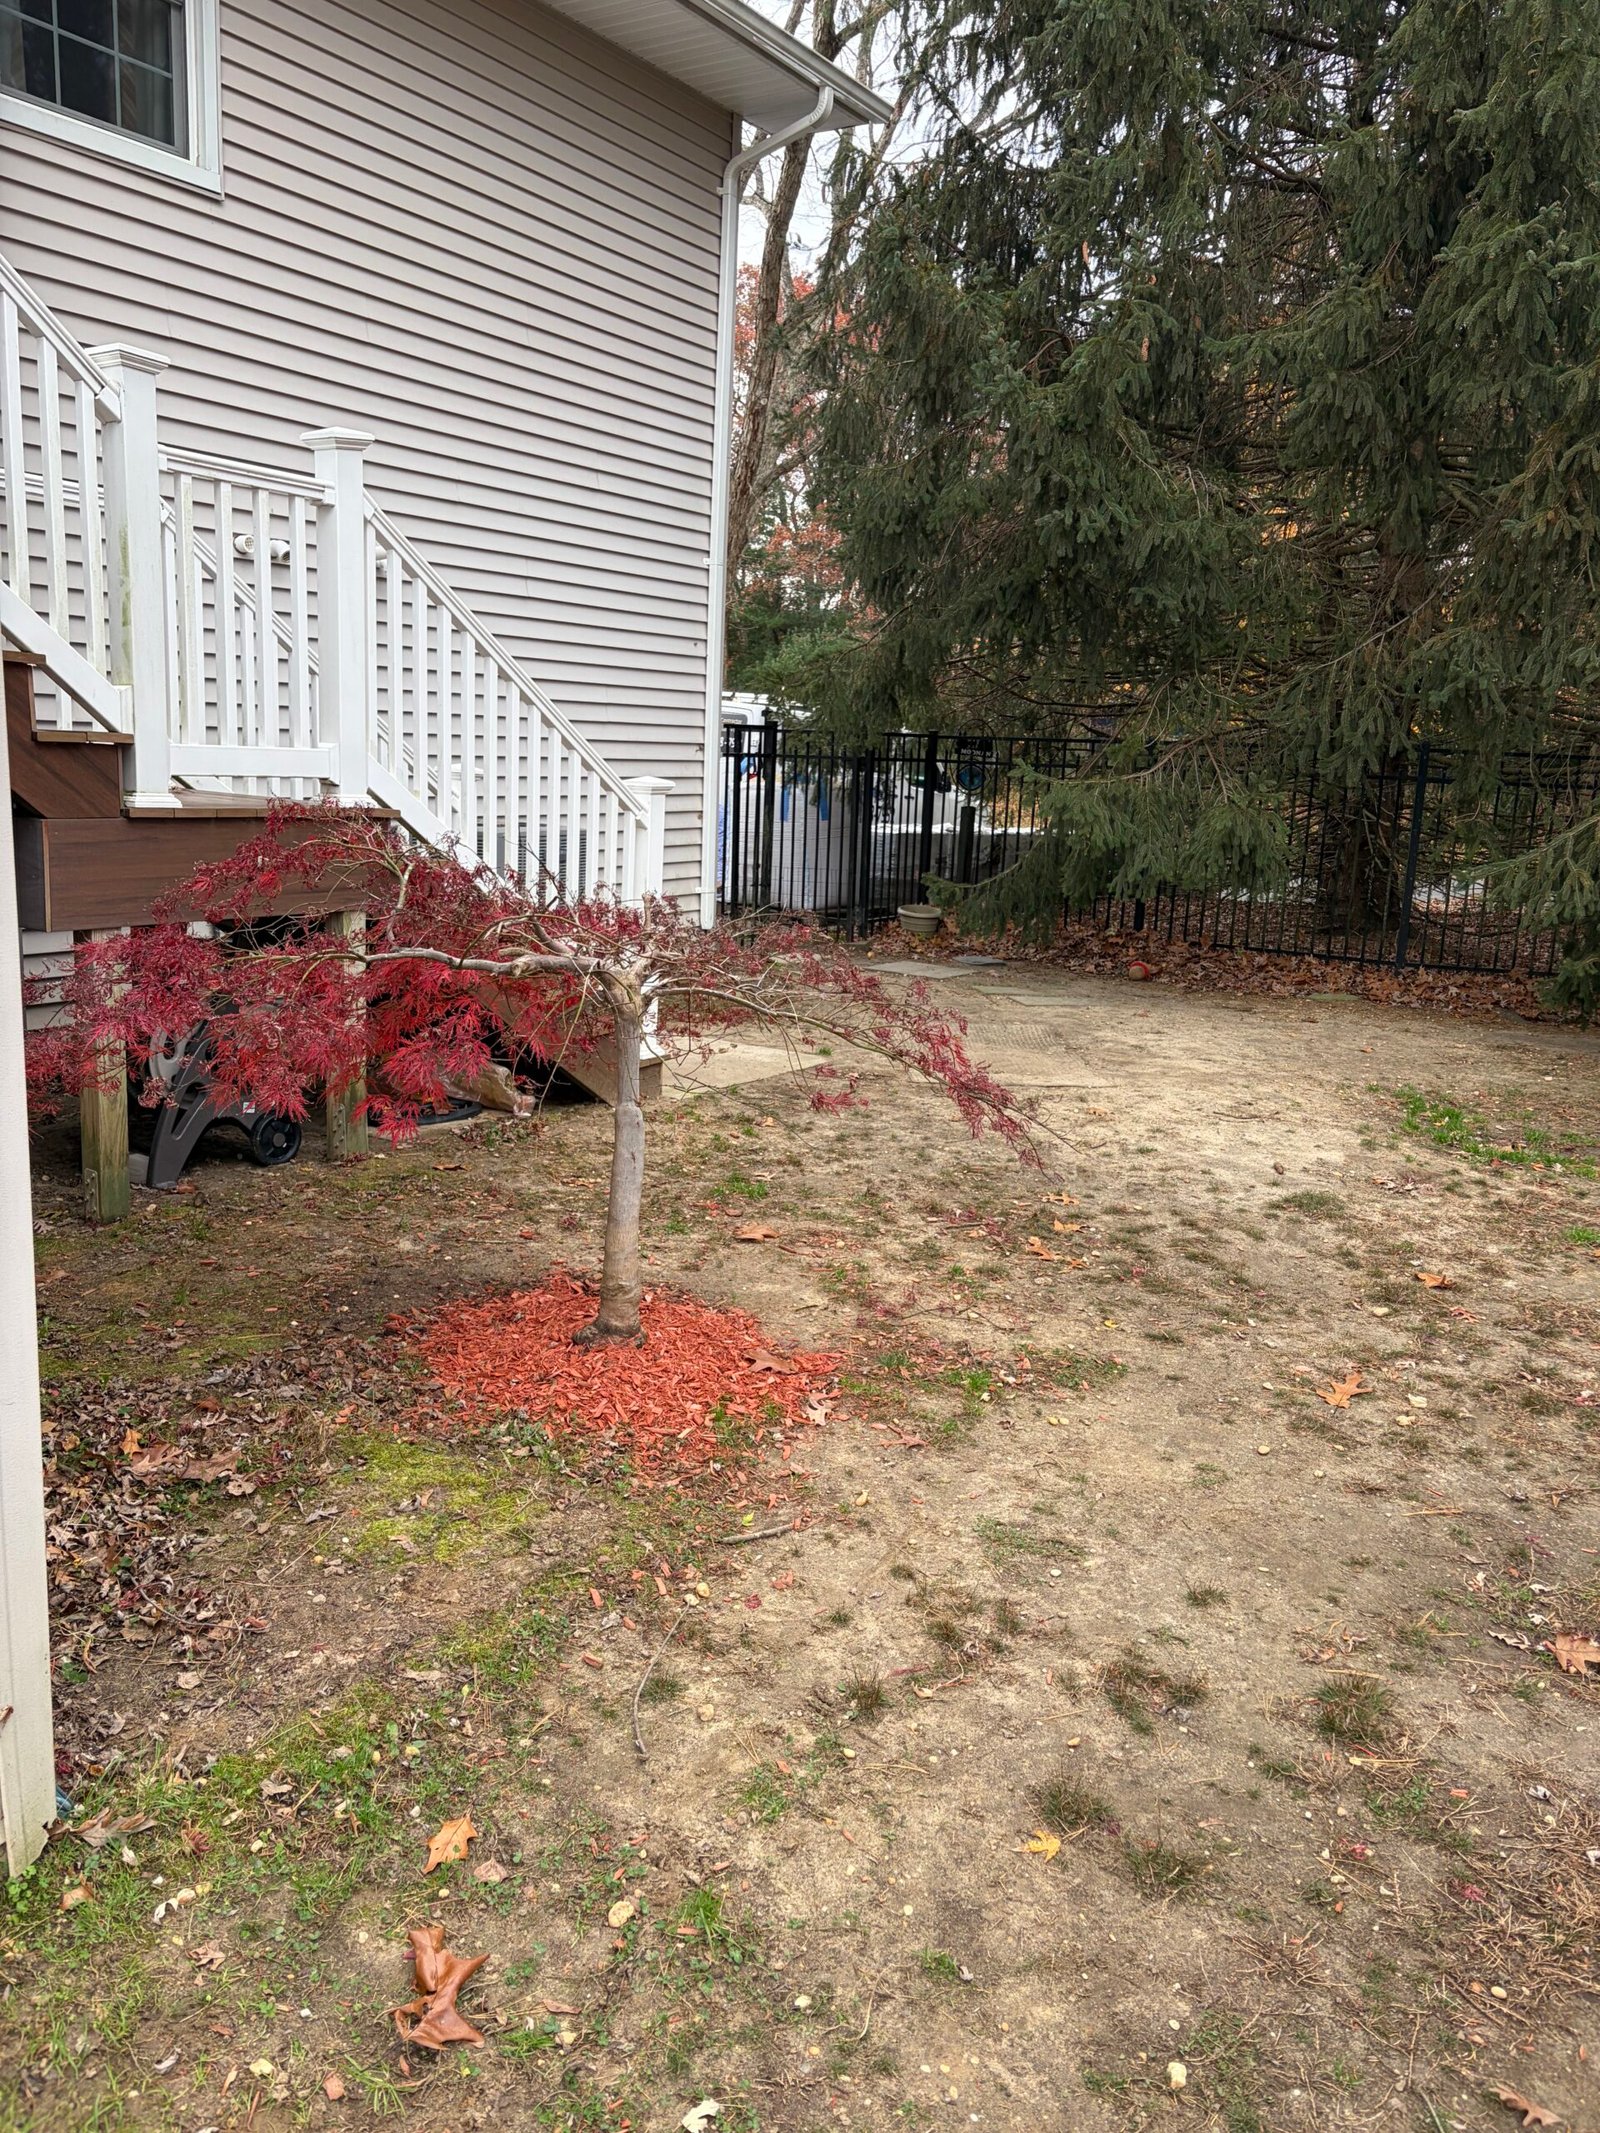 BEFORE
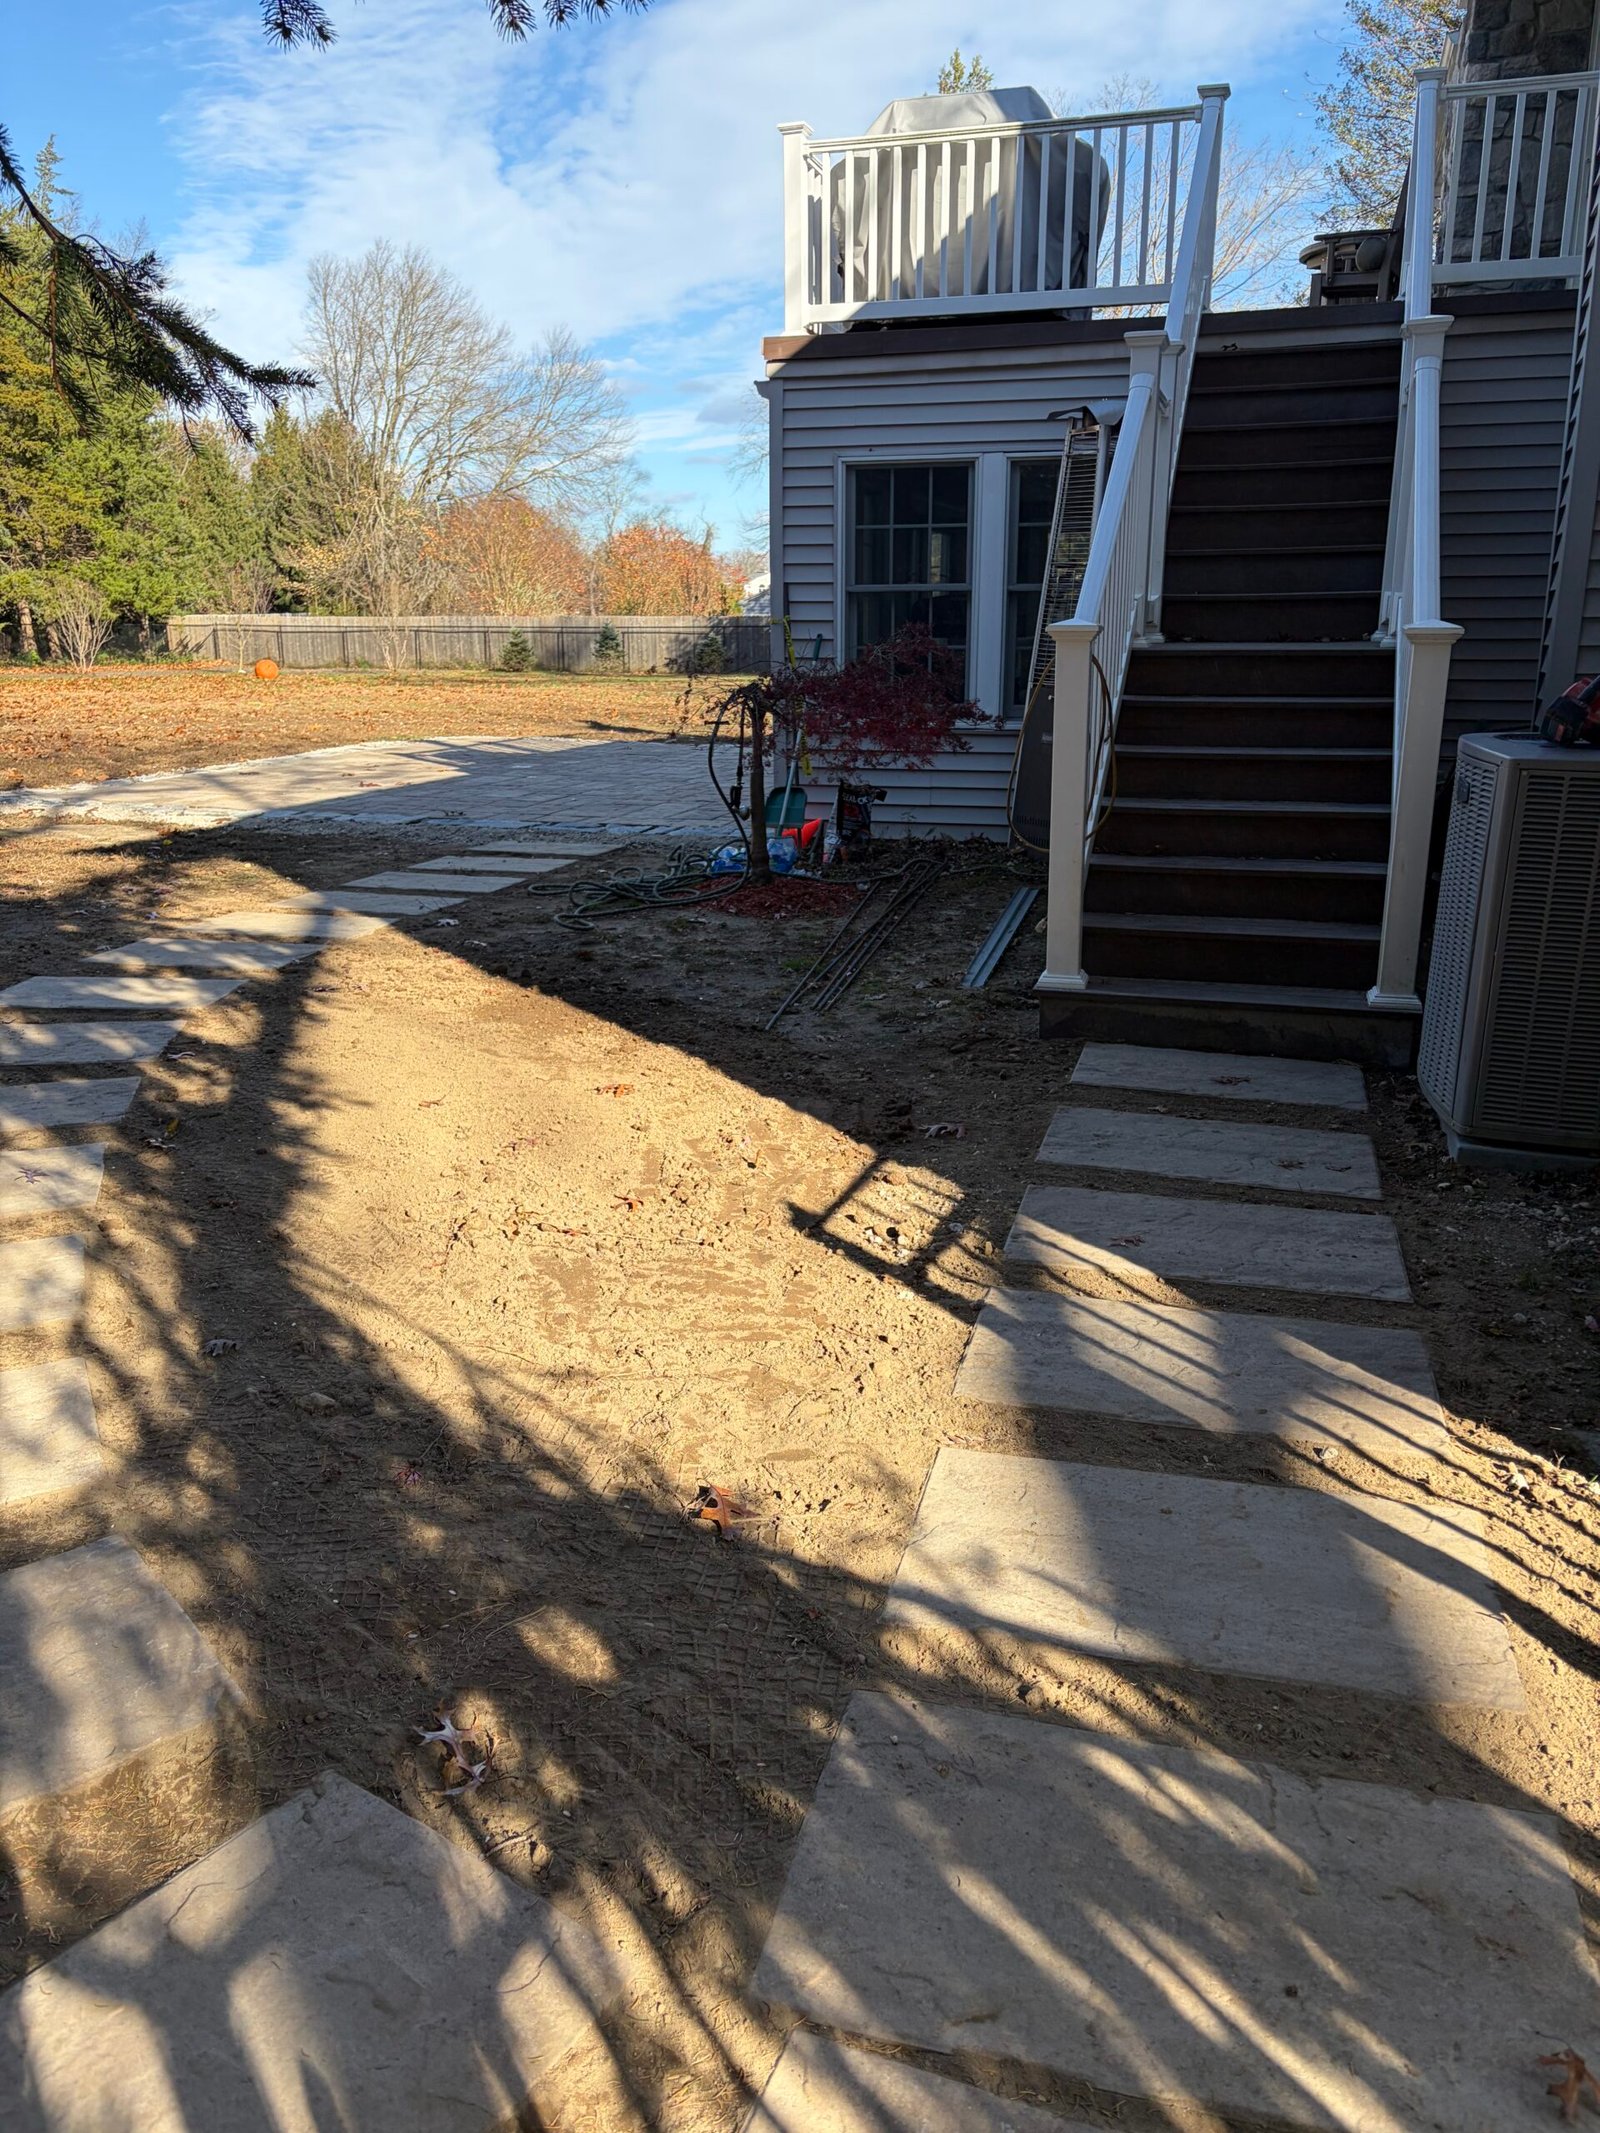 AFTER
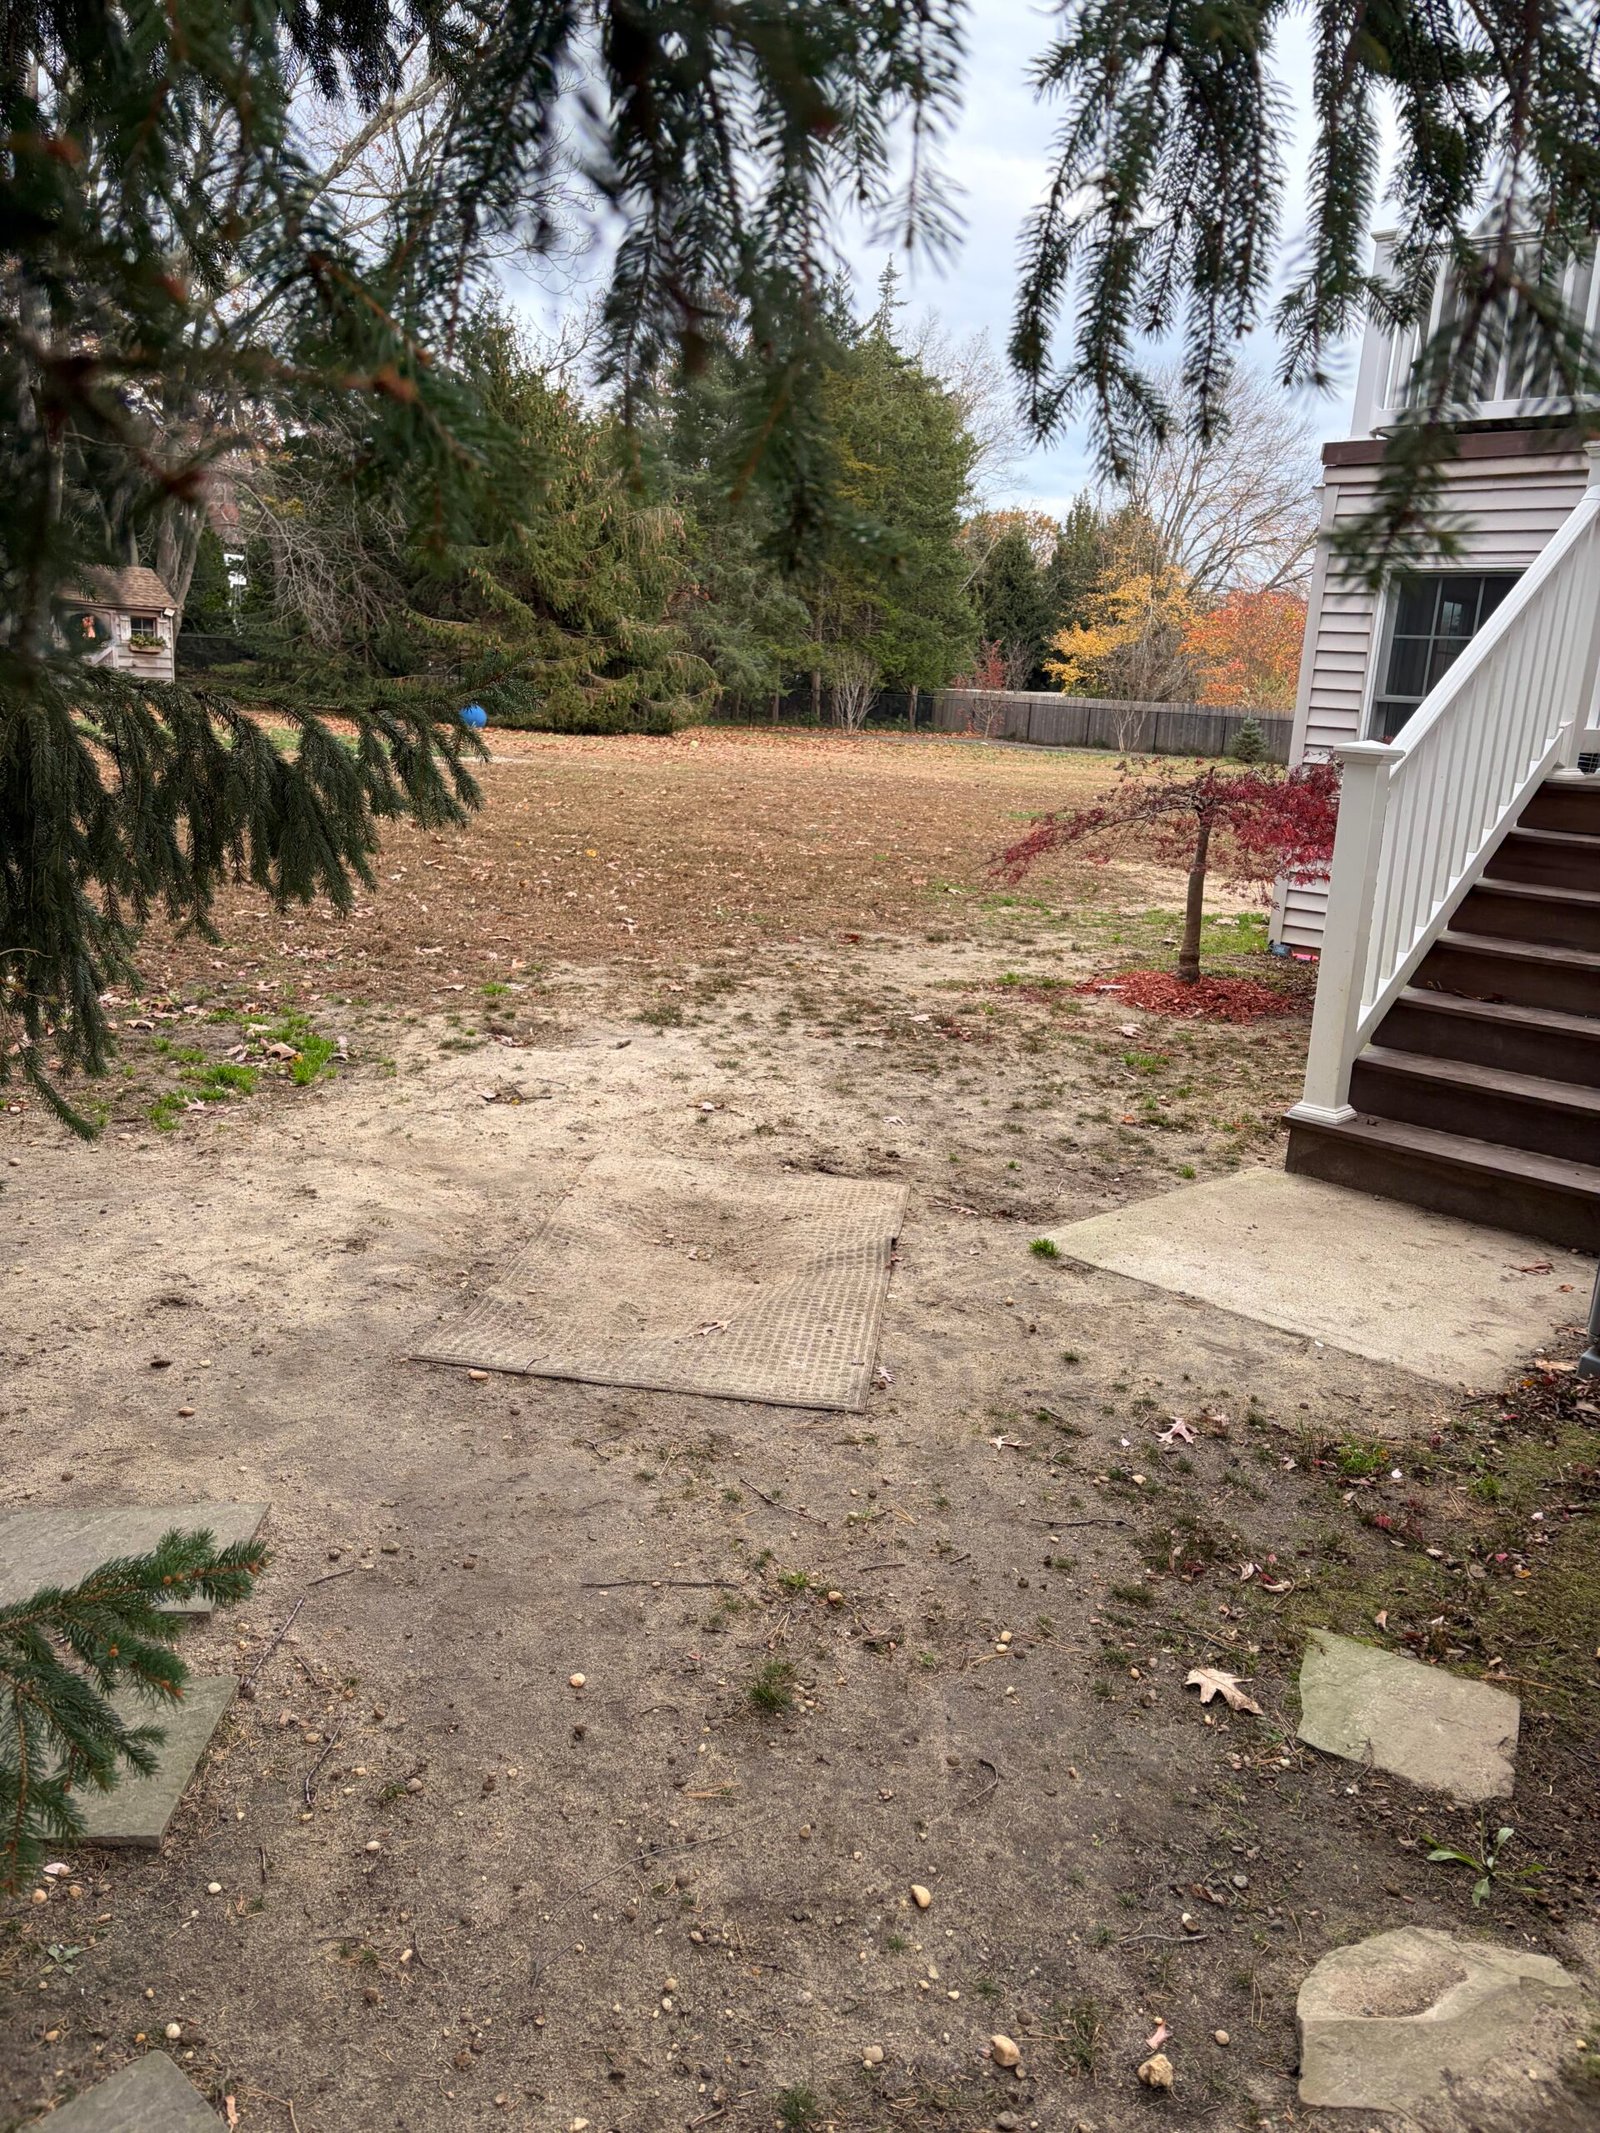 BEFORE
Move either slider to compare the original area with the completed paving. The photographs were taken at different times and from slightly different positions.
The side yard needed a more defined connection between the gate, the existing stairs and the open rear yard. The walkway follows this route with separate square stepping stones rather than a continuous paved surface.
A prepared granular route and finer bedding establish the line around the house. The completed stones connect the stair landing and gate with the new rear patio, while working around the existing equipment and planting areas.
Explore 4 stages with 12 selected photographs and 3 videos. Select a photograph to open the gallery, or play the videos beside the stages they document.
Stage 01
The starting views show worn ground beside the house, the landing at the foot of the stairs and the route toward the side gate. In the other direction, the same area opens into the rear yard.
The new walkway follows these existing connections, keeping its line alongside the house and around the nearby planting area.
Stage 02
A band of granular material was placed along the curve through the side yard. Near the stair landing, stepping stones were already being arranged while the rest of the base and bedding remained in progress.
The preparation views follow the route beside the stairs and equipment and through the open gate. This brought the separate connections into one continuous layout before the remaining stones were fitted.
This video could not be played here. Open the original video.
Watch this stage
Walk beside the house and stairs to see the stones near the landing and the granular route continuing toward the gate.
Stage 03
Fine material was spread along the prepared route and worked into an even bedding area. The video shows this material being raked across the curve before the remaining stepping stones were installed.
The photographs follow the line past the house and toward the gate, with the stones near the landing providing the starting point for the rest of the path.
This video could not be played here. Open the original video.
Watch this stage
Watch fine material being spread and leveled along the curved route before the remaining stepping stones were fitted.
Stage 04
Spaced square stones now define the route around the side of the house. They connect the existing landing with the gate in one direction and the new patio in the other.
The finished views follow the curve from several positions, including the gate opening and the rear-yard connection. The work shown finishes the walking route; surrounding soil and landscape areas remain visible alongside it.
This video could not be played here. Open the original video.
Watch this stage
Follow the spaced stepping stones through the gate and around the side of the house.
Browse all 12 stage photographs with the gallery arrows, your keyboard or a swipe on your phone.
The stepping stones give the side yard a defined walking route between the gate, stairs and patio. The curved line brings those connections together while retaining the open spaces between the individual stones.
Explore the adjoining backyard patio
Planning a side-yard walkway, garden path or a connection to a new patio? Share photographs, your property location and the points you want to link. Nashkov Group can help shape the route and its installation scope.
Discuss your walkway project