Phone:
(701)814-6992
Physical address:
6296 Donnelly Plaza
Ratkeville, Bahamas.

Phone:
(701)814-6992
Physical address:
6296 Donnelly Plaza
Ratkeville, Bahamas.
Project story
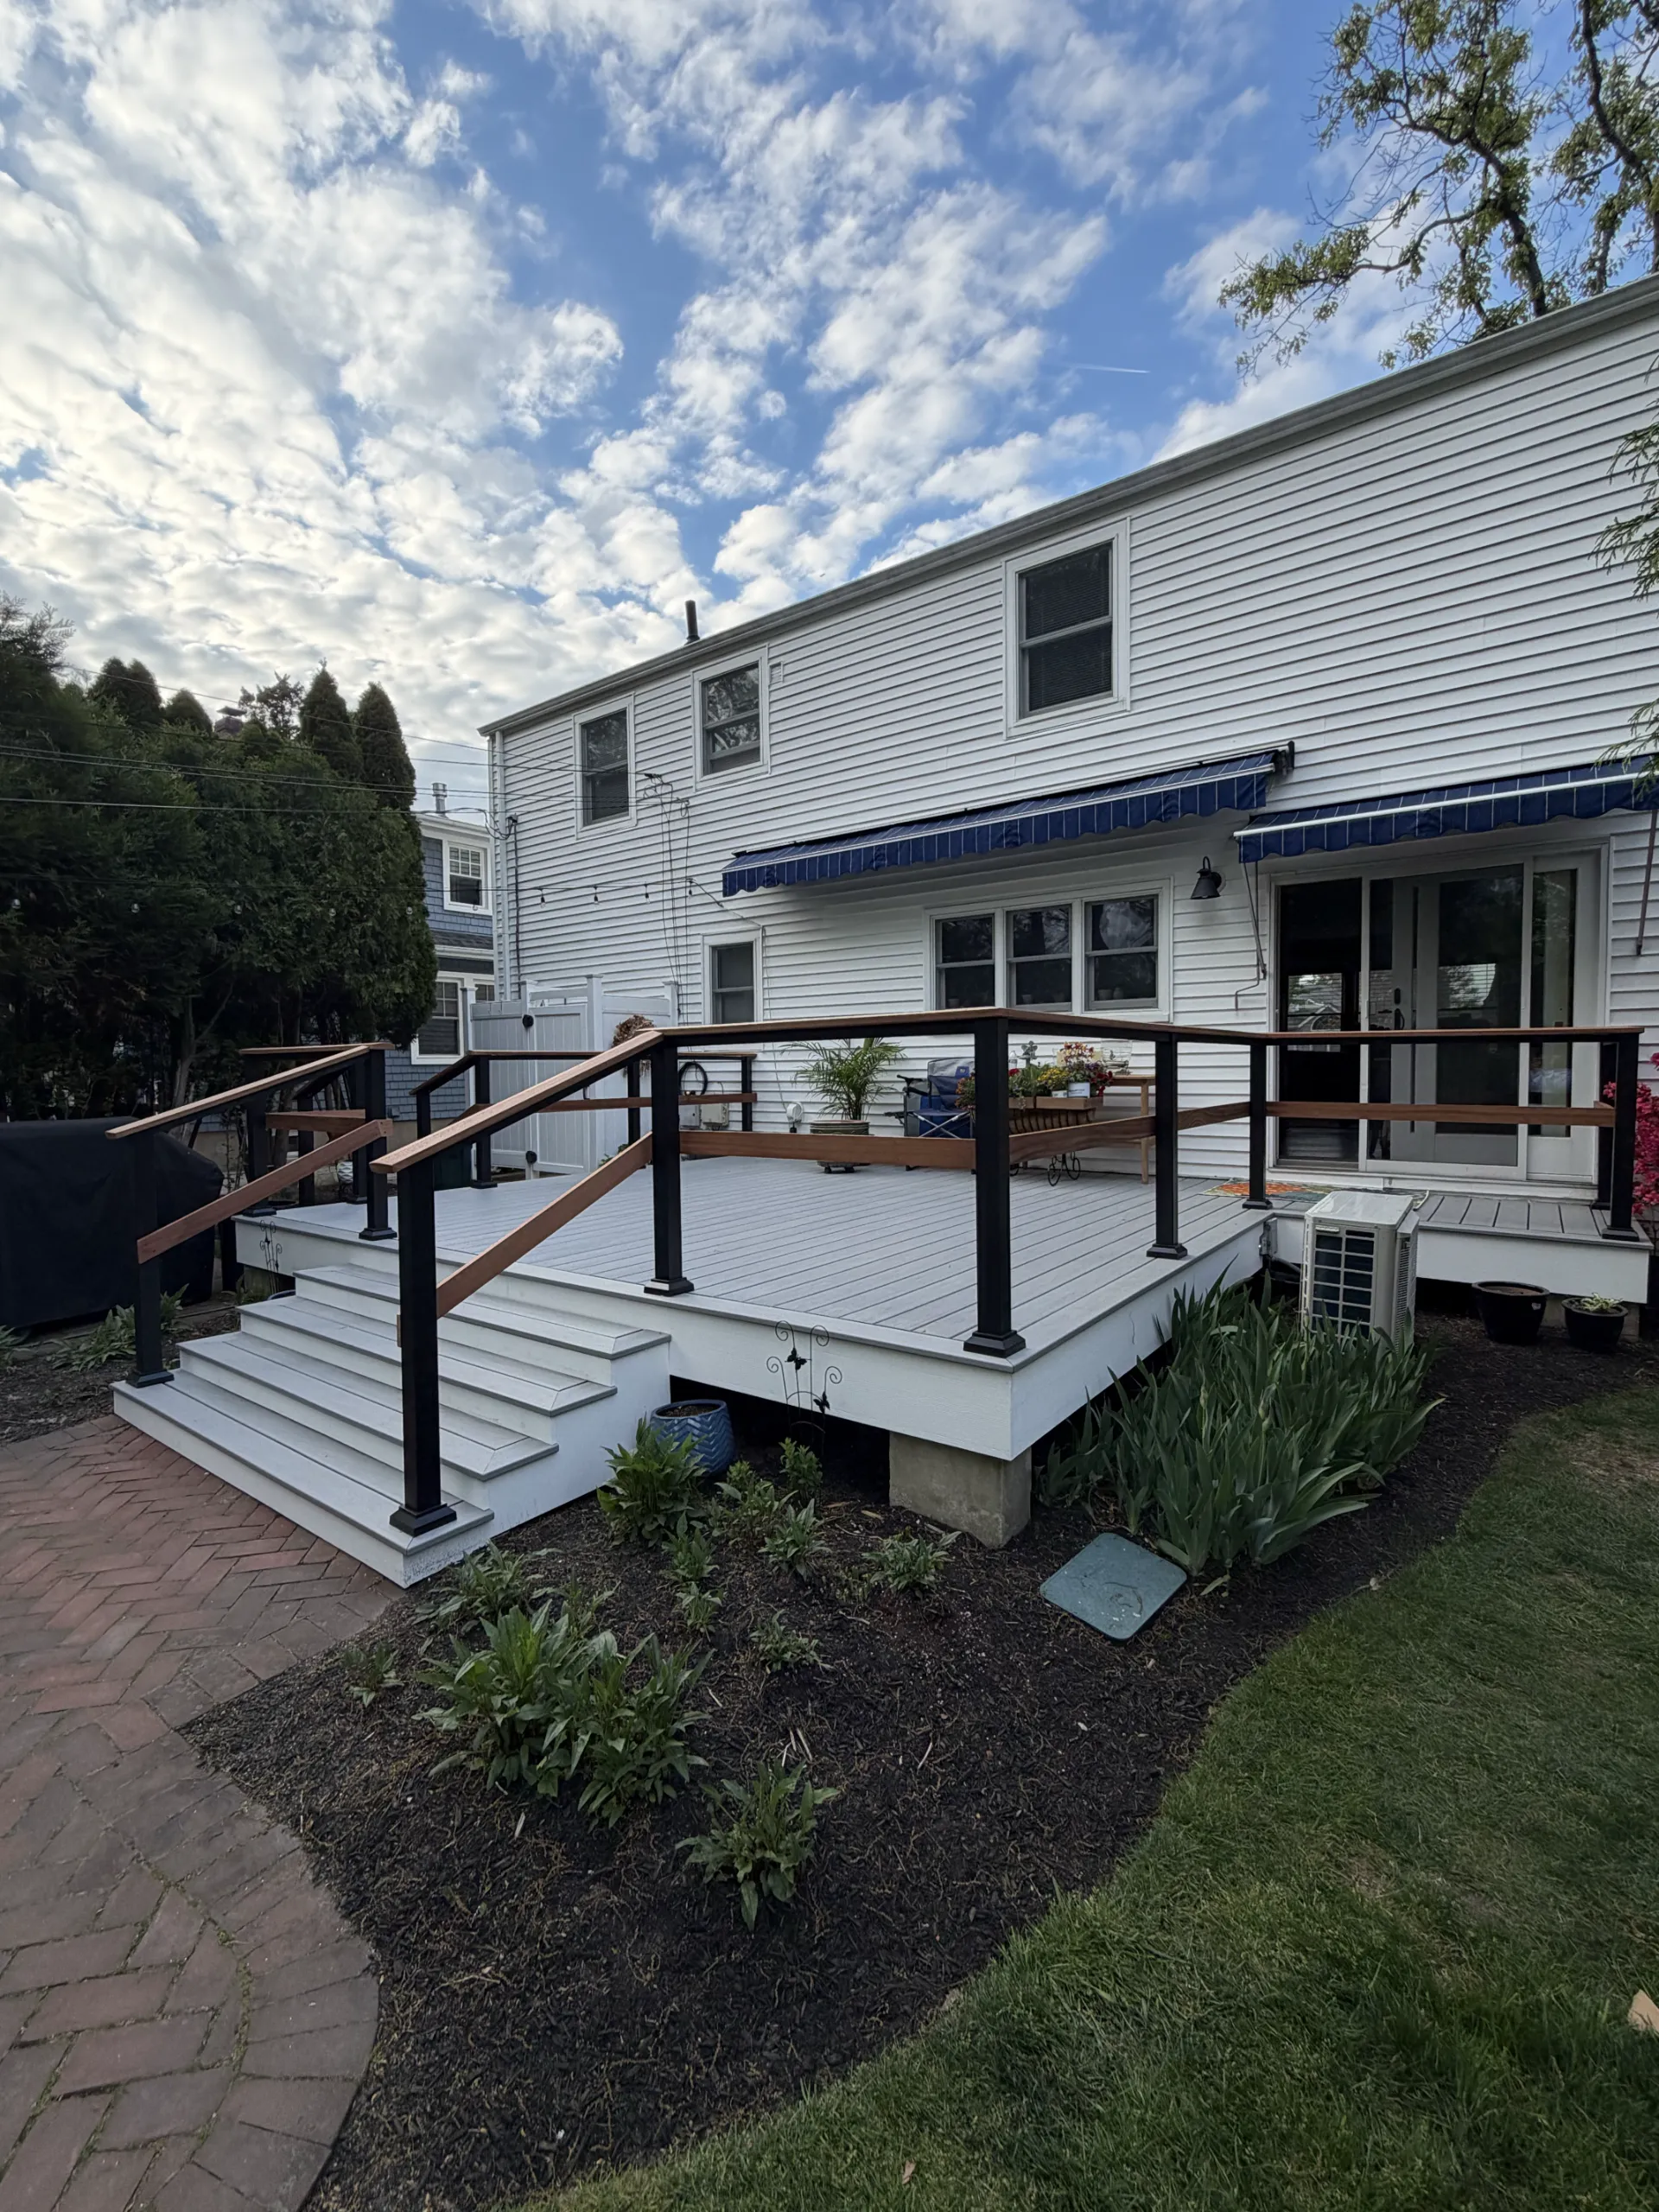
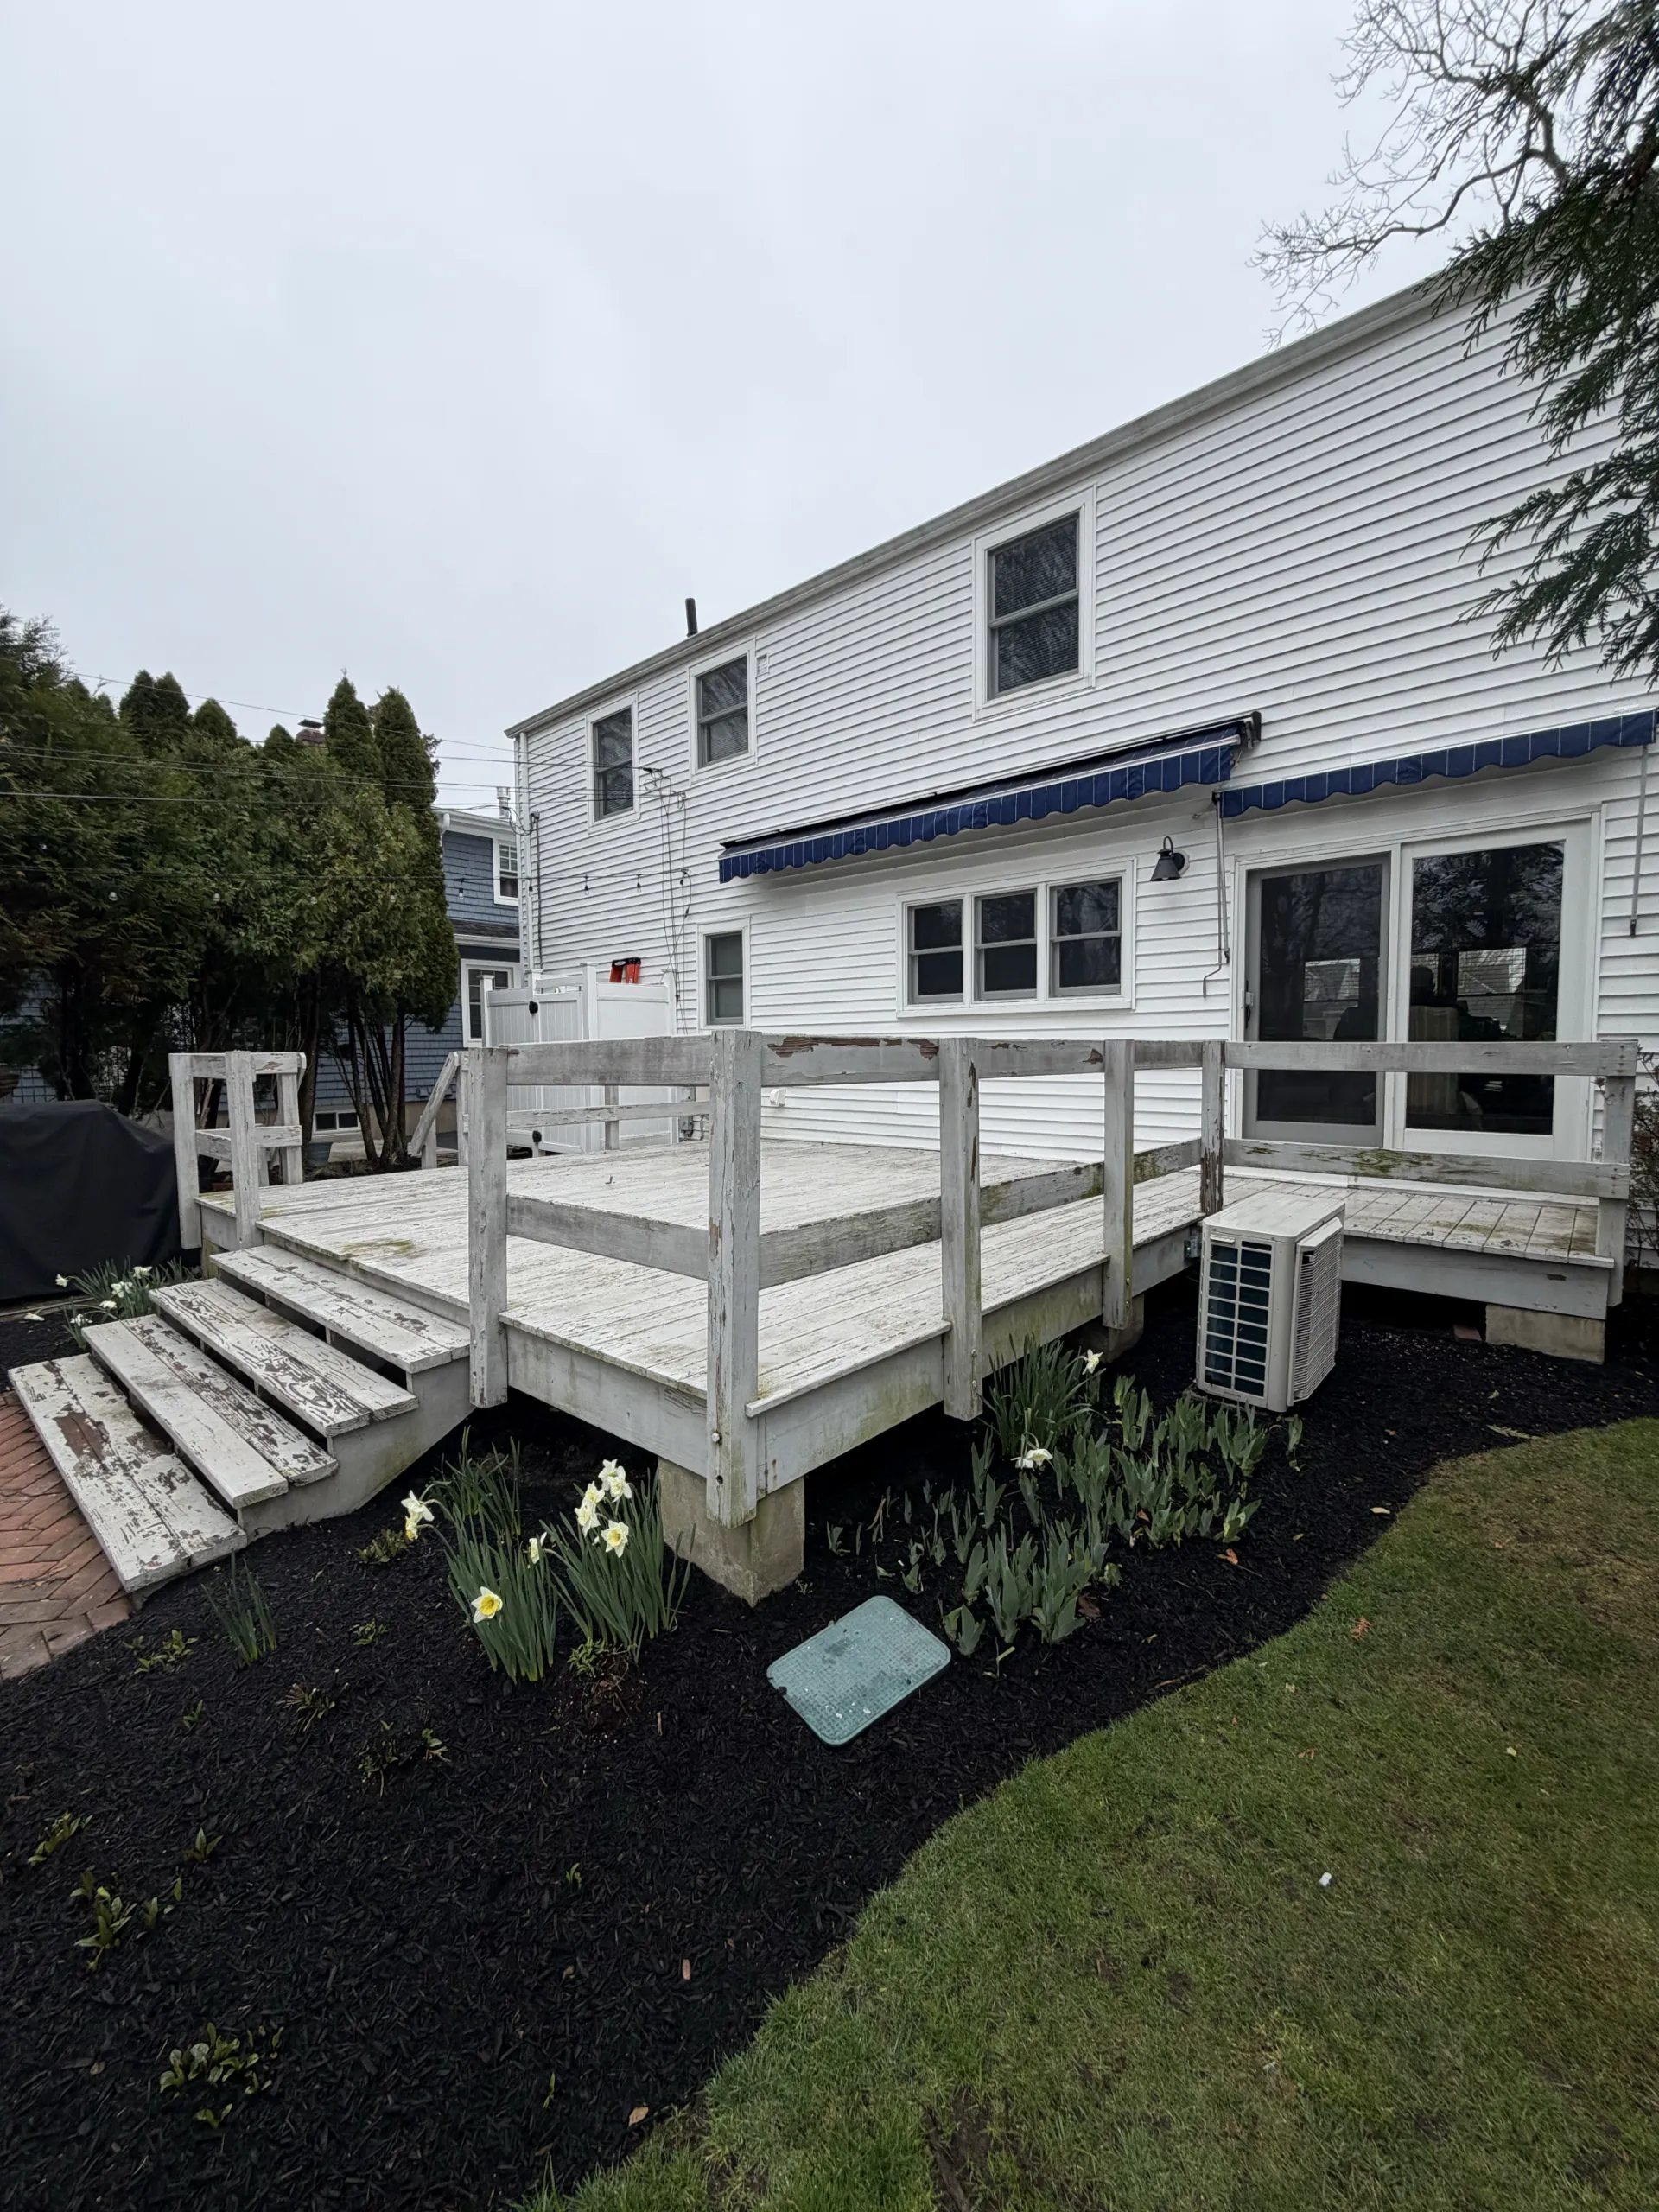
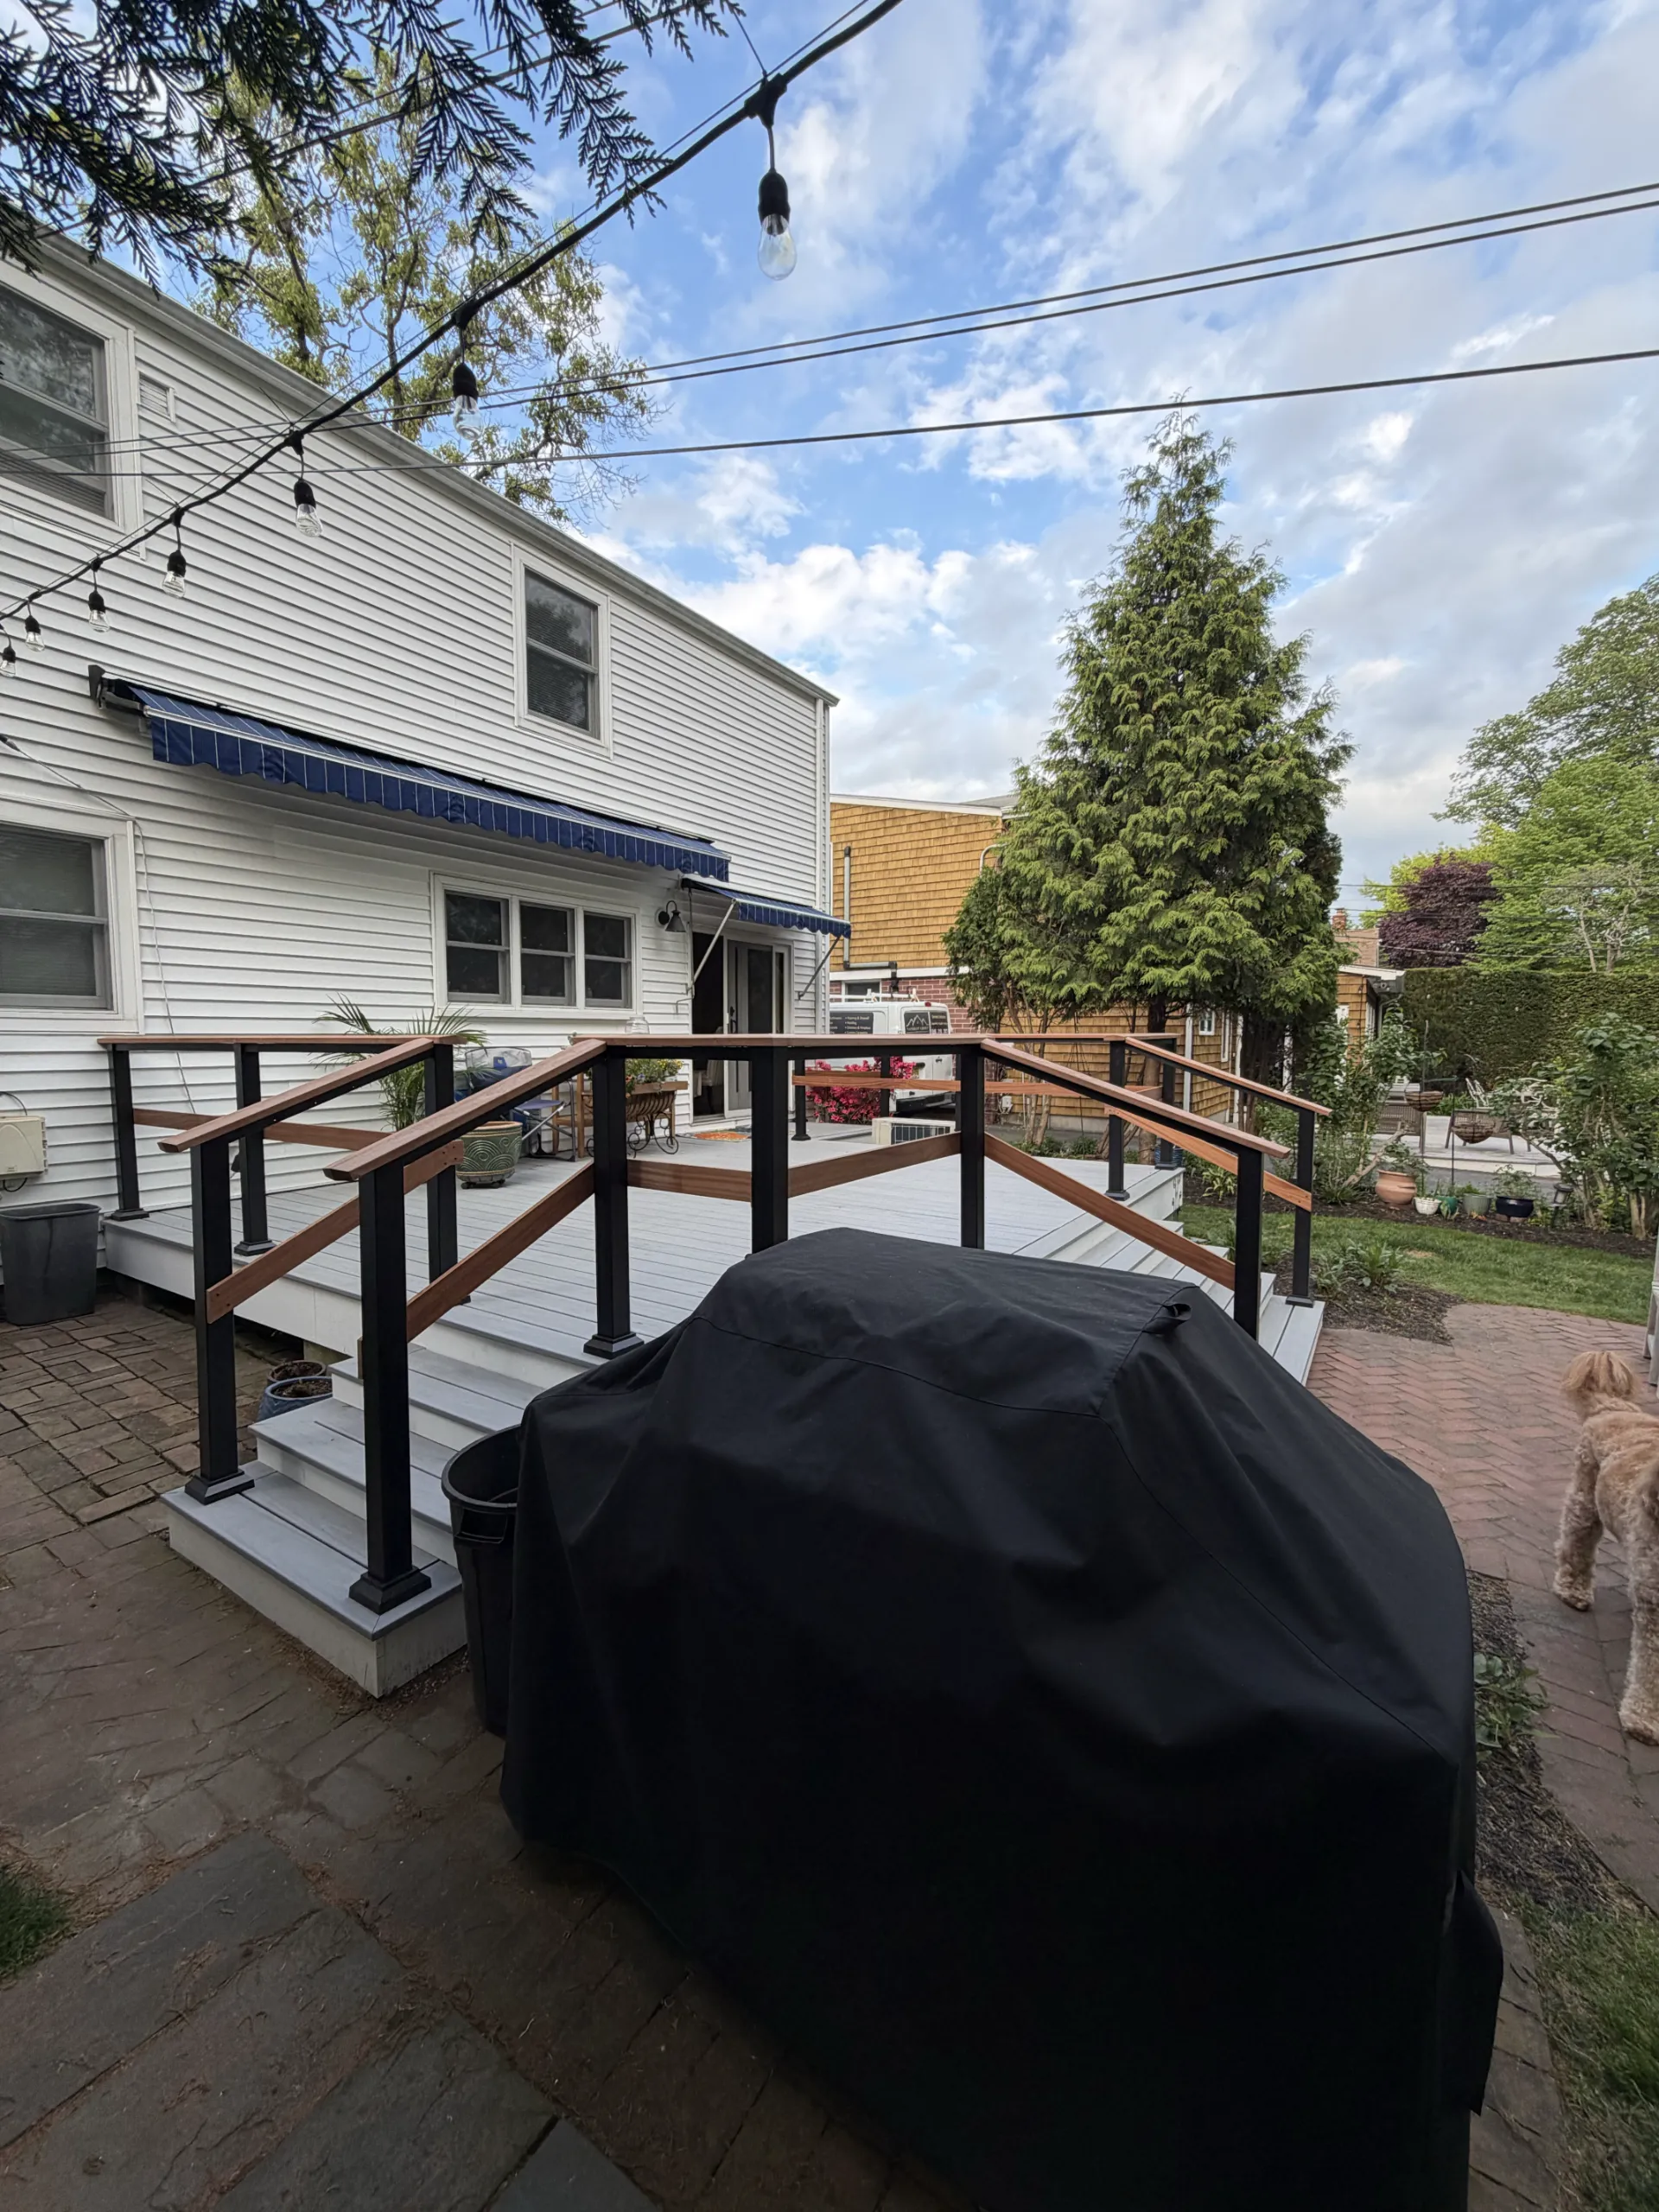
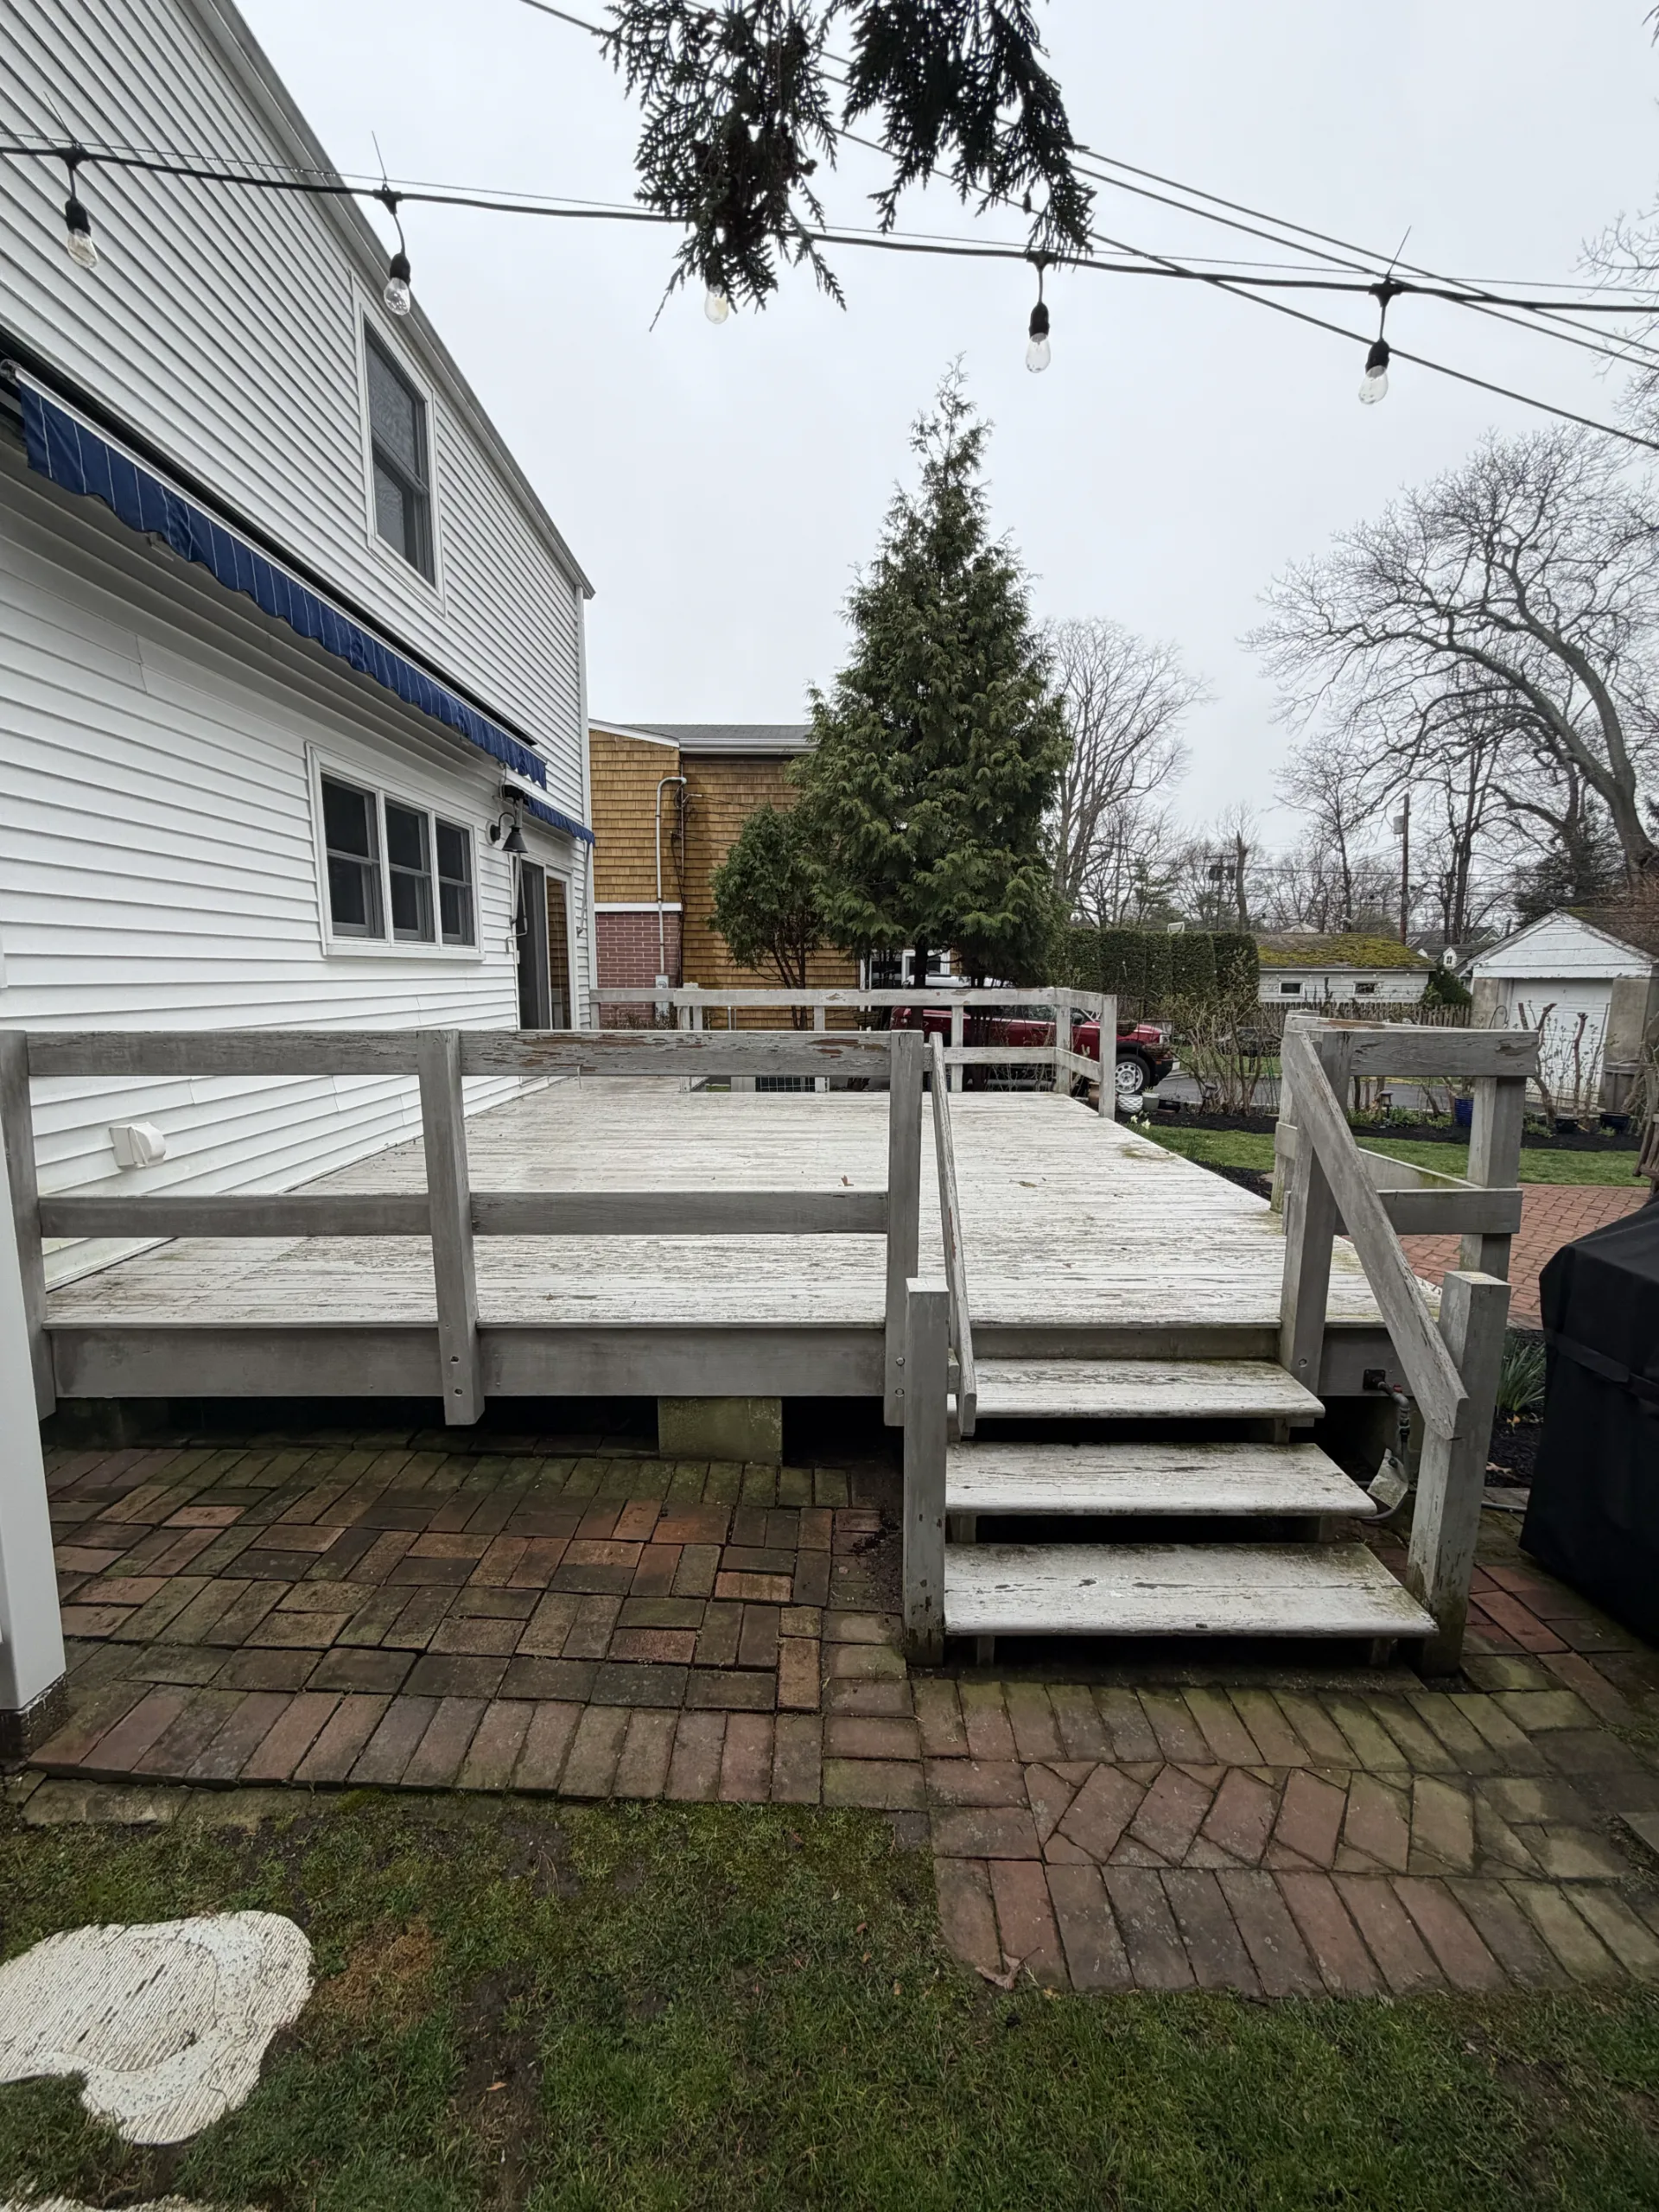
The same backyard setting, with a fresh way to enjoy it. A weathered white-painted deck was renewed with gray decking, white trim, reworked stairs and railings that pair black posts with contrasting wood rails. Explore the transformation from the original surface to the finished outdoor space.
Move either slider to compare the original deck with the finished result.
 AFTER
 BEFORE
 AFTER
 BEFORE
Follow seven stages of the renovation in 20 photographs. Select any image to open the gallery here on this page, then use the side arrows, your keyboard or a swipe to move through the full project.
Stage 01
The original deck had a white-painted timber surface, timber guardrails and two stair connections to the brick patio. Peeling finishes and weathered boards made the space feel tired. The renovation kept the familiar deck footprint and its connection to the house while changing the surfaces, stair details and railings.
Stage 02
The old deck boards and timber guardrails were removed to open up the supporting frame. With the surface lifted, the joist layout and deck edges became accessible for the next stage. The original stairs are still visible in these early views, before the stair work progressed.
Stage 03
Work continued with the timber frame open, before any new decking covered it. This stage provided access to the joists, perimeter and stair connections, so the supporting layout could be prepared for the replacement surface and the work at the deck edges.
Stage 04
New timber stair framing took shape at the main and side access points. White perimeter fascia began to give the deck a cleaner outline, while the stair structure and prepared tread supports were still visible ahead of the finished boards and risers.
Stage 05
Gray boards replaced the worn white-painted timber surface. Matching stair treads and white risers tied the access points into the new deck, while the fascia created a continuous light-colored edge. At this point, the surface and stairs were taking their finished form ahead of the railing installation.
Stage 06
Black railing posts were set around the deck perimeter and at the stair runs. Their placement established the lines for the new rails and introduced a darker accent against the gray boards and white trim.
Stage 07
Contrasting wood rails joined the black posts around the deck and down the stairs. The finished combination of gray decking, white trim and dark posts gives the space a more defined appearance, while preserving the connection to the existing brick patio and garden.
Gray boards give the deck a more consistent finish, while white stair and perimeter details connect it visually to the house. The new railing lines frame the outdoor space without changing the familiar relationship between the deck, brick patio and garden.
Discuss your deck or entry project