Phone:
(848)318-7679
Physical address:
954 Vaughn Ave, Toms River 08753

Phone:
(848)318-7679
Physical address:
954 Vaughn Ave, Toms River 08753
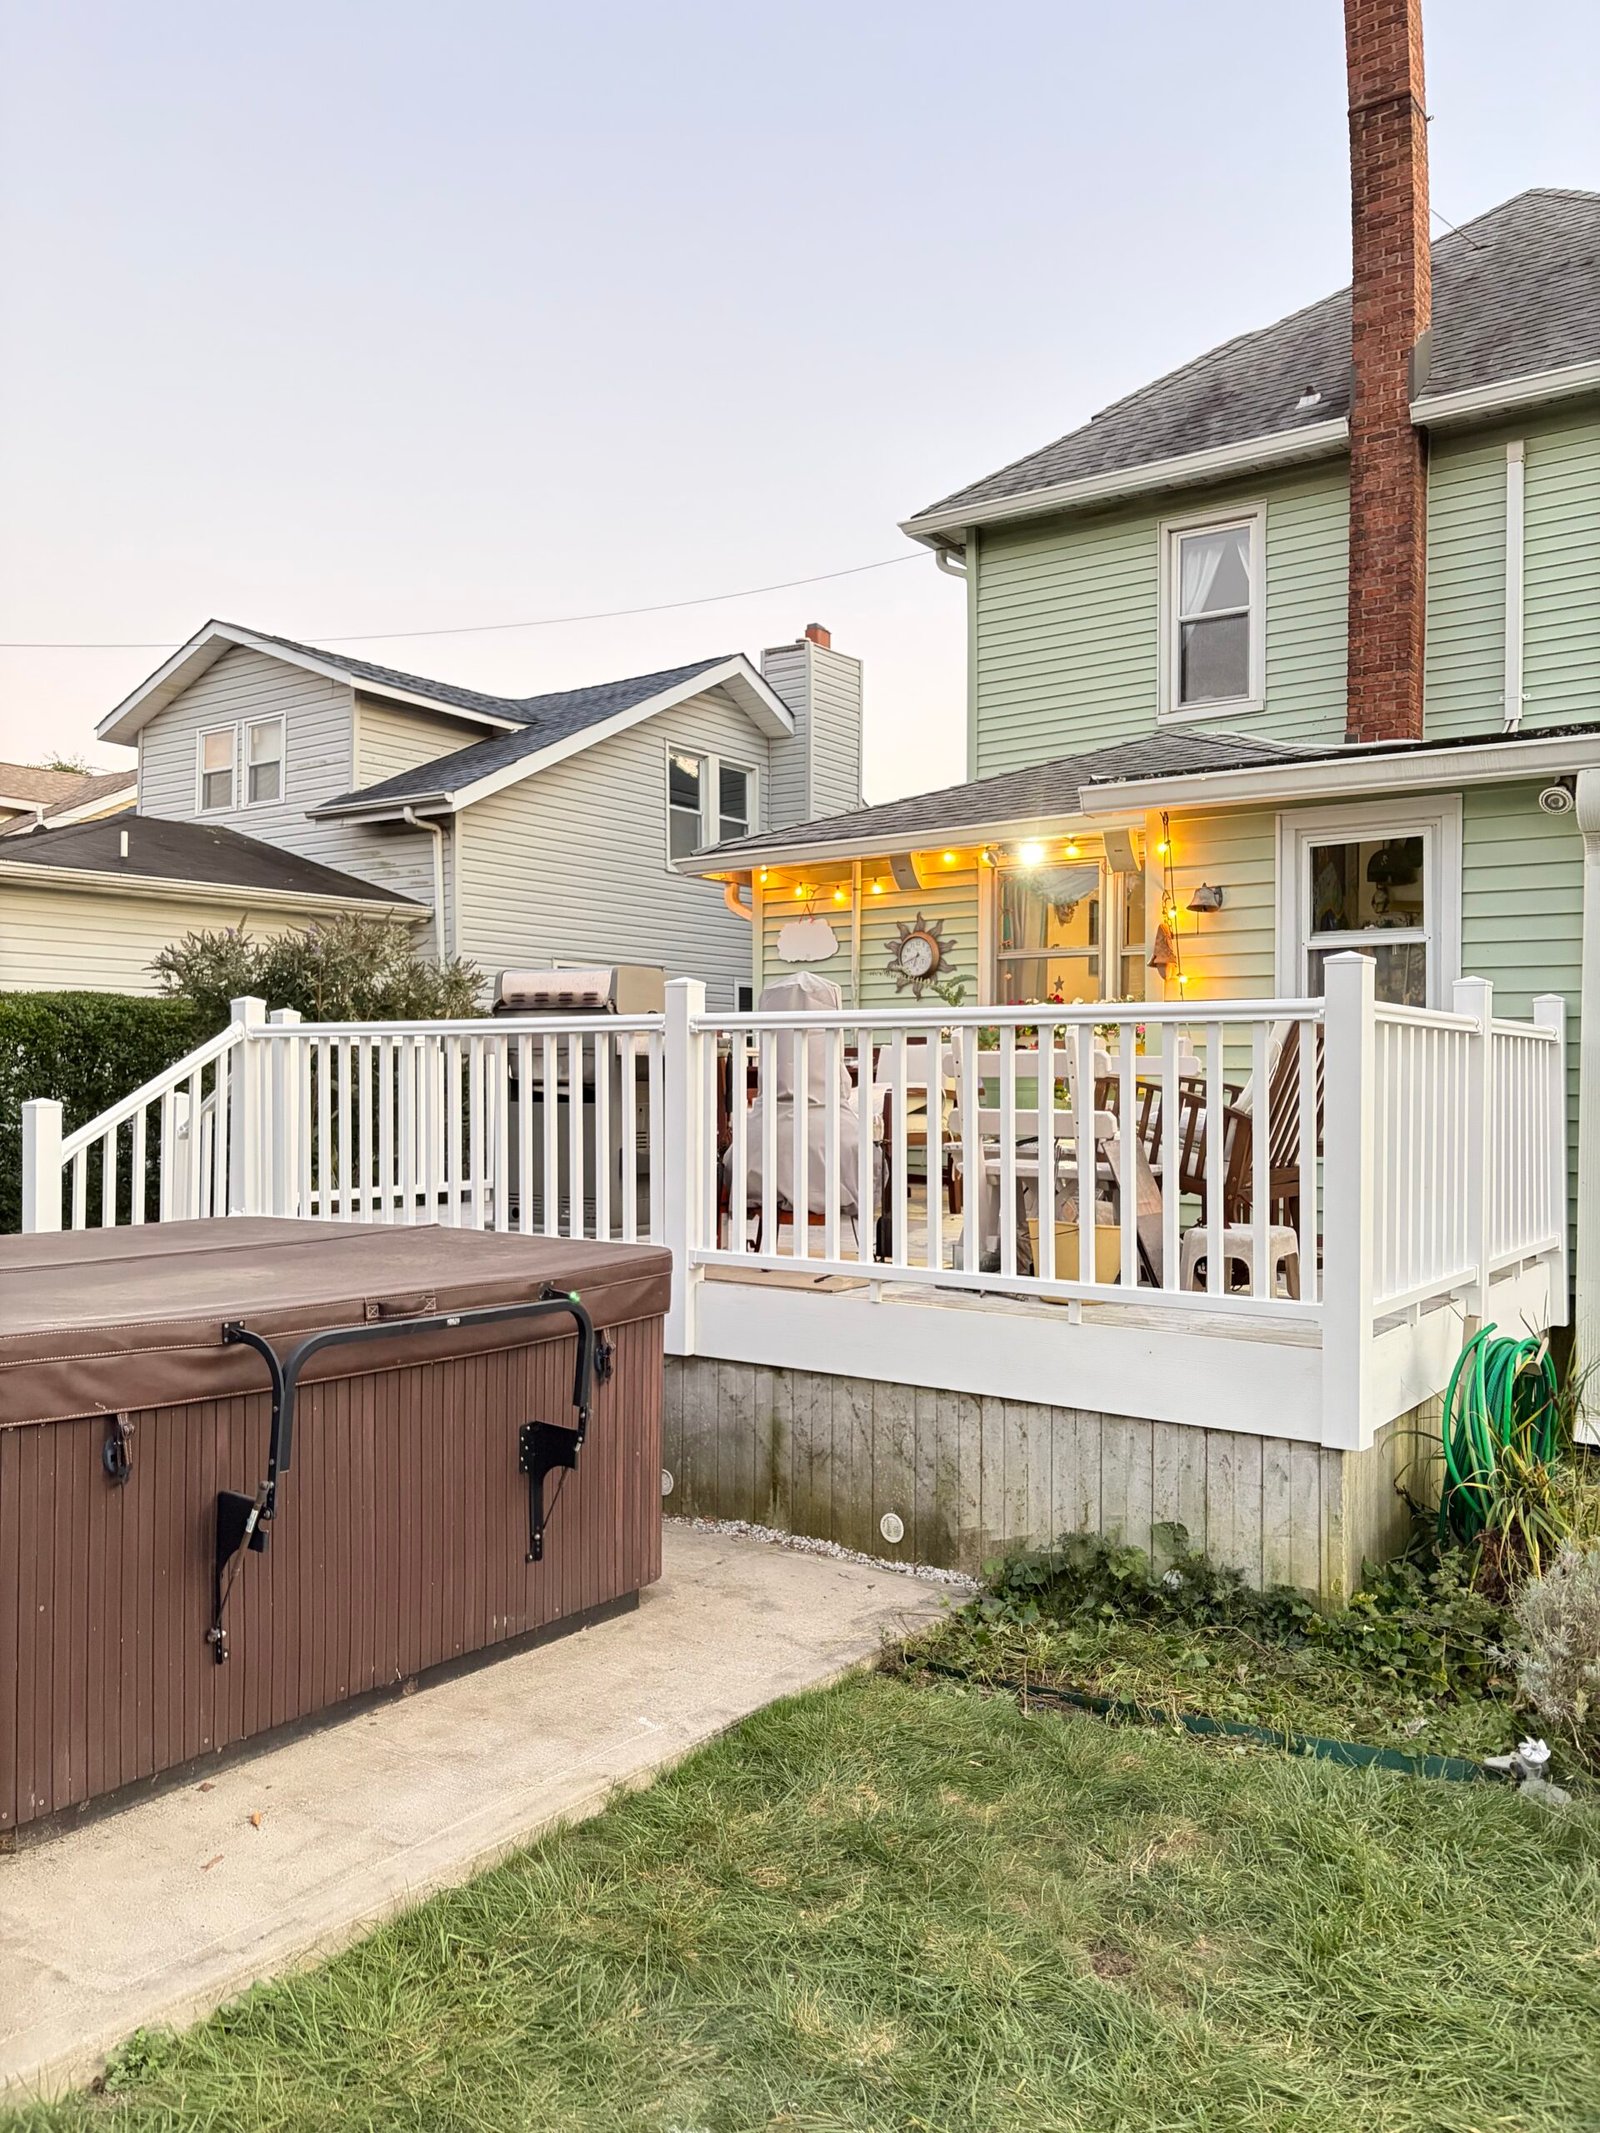
Deck railings. Rebuilt stairs. A renewed garden connection.
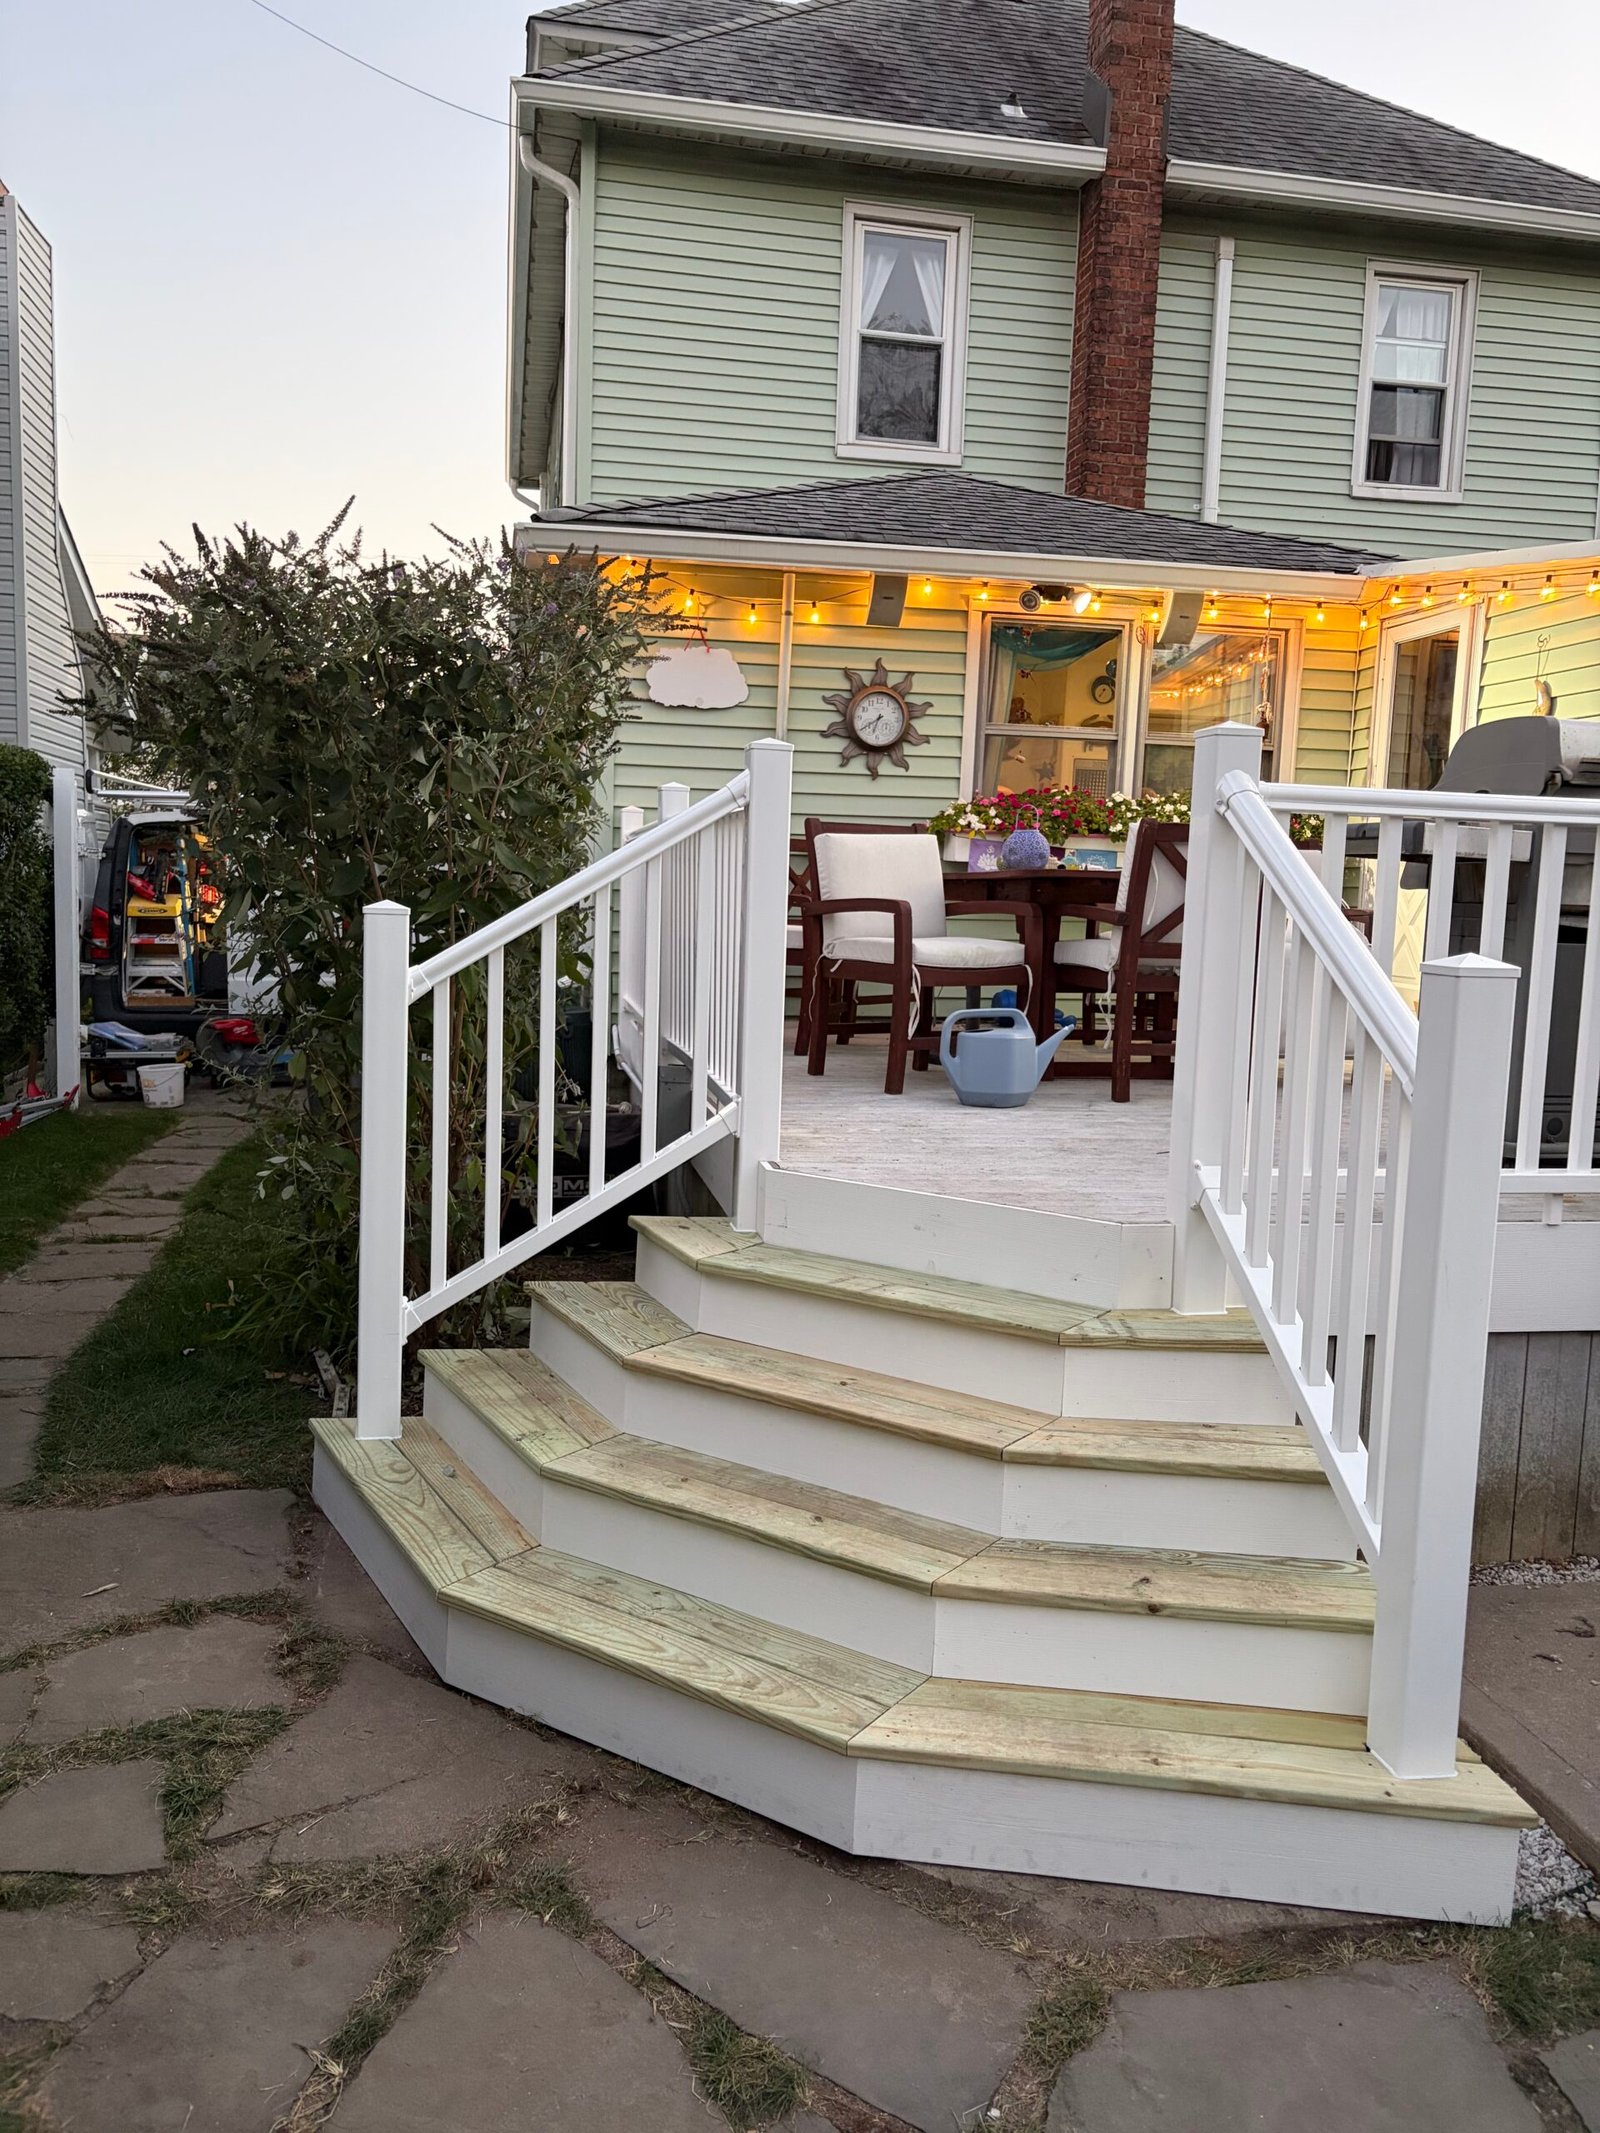
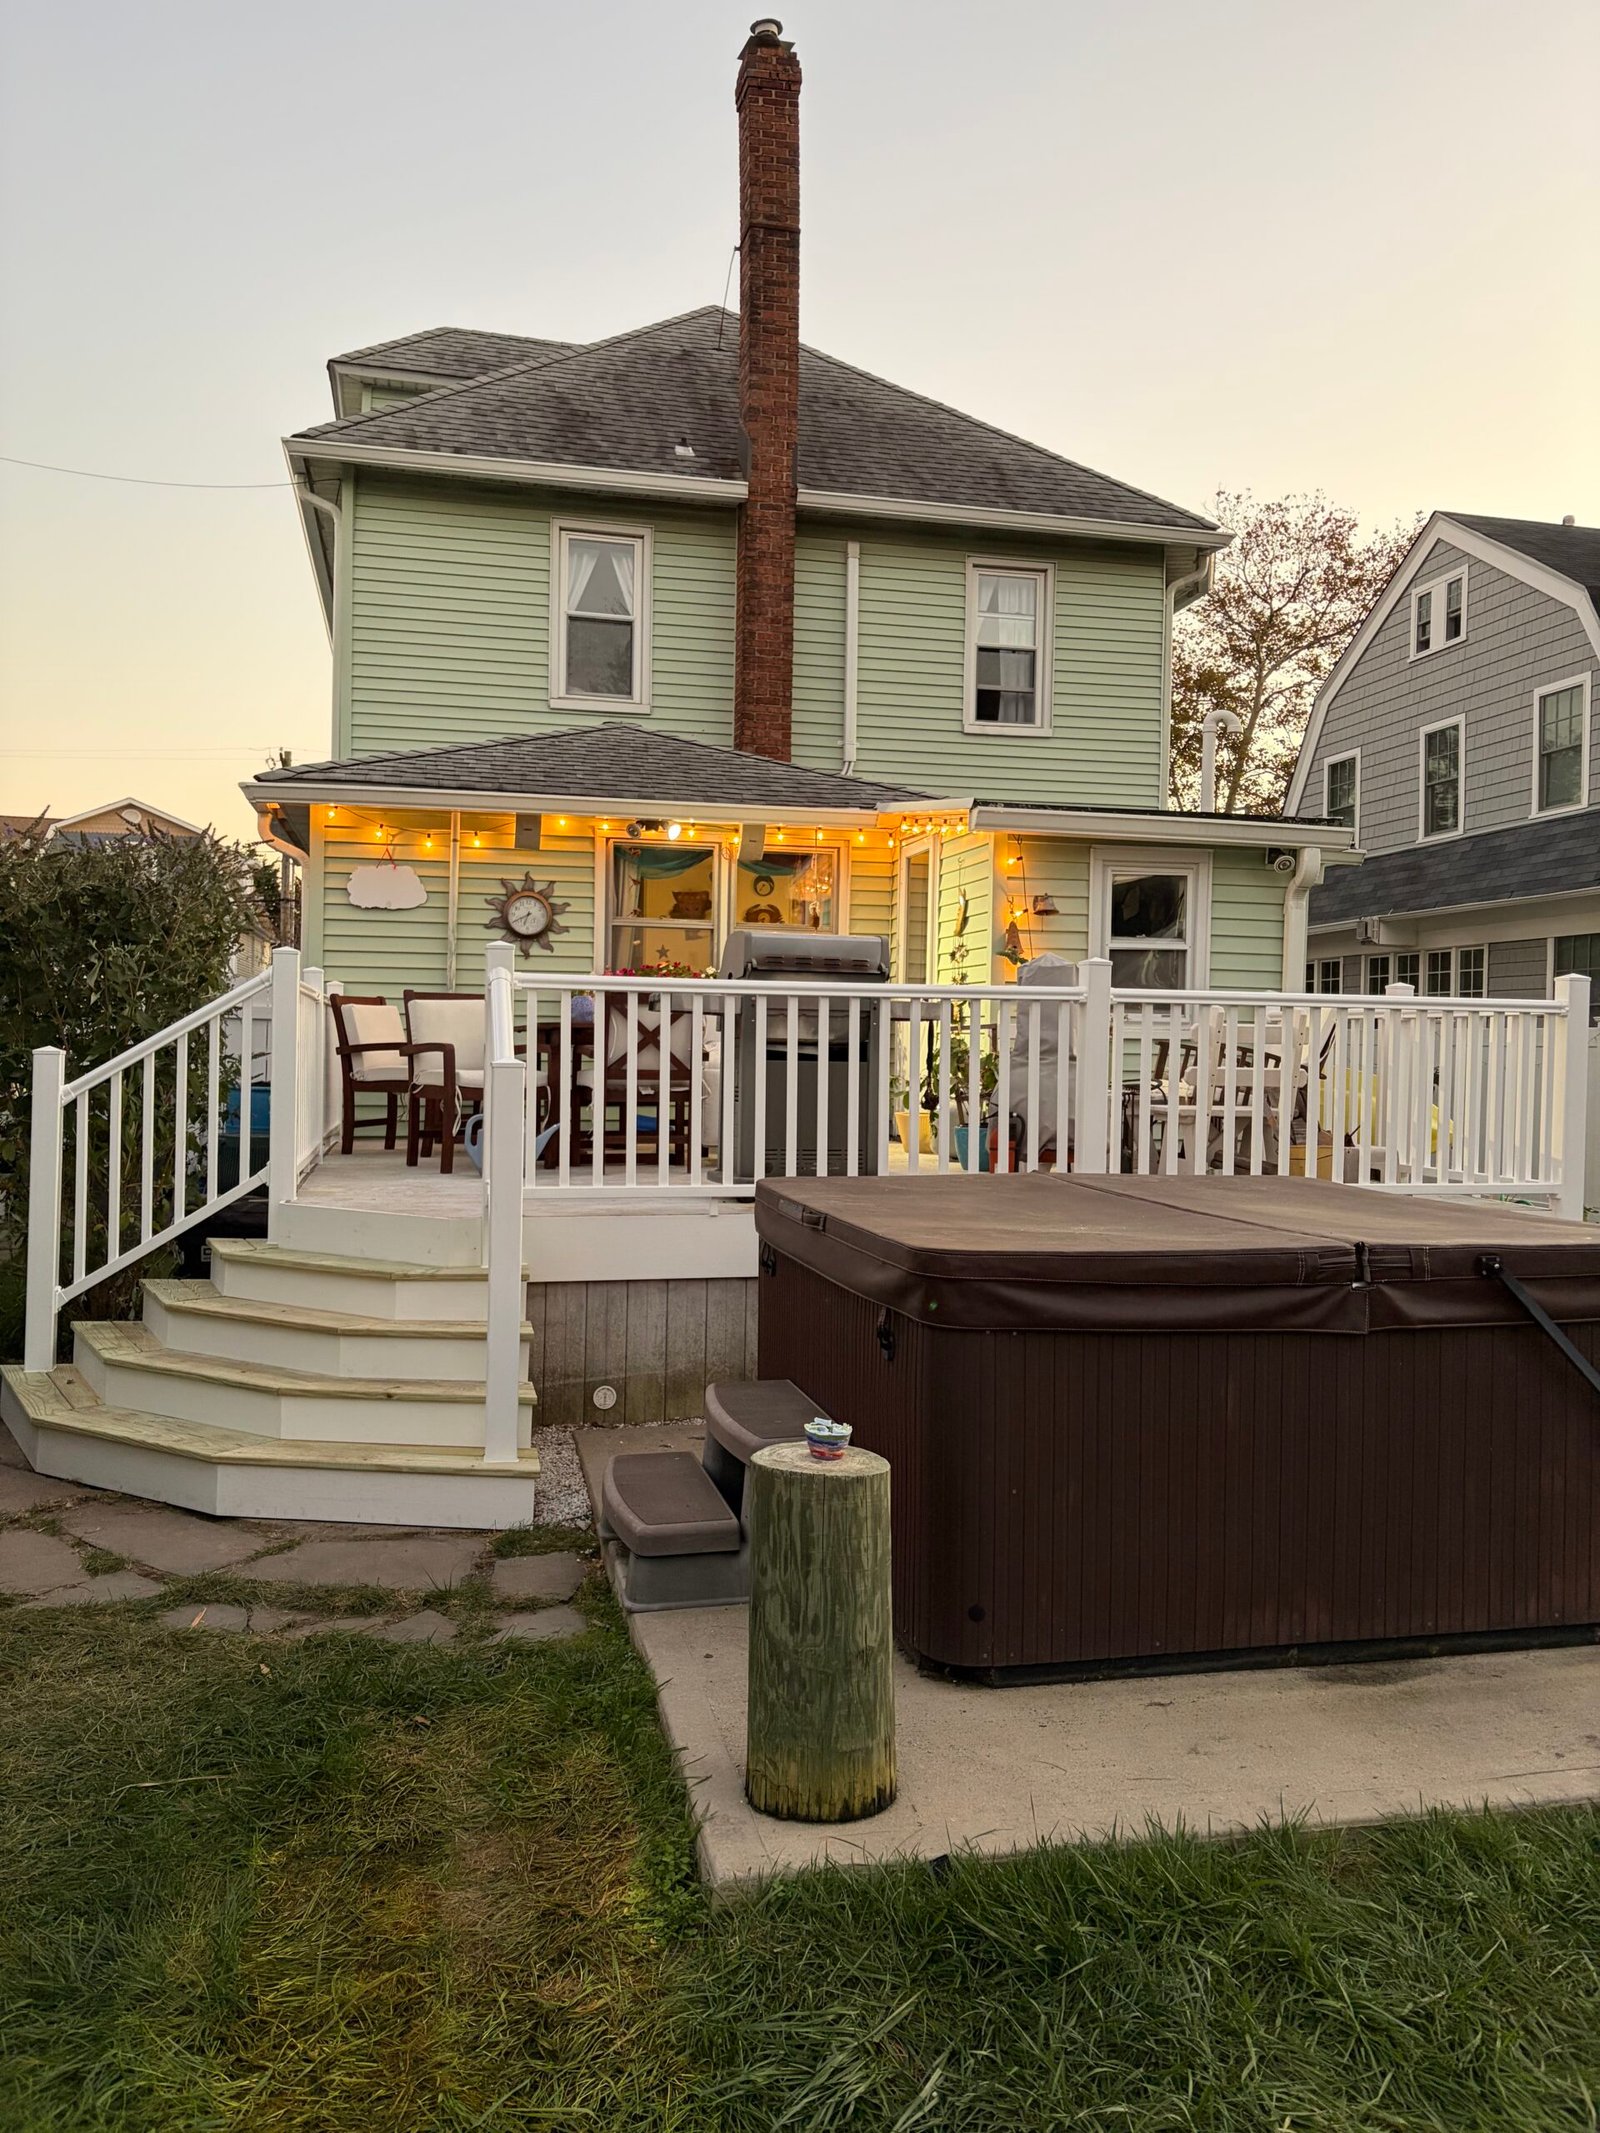
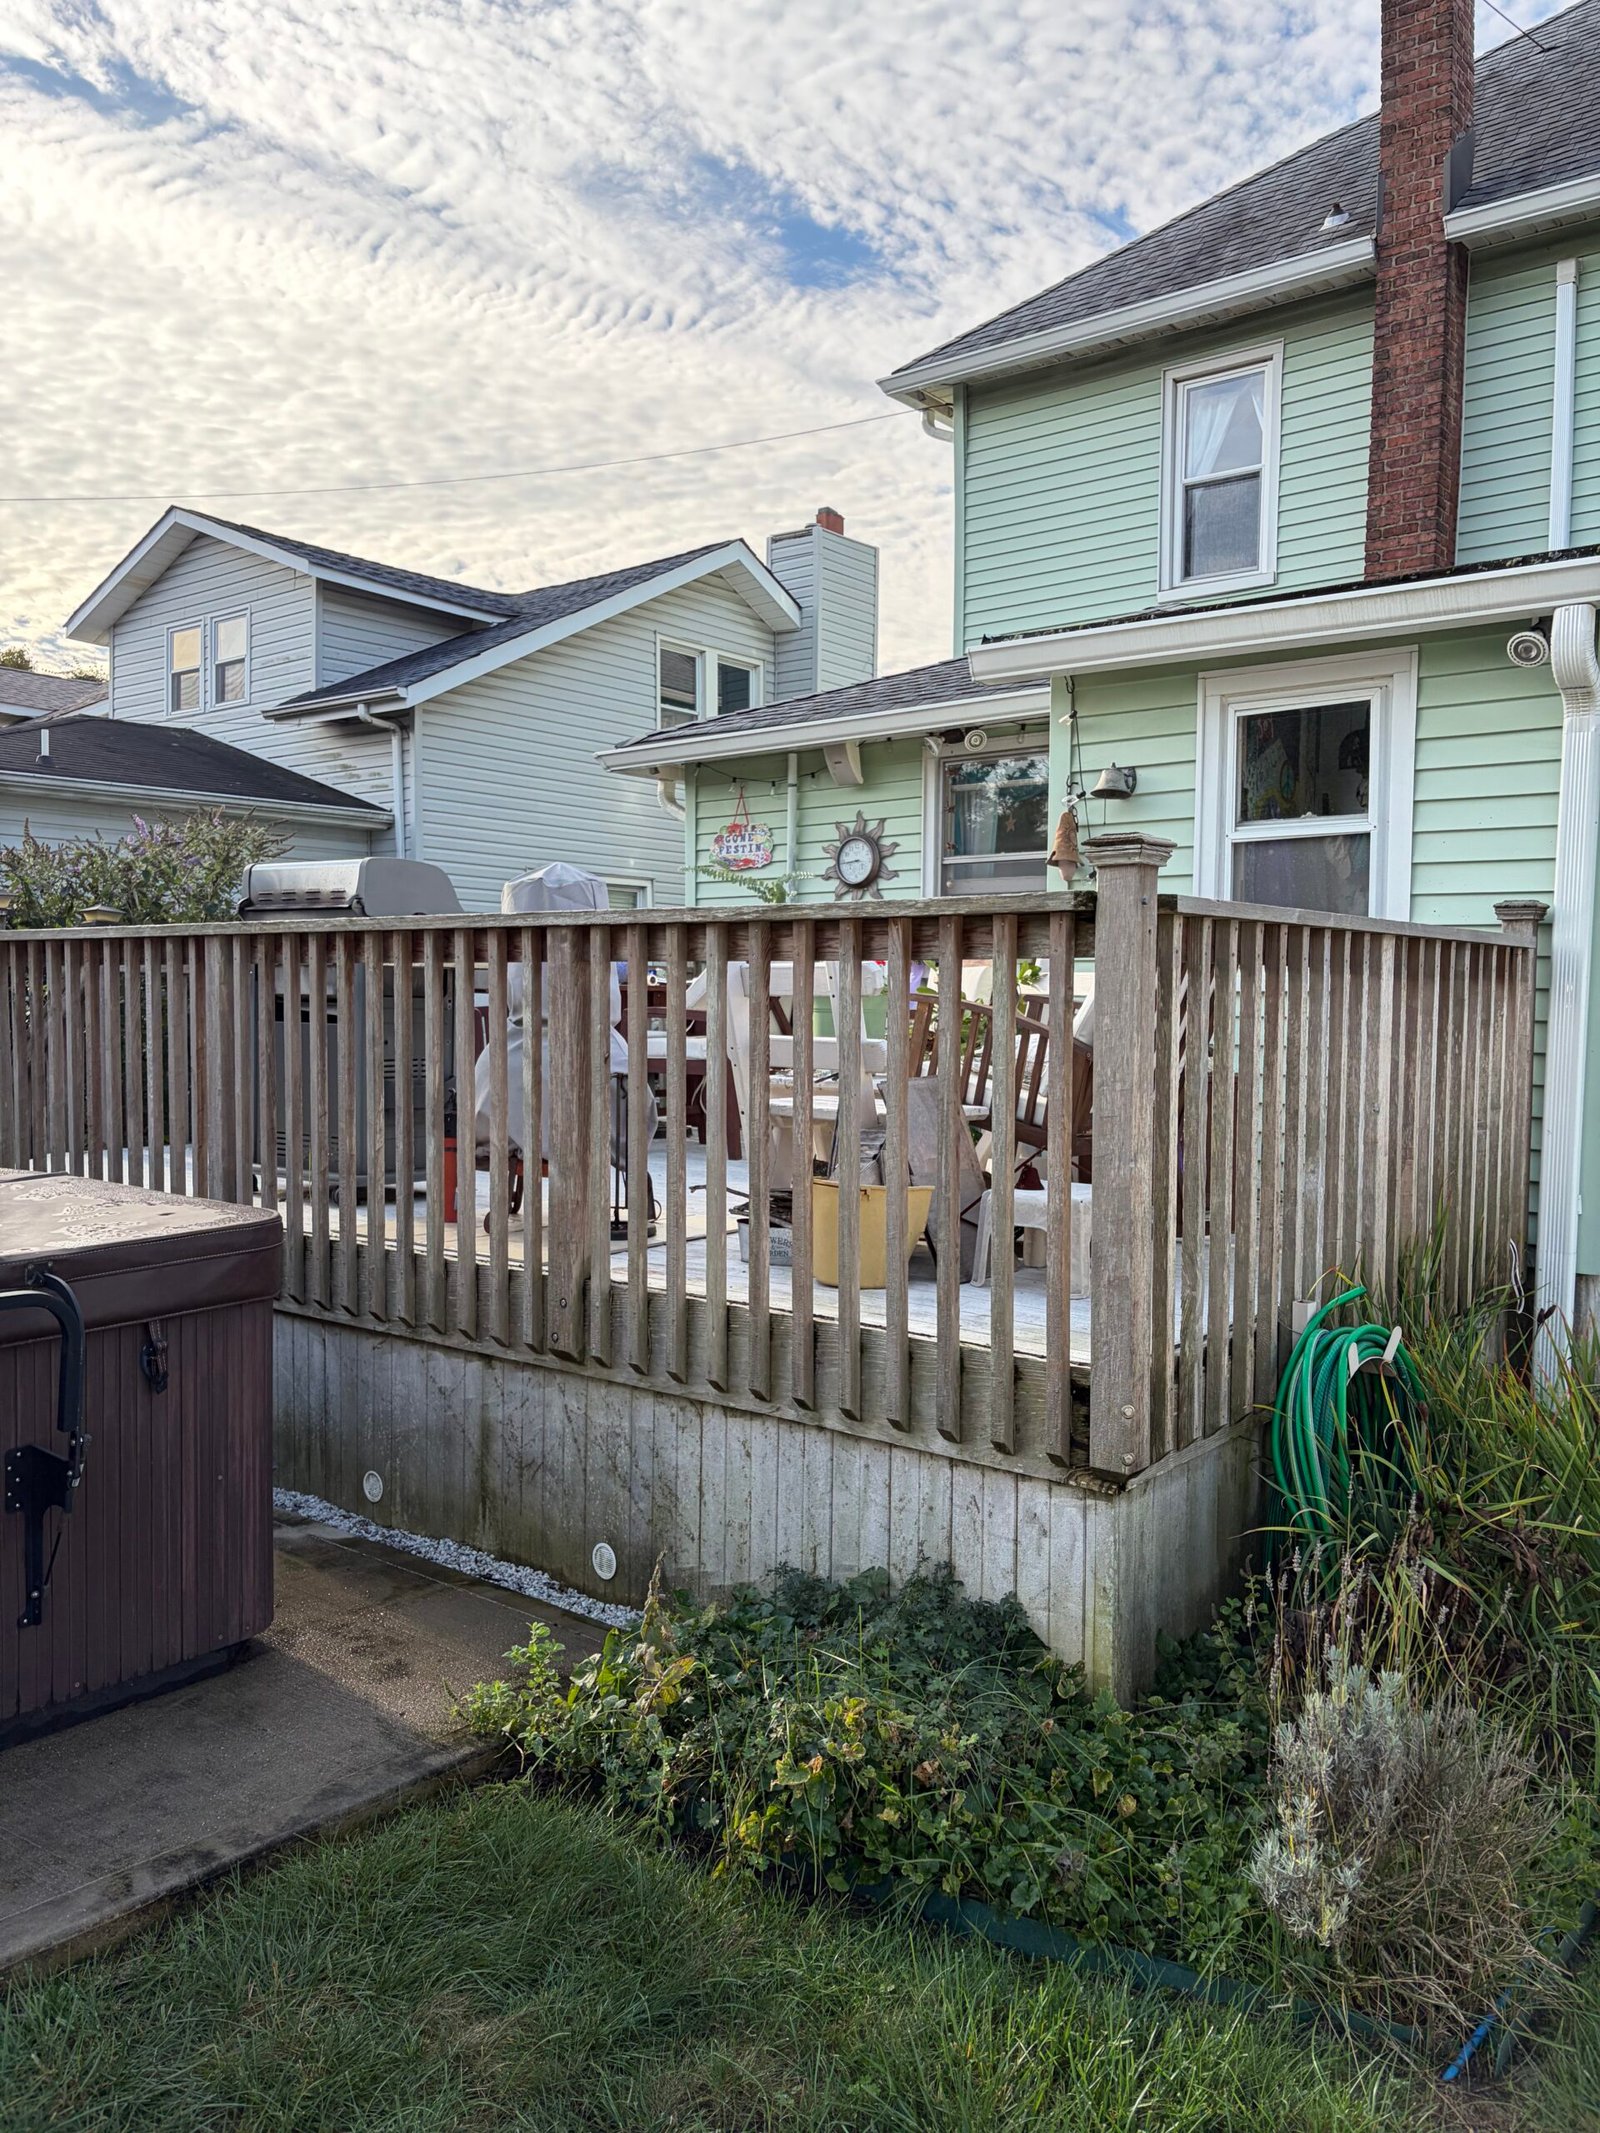
An established backyard deck renewed with white railings, updated perimeter details and a rebuilt stair run with wraparound corners. Follow the work from weathered timber rails and exposed stair framing to the completed steps and garden connection, with the main deck platform retained.
Move either slider to compare the original deck railings and stairs with the completed renovation.
 AFTER
 BEFORE
 AFTER
 BEFORE
Follow the deck renovation from removal and framing to the completed railings, stairs and finishes. Select a photograph to open the full image, then browse with the arrows, your keyboard or a swipe. Videos are placed alongside the stage they document.
Stage 01
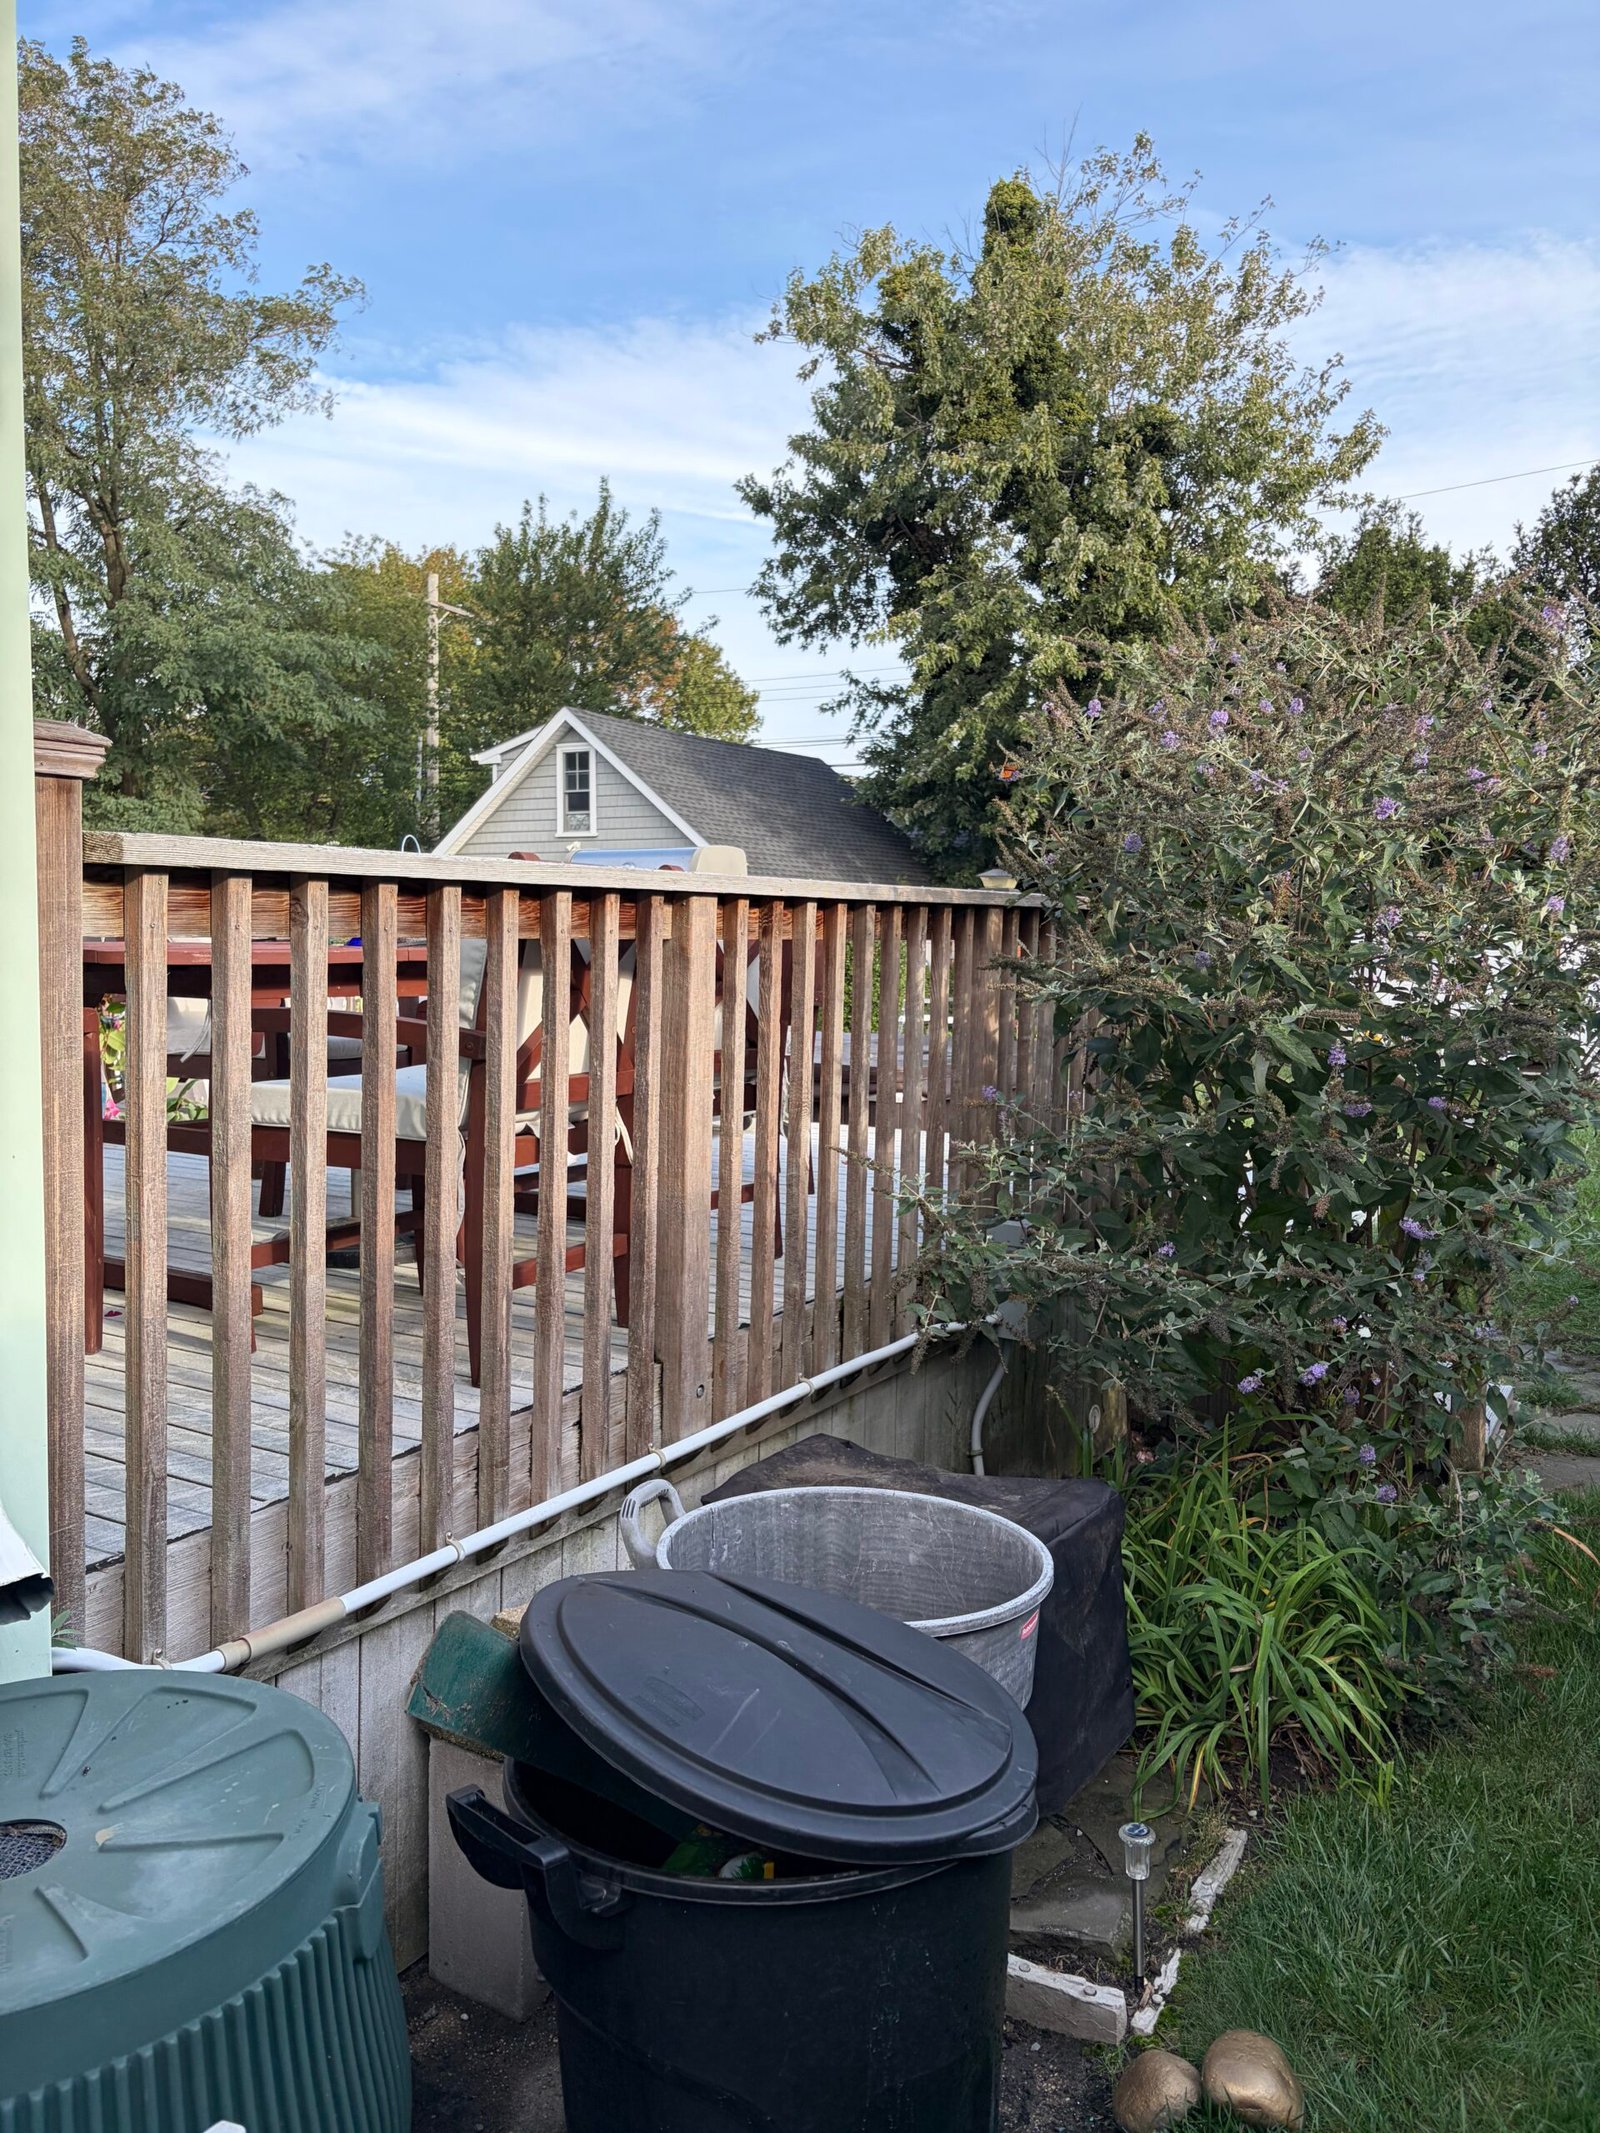
The existing deck connected the rear of the house to the garden with a broad stair run and timber railings. The exposed railing surfaces and tread boards showed weathering, while the deck remained a familiar space for dining and spending time outside.
The starting photographs and two short videos record the railings, stair surfaces and perimeter from several viewpoints. The renovation focused on the deck edges, replacement railings and stair construction around the retained main platform.
Stage 02
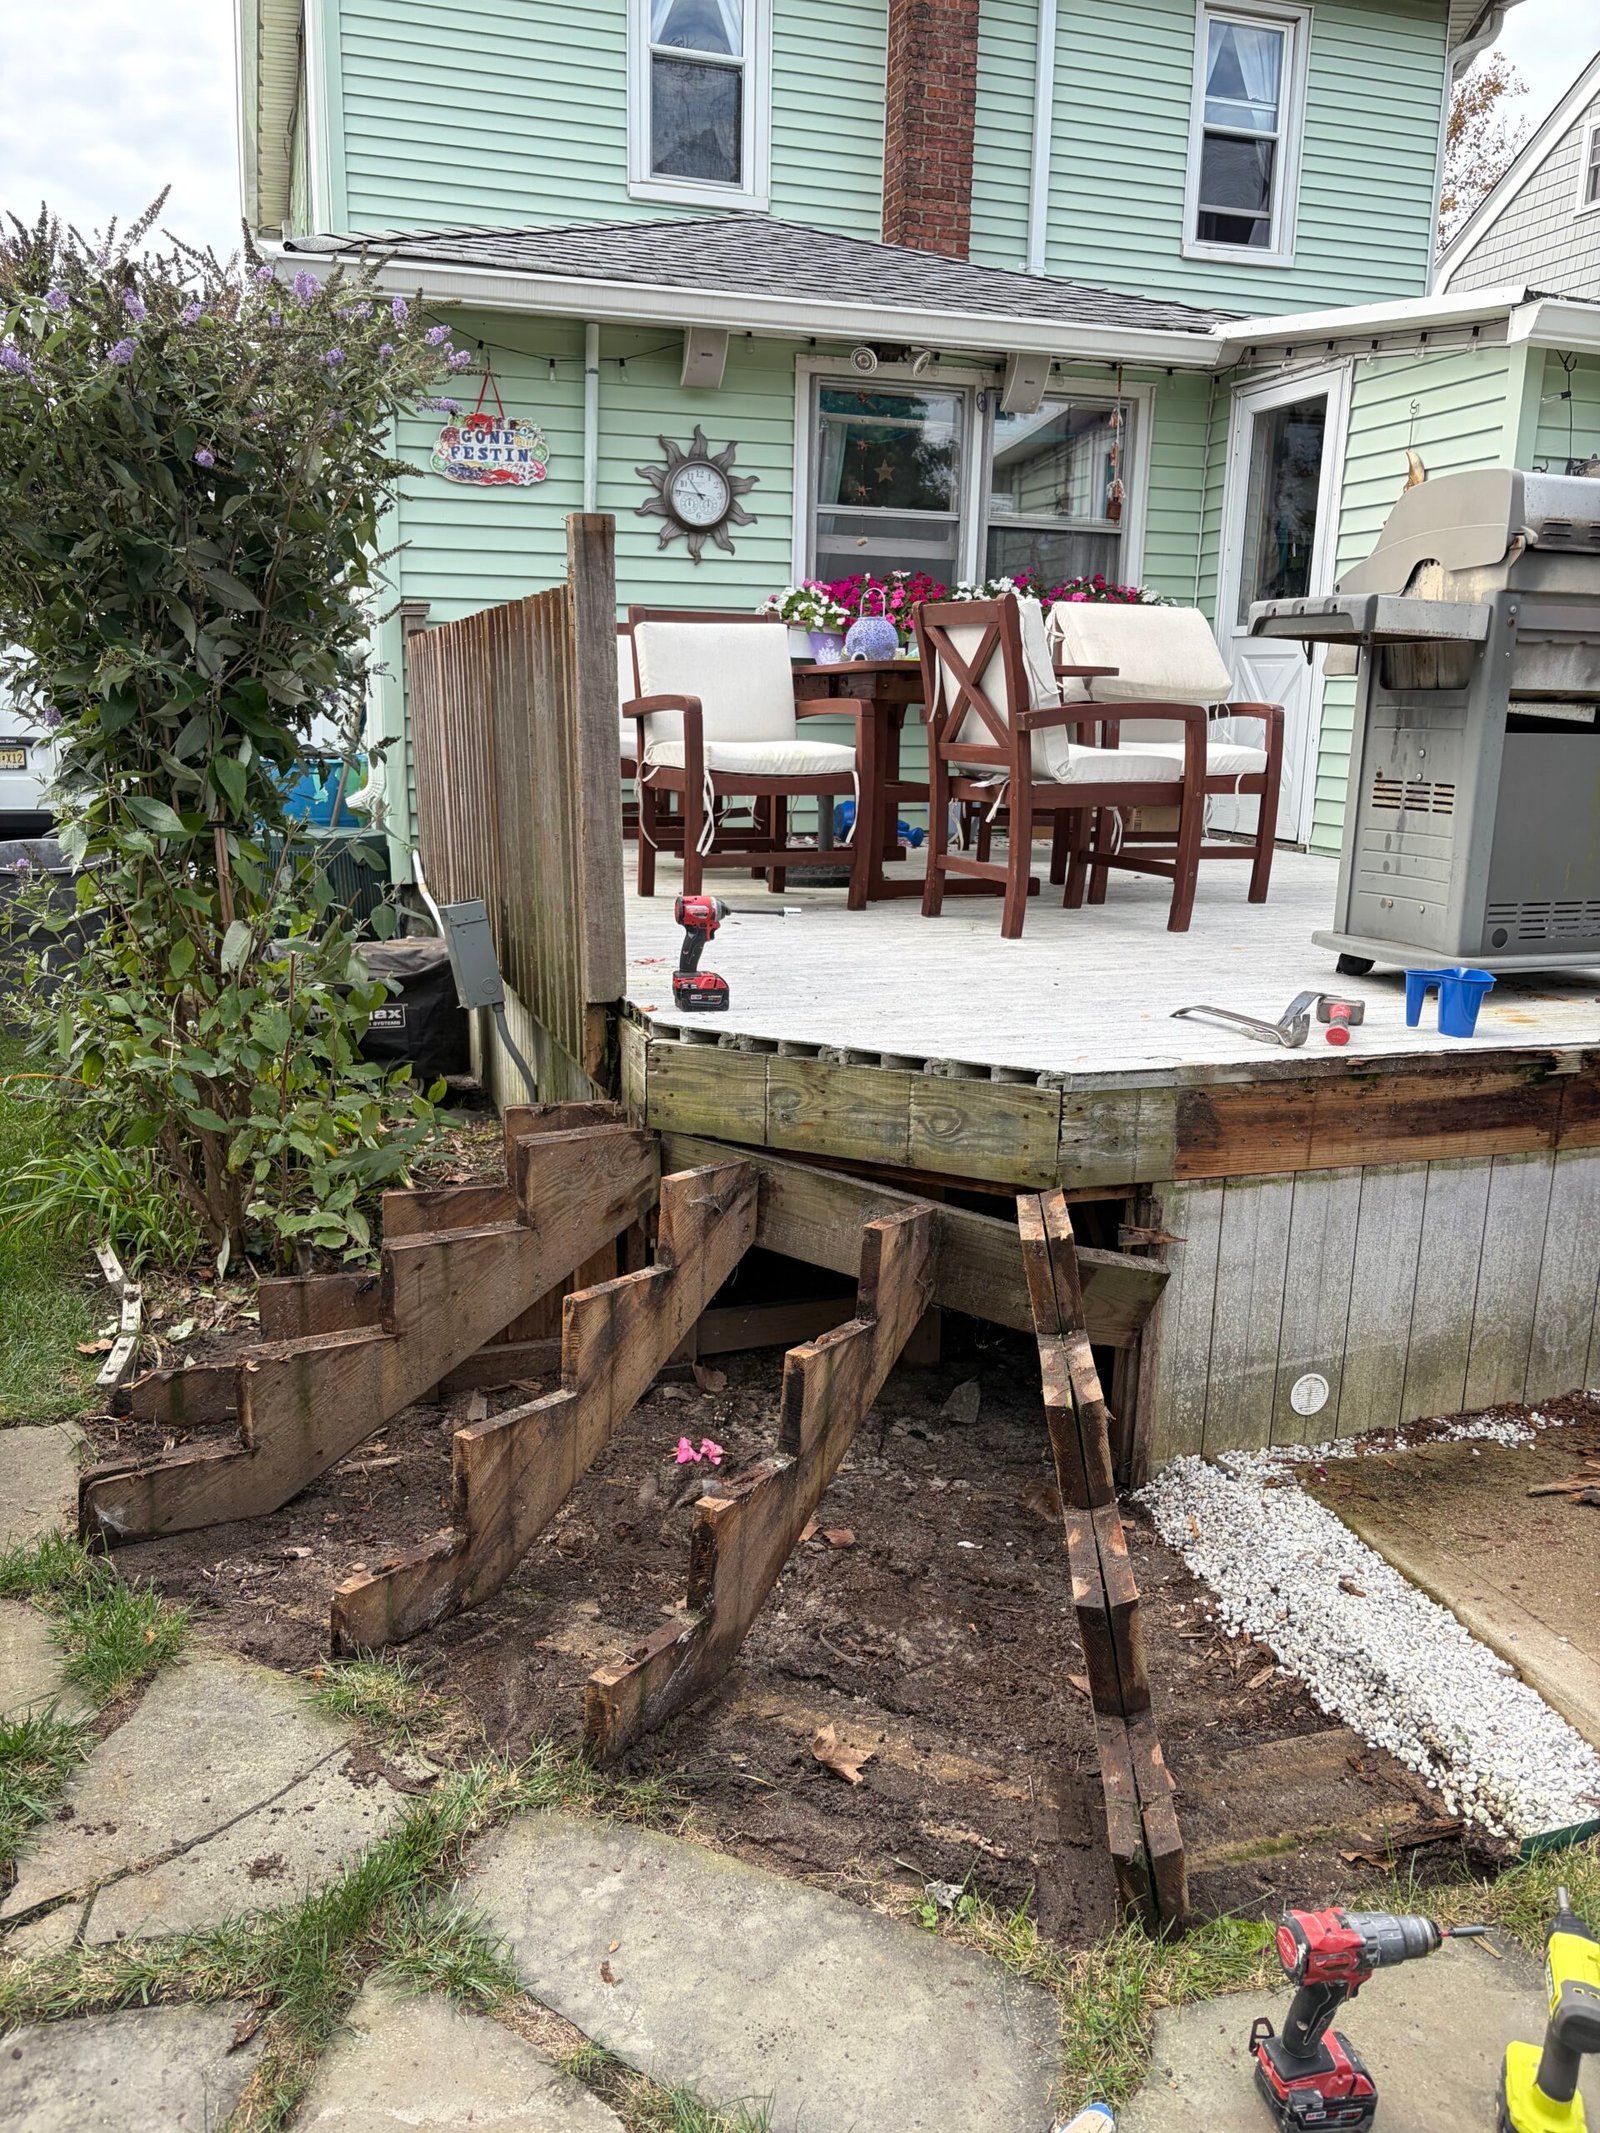
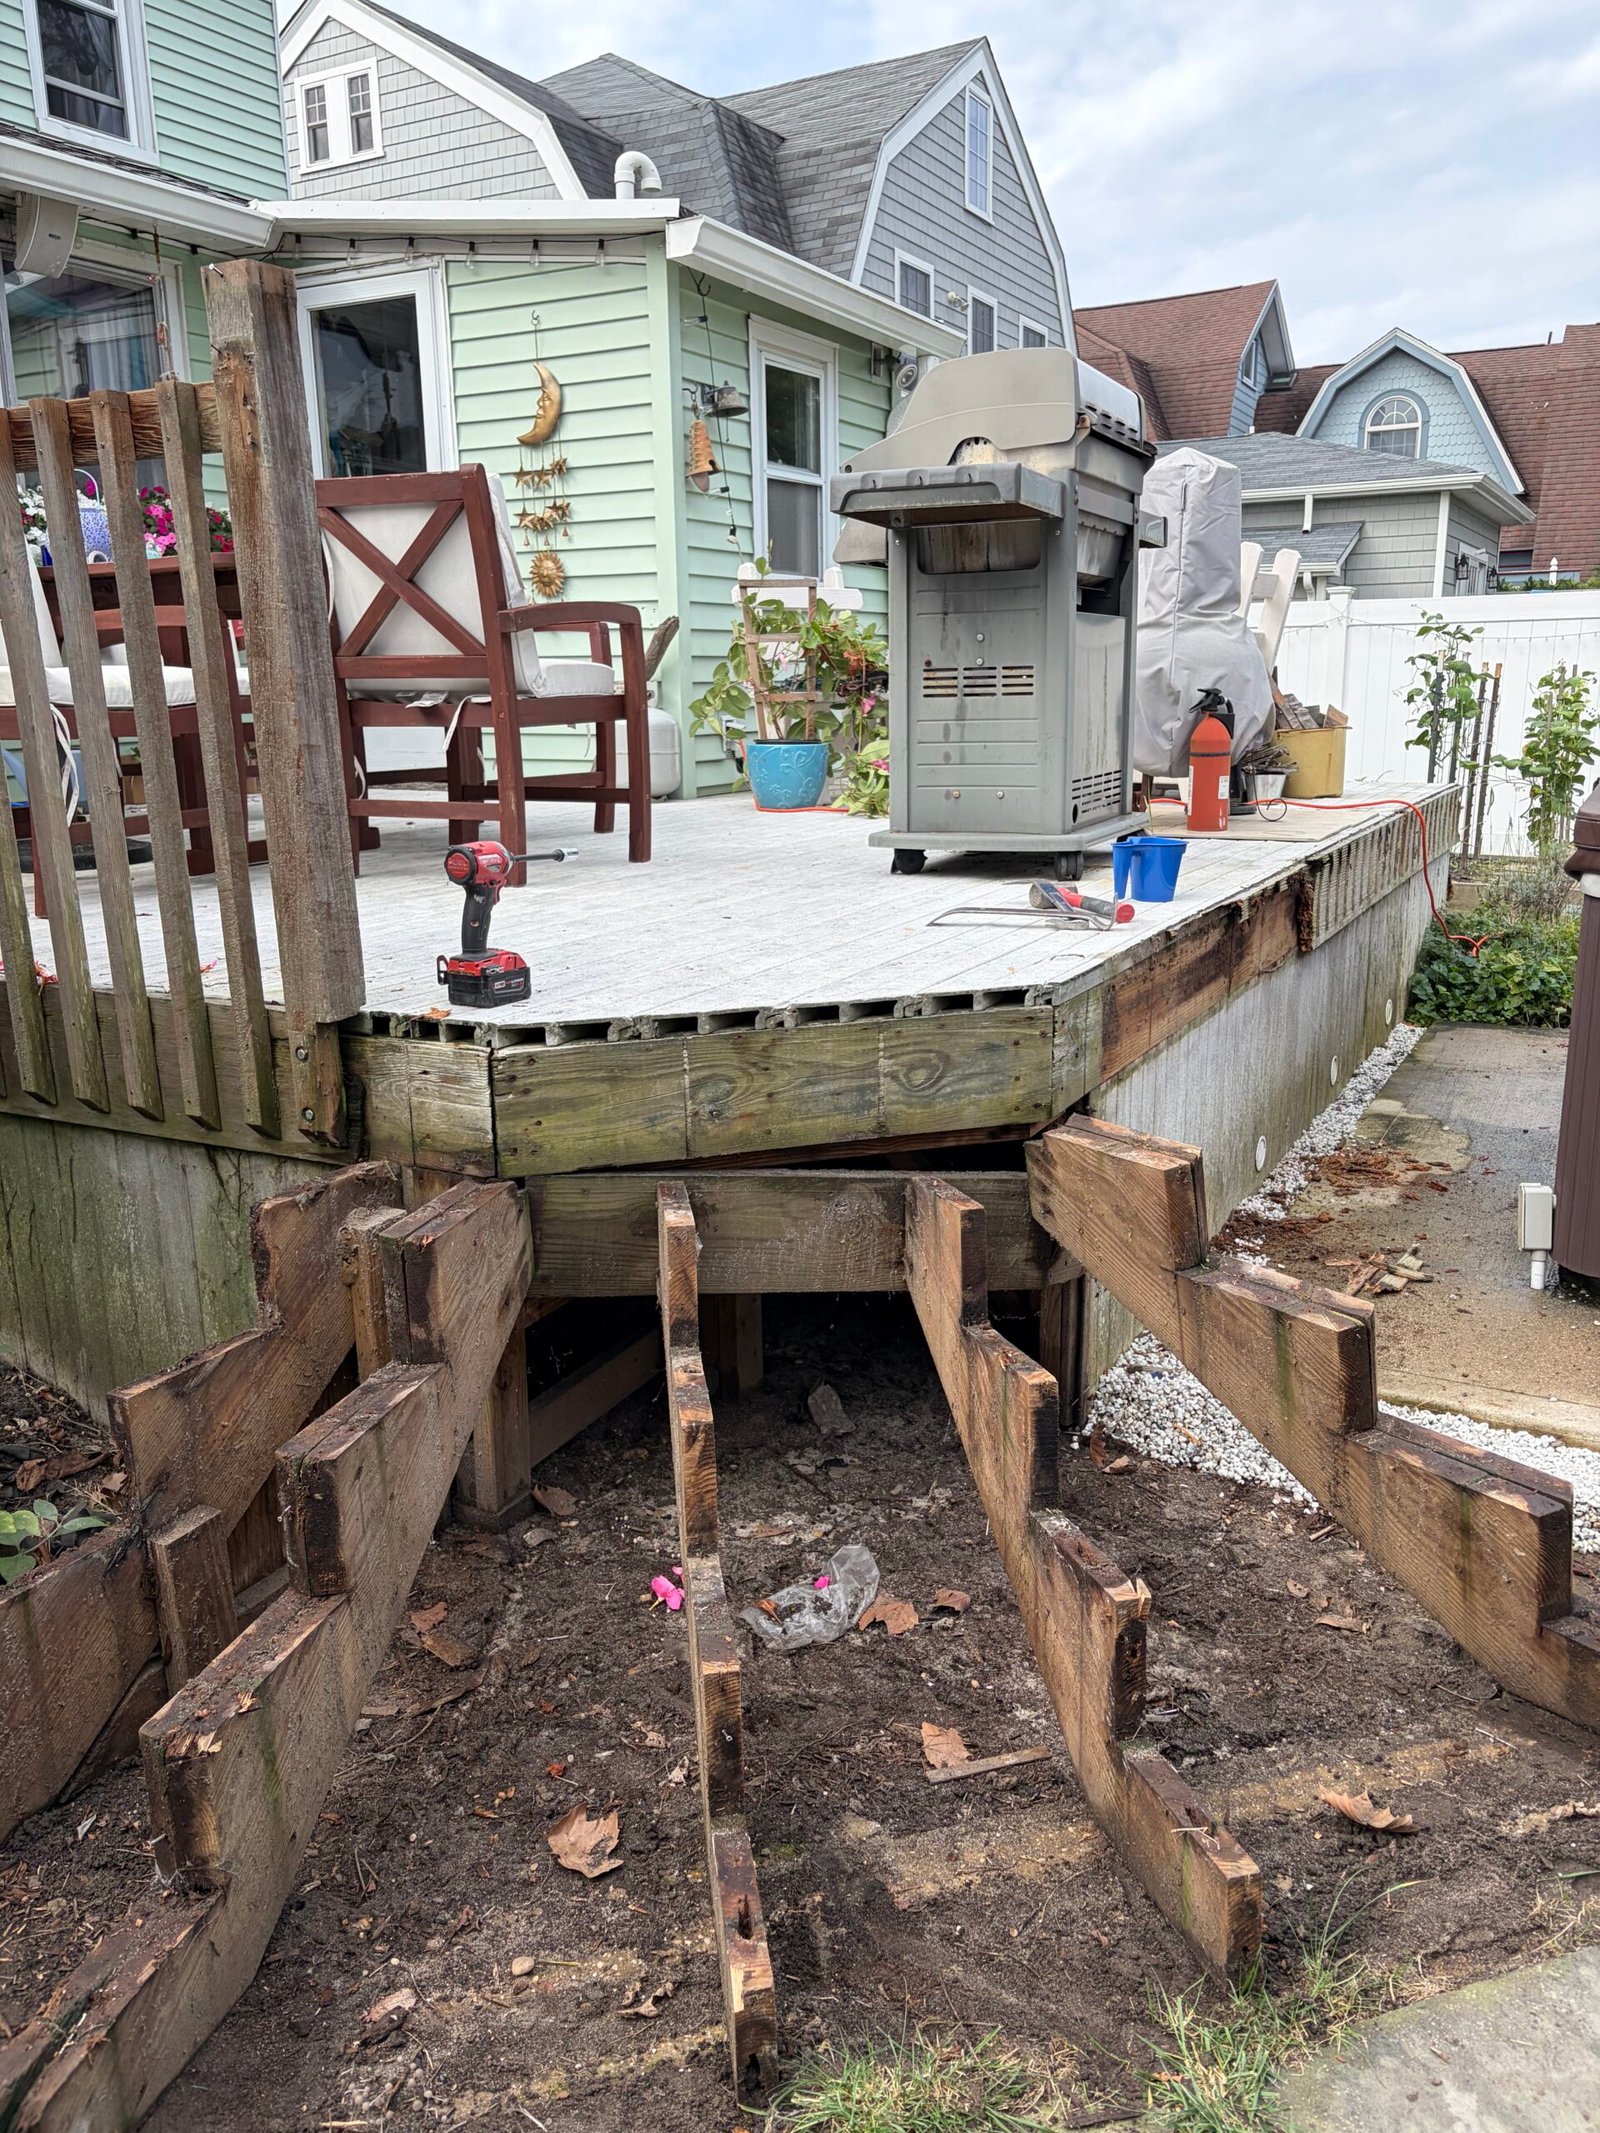
The old railing sections and stair surfaces were removed to expose the underlying timber. The photographs show the deteriorated stair stringers and the open deck edge before the replacement stair construction.
The video continues the sequence after more of the old stair and railing components had been cleared. With those areas accessible, the replacement posts, perimeter finishes and stair connection could be set out around the existing platform.
Stage 03
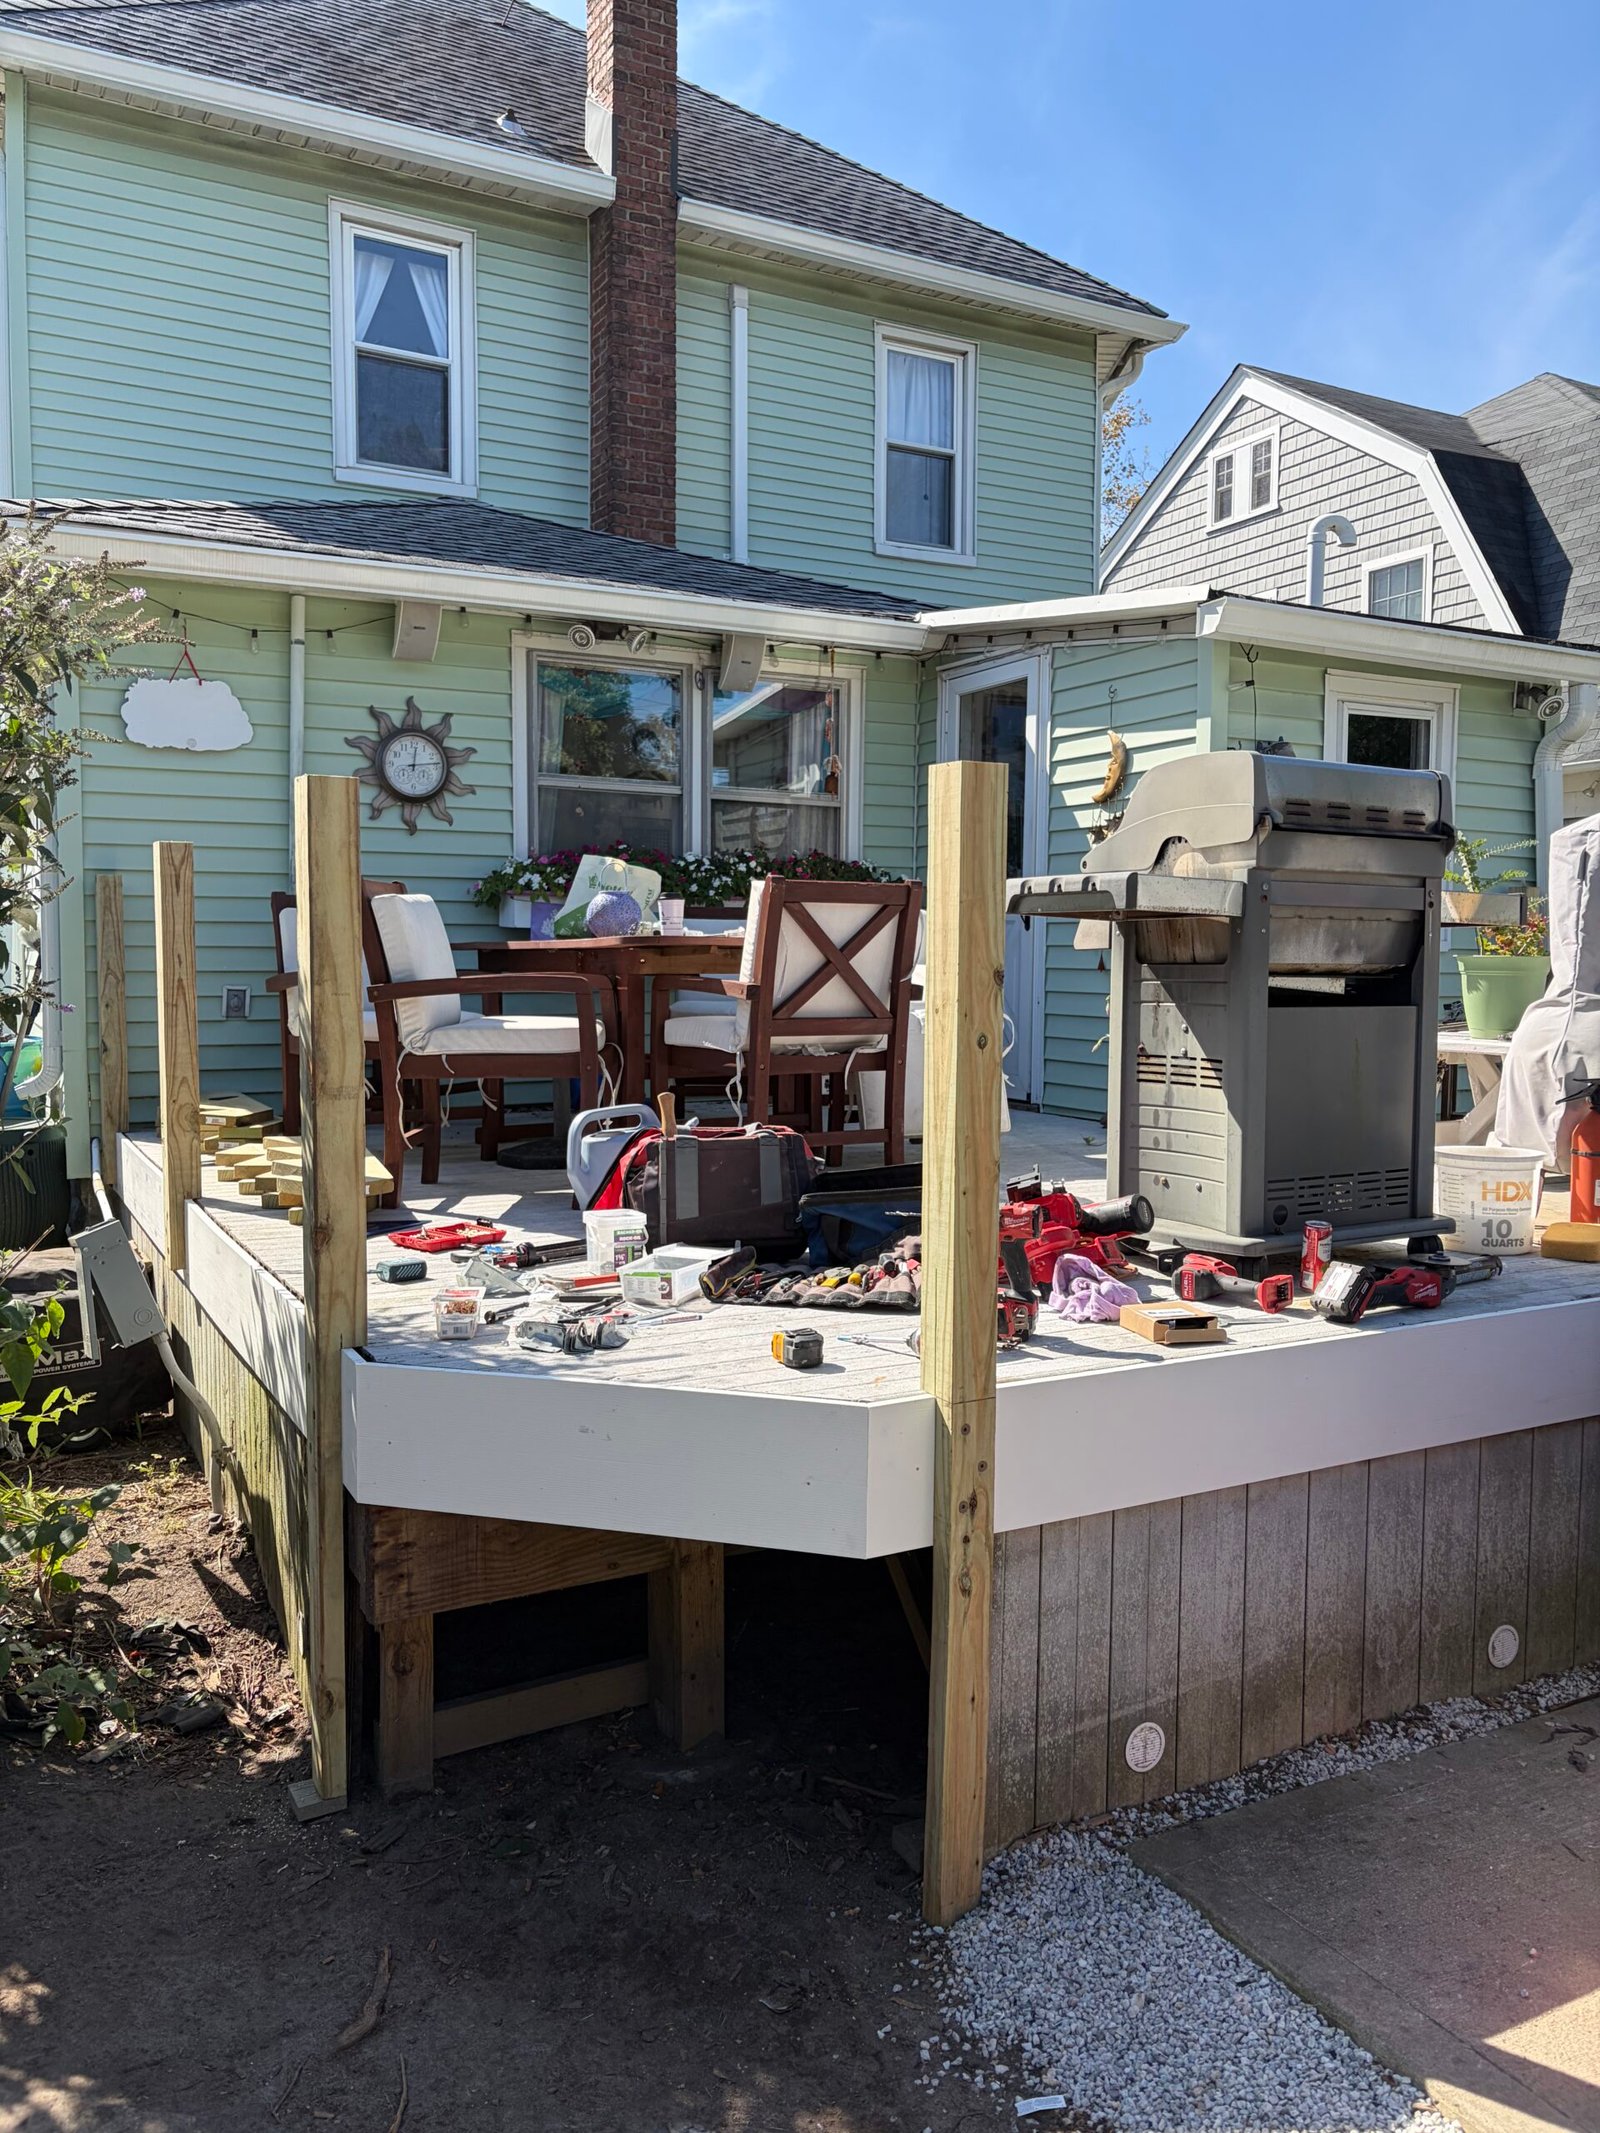
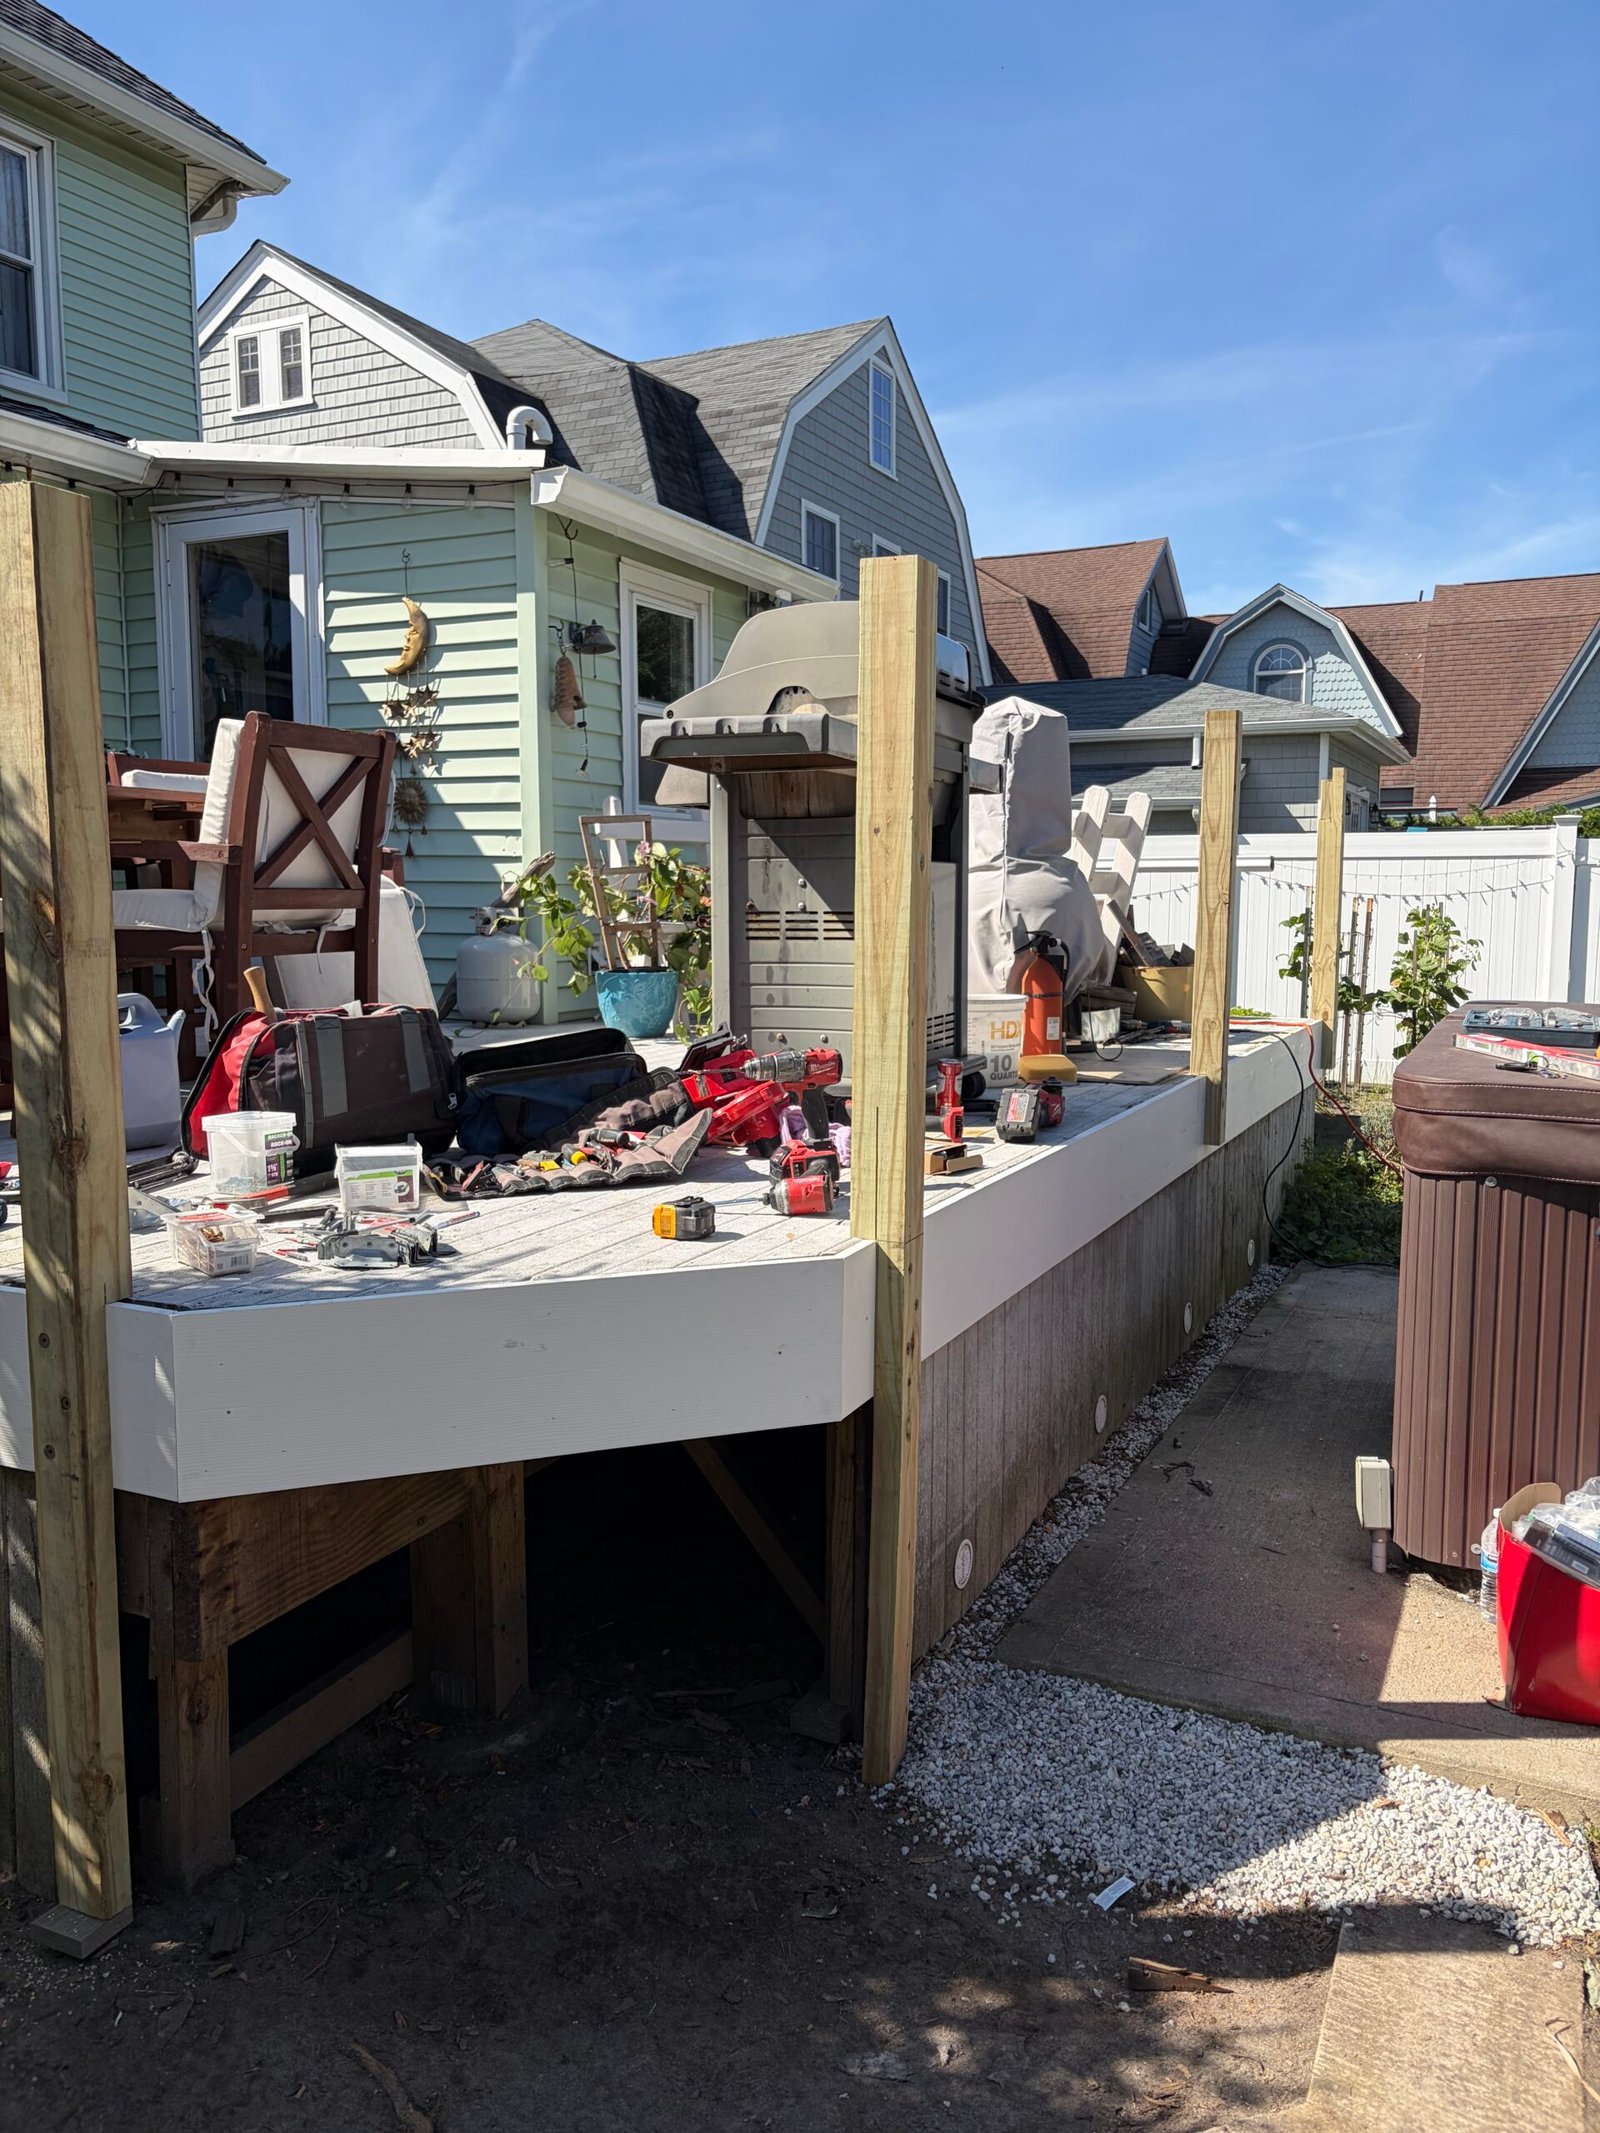
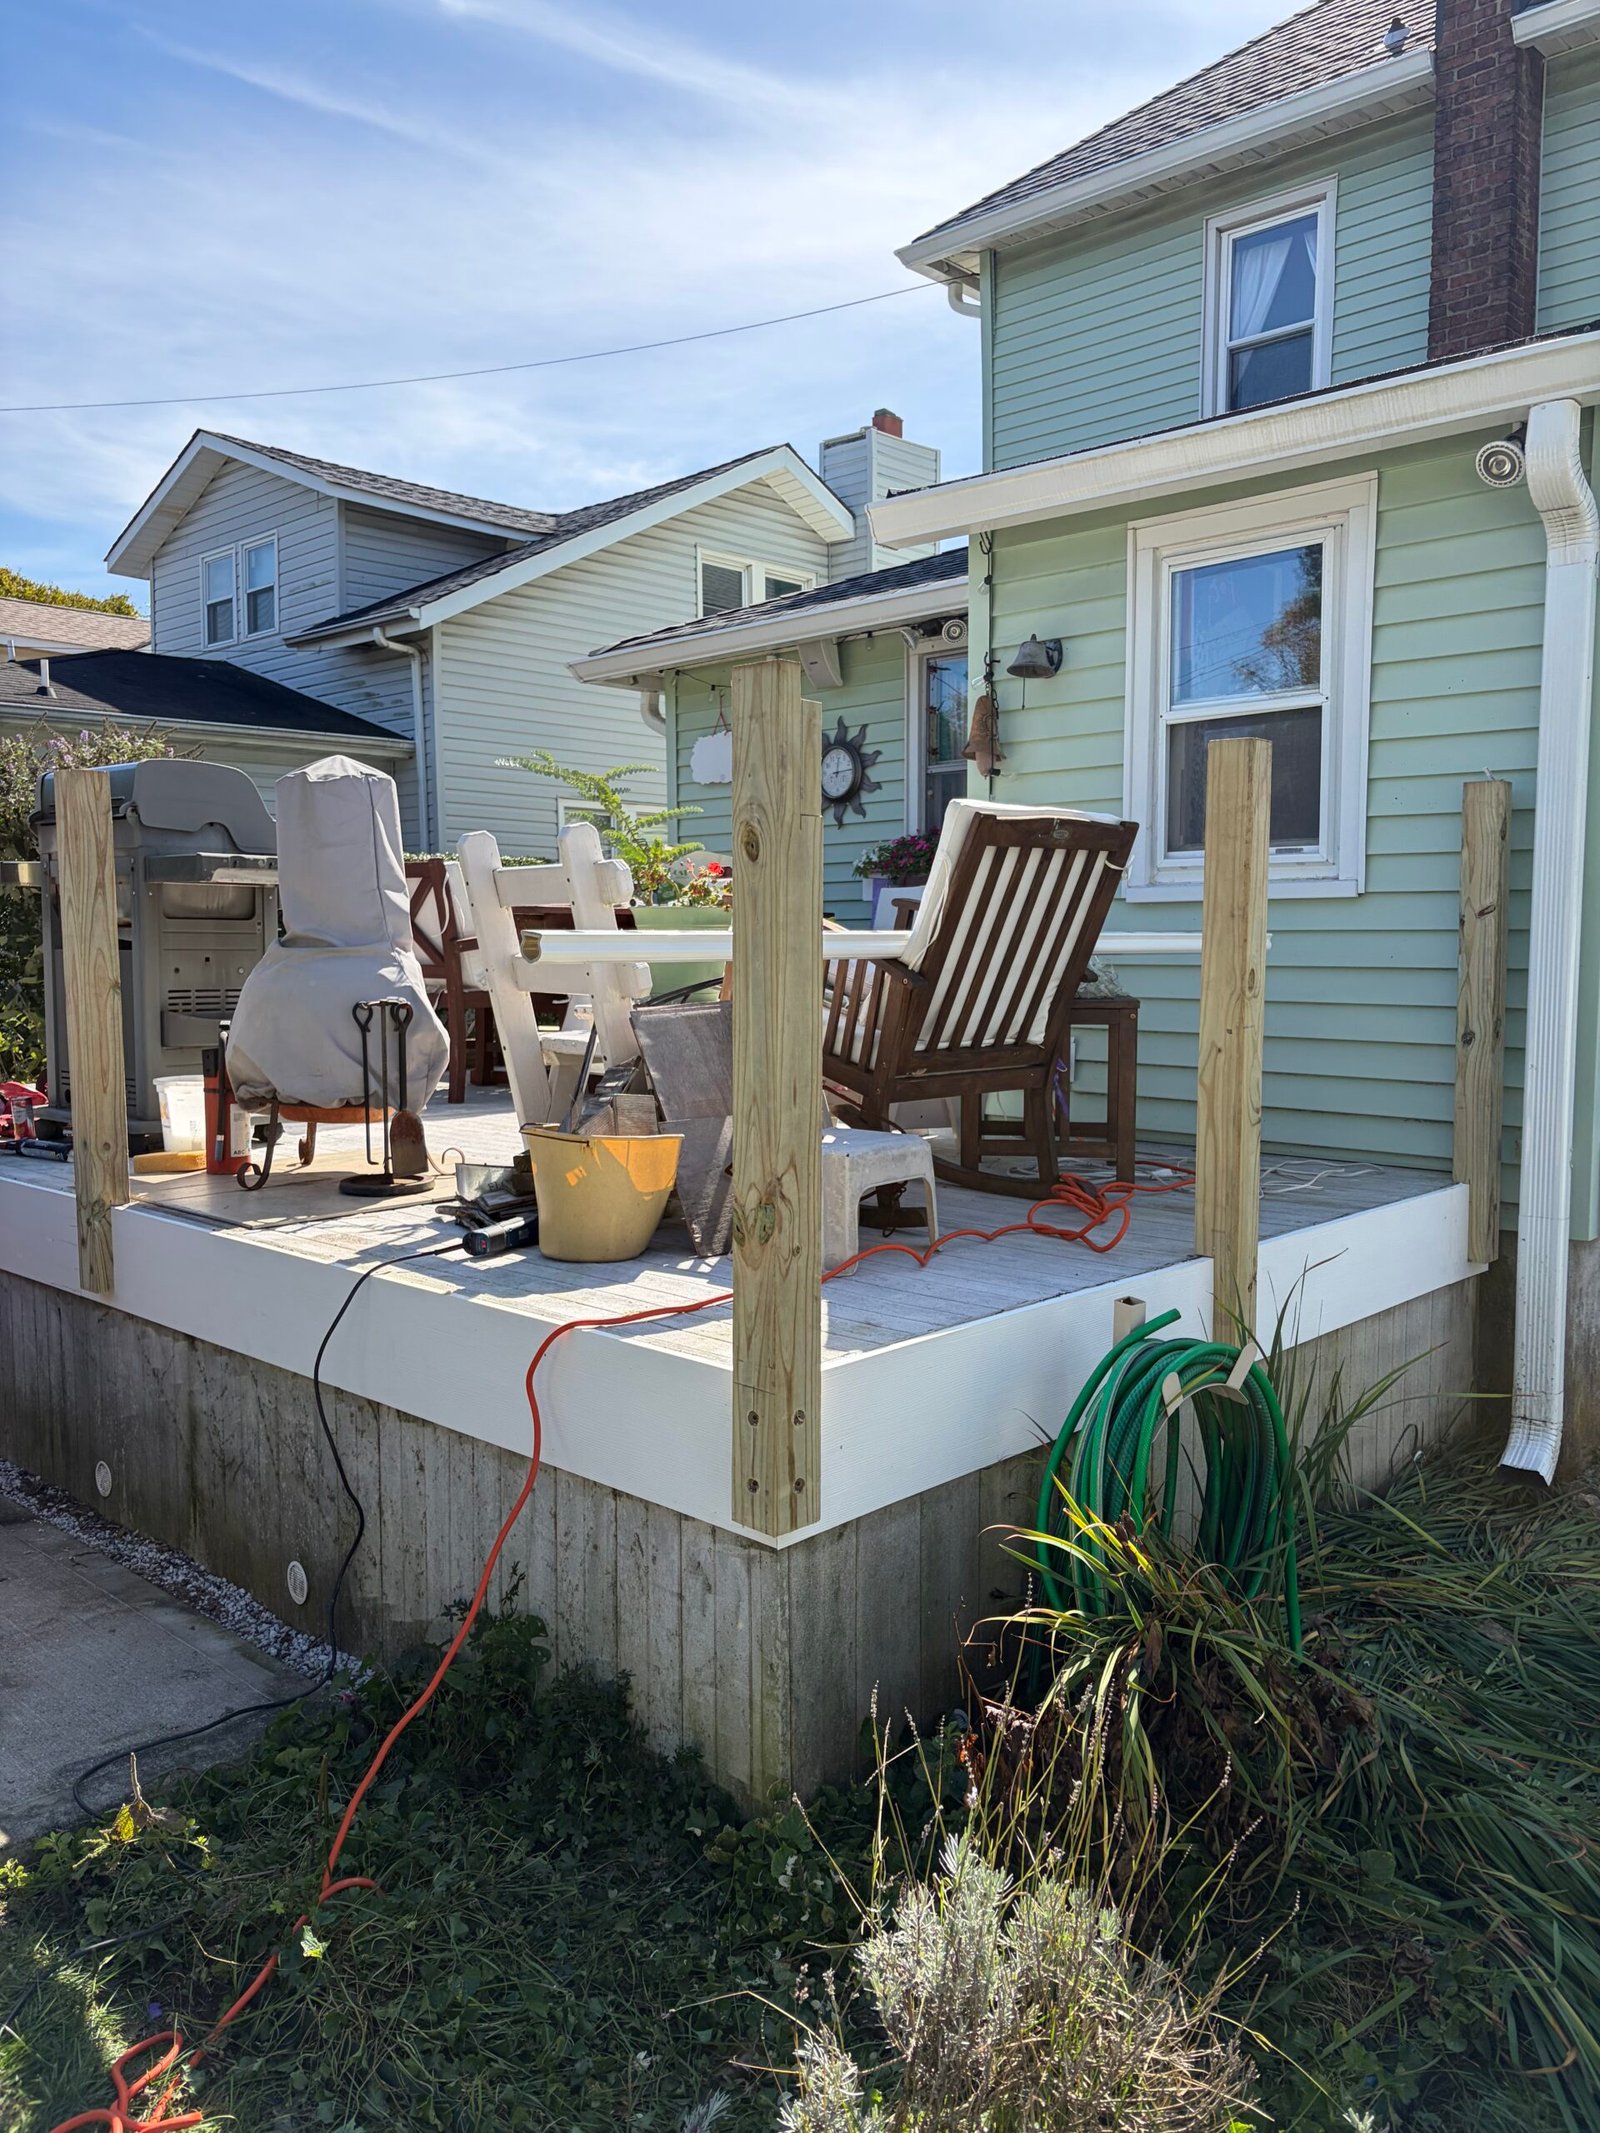
New timber railing posts were positioned around the deck perimeter and the stair opening. White fascia was fitted along the visible deck edge, introducing the lighter finish that would continue through the railing installation.
These views show the deck with its main platform retained, the new posts in place and the stair opening still clear. The short progress video records the perimeter details before the white railing sections were added.

Stage 04
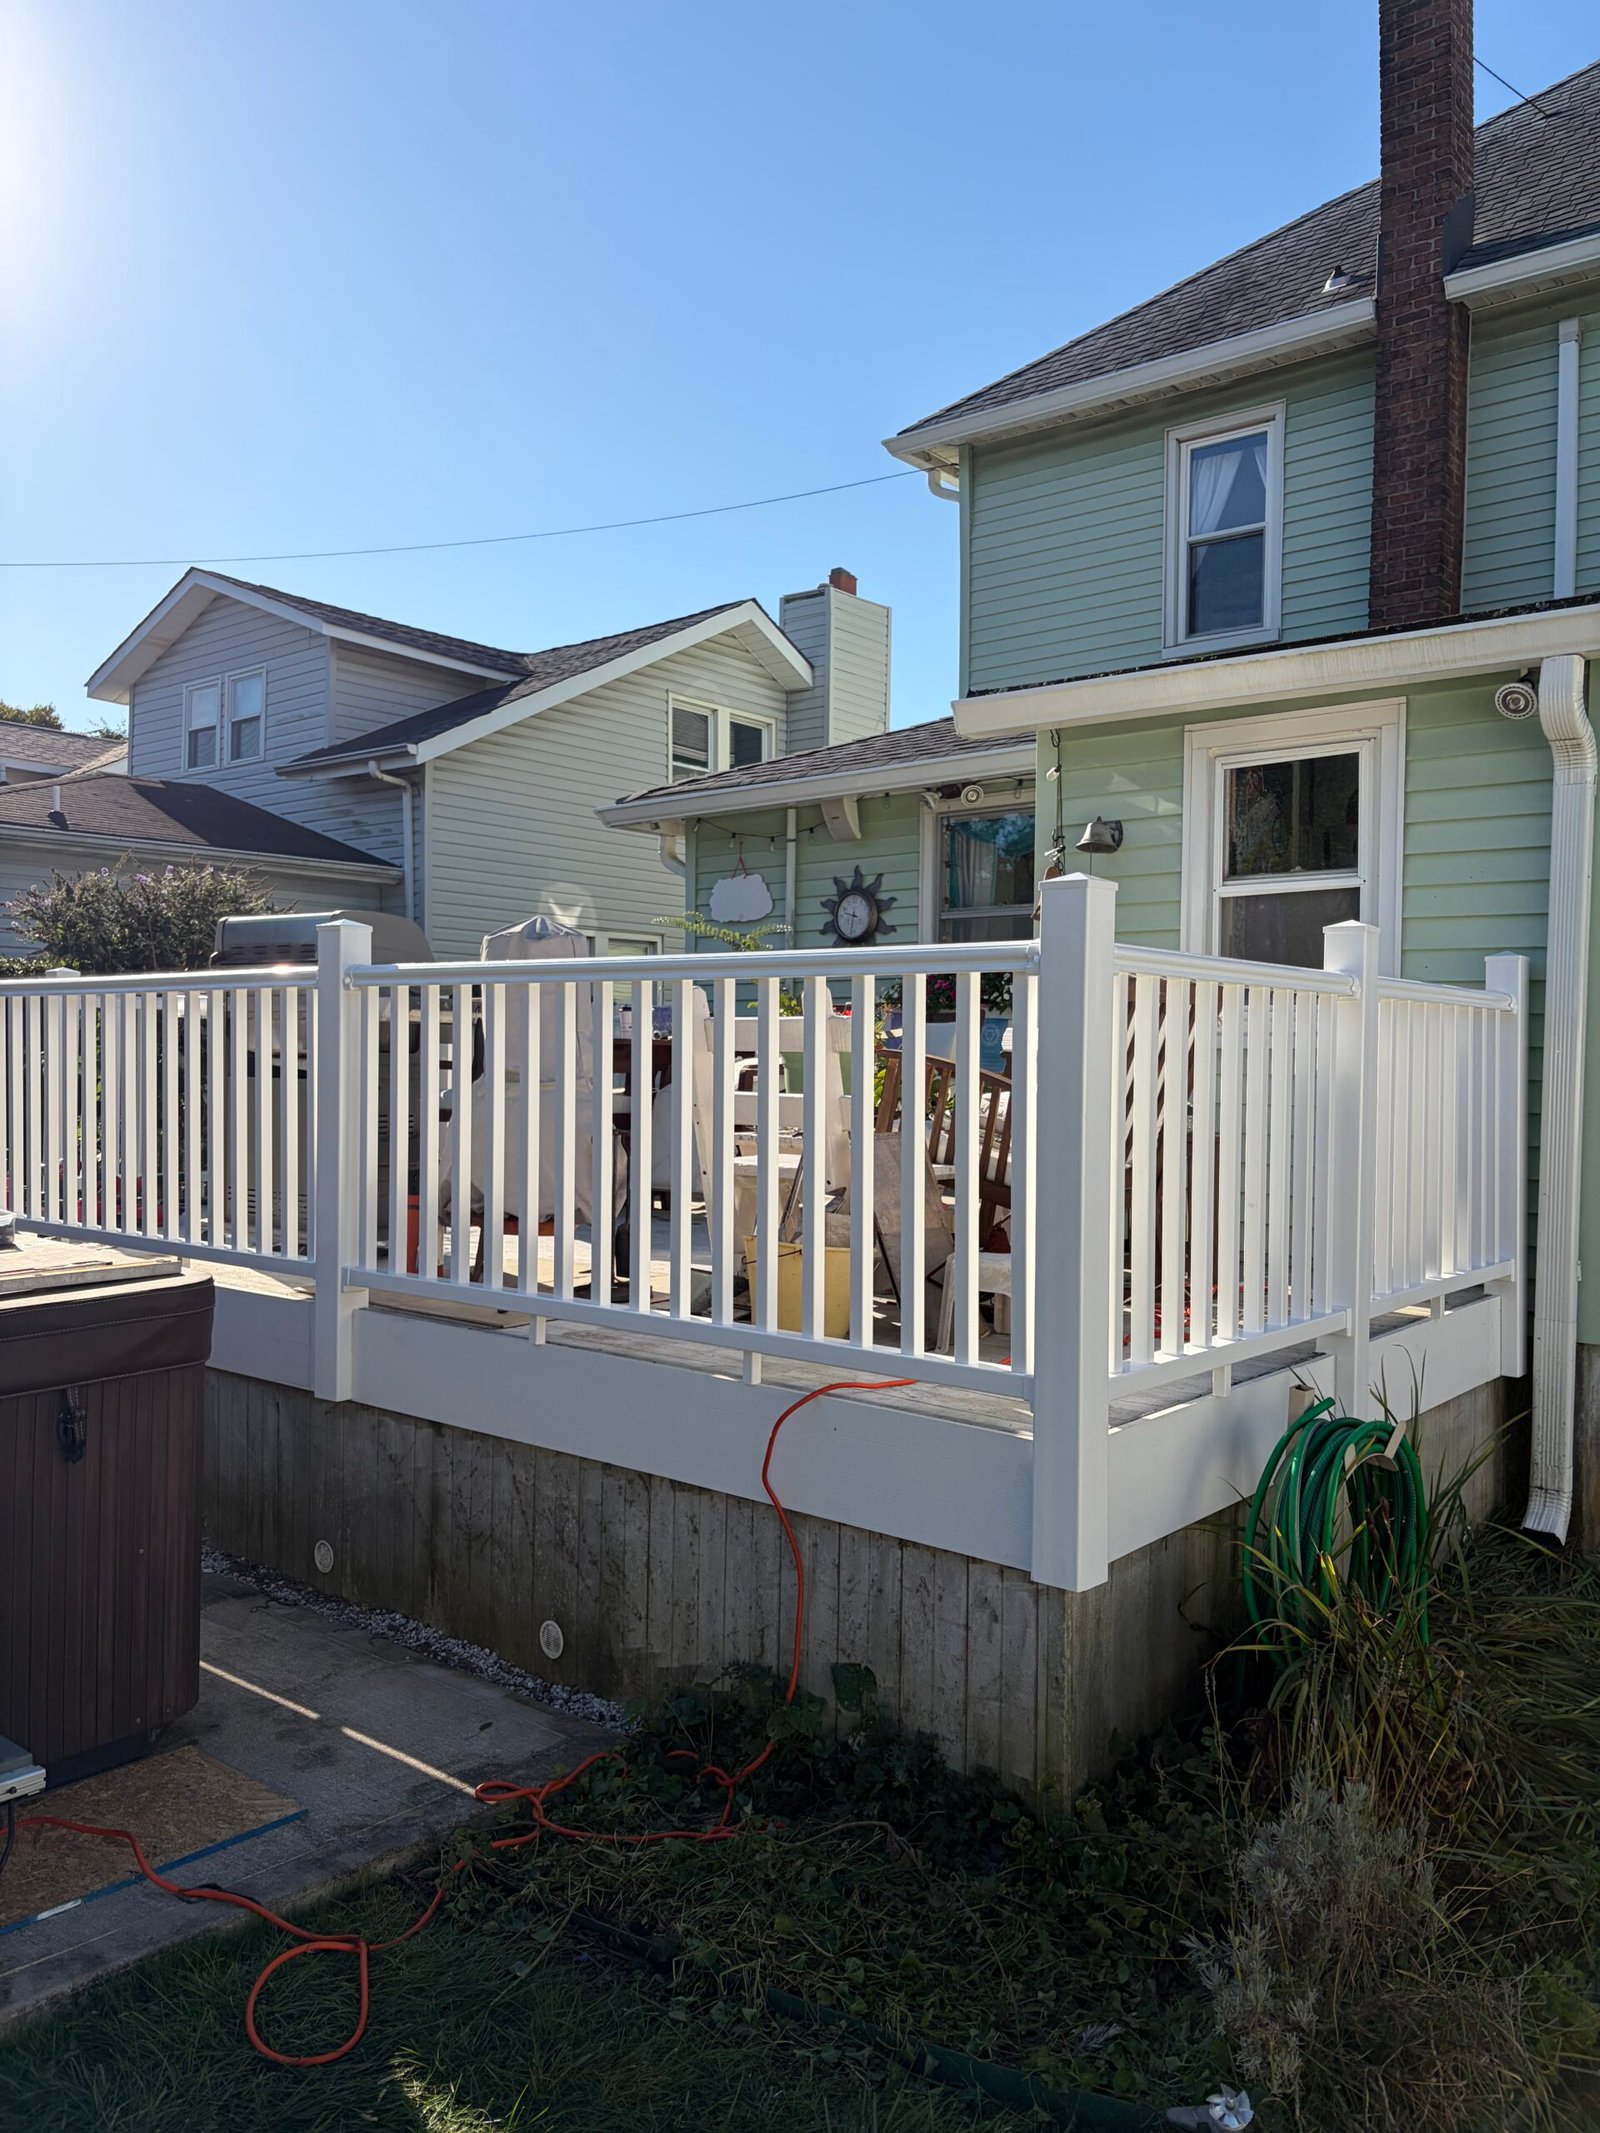
White railing sections with vertical balusters were fitted between the posts around the platform. The new railing line changes the appearance of the deck perimeter while keeping the relationship between the house, seating area and garden.
At the stair opening, the first new timber members are visible below the landing edge. The next stage completes the broader stair frame and its angled side sections.

Stage 05
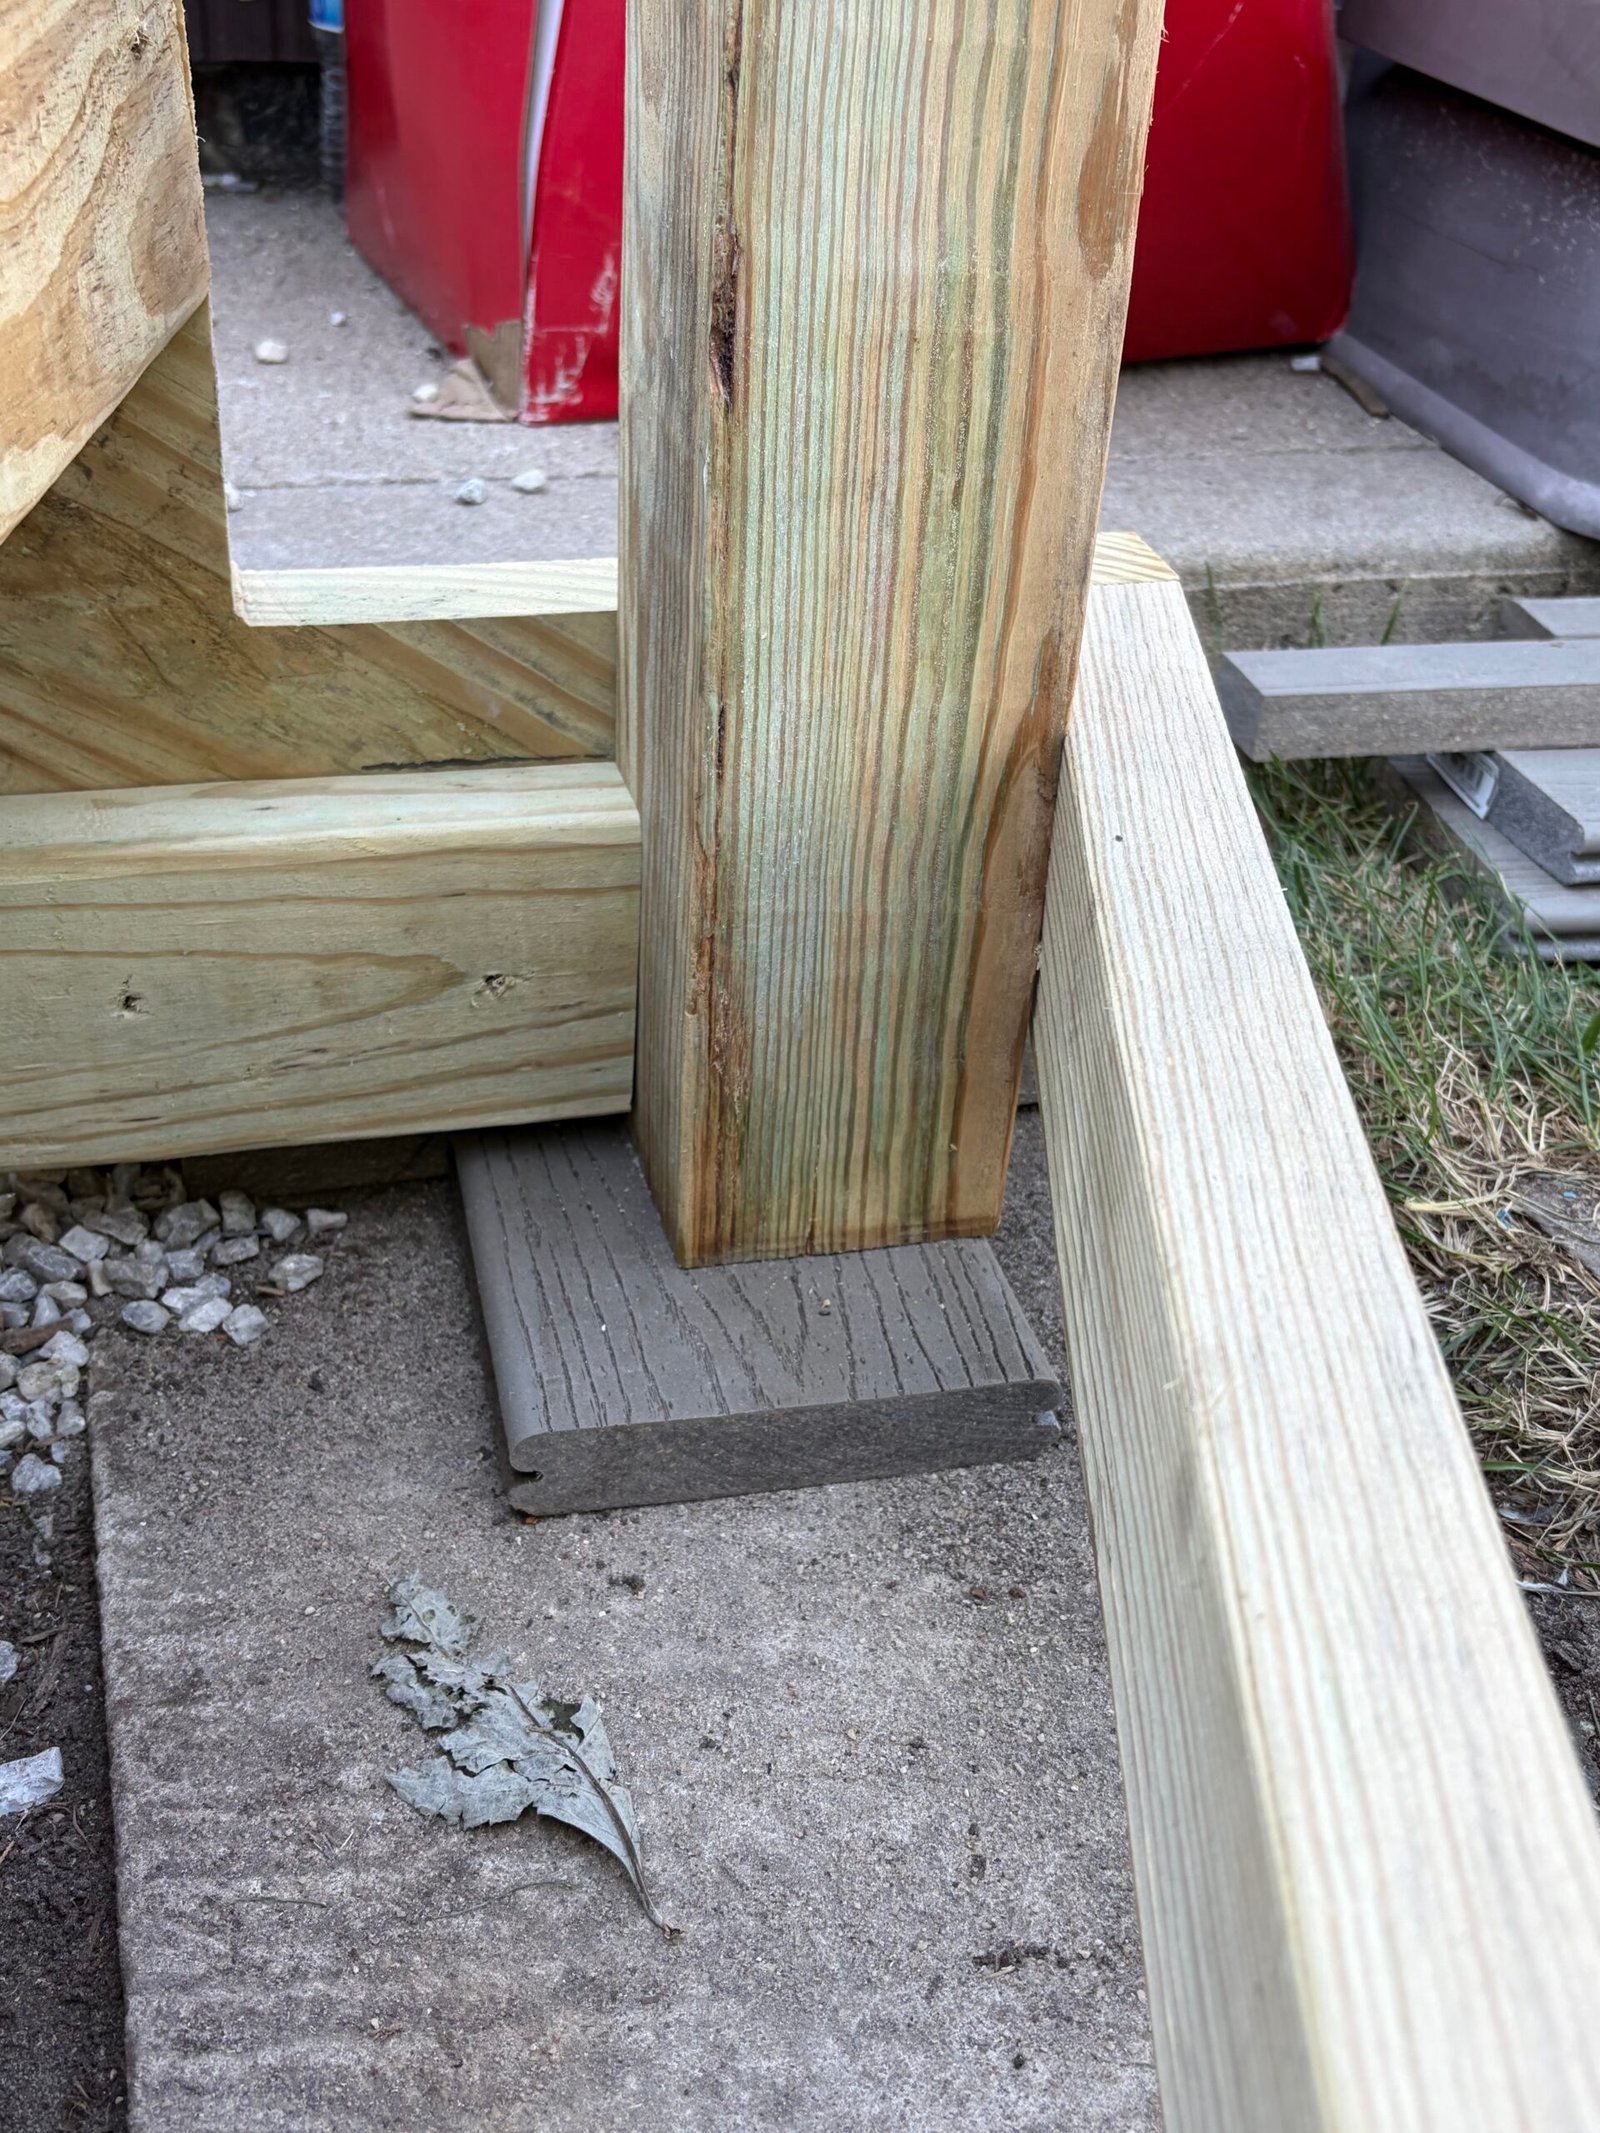
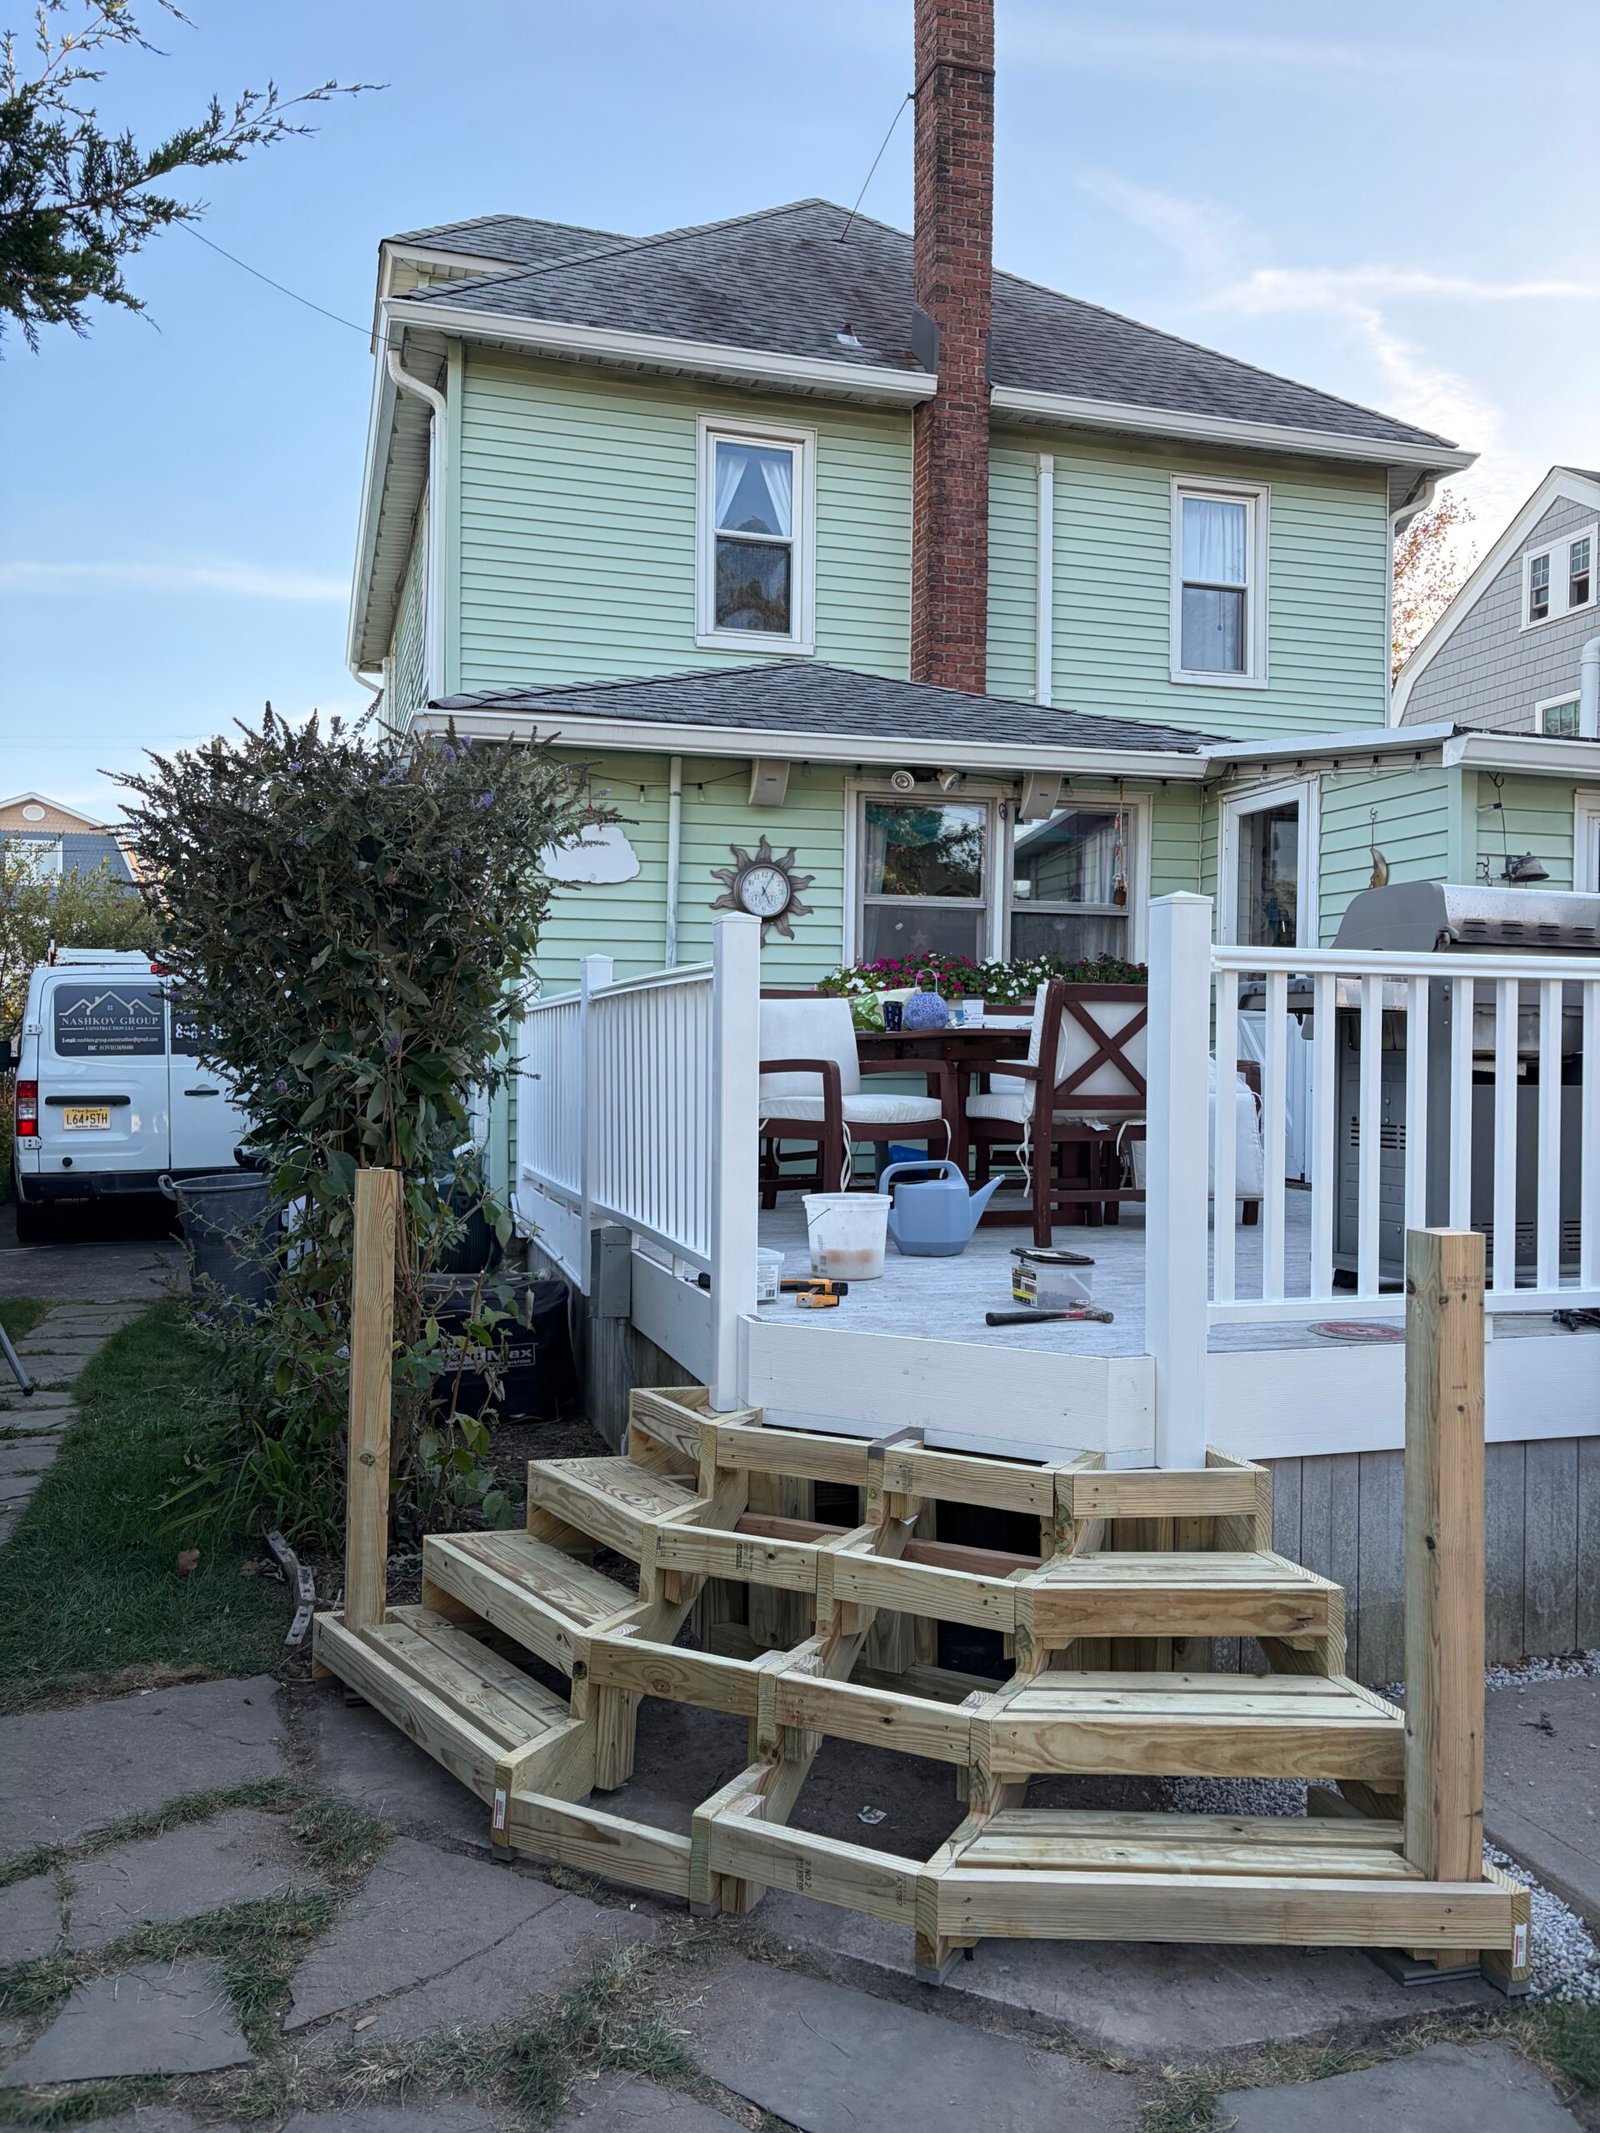
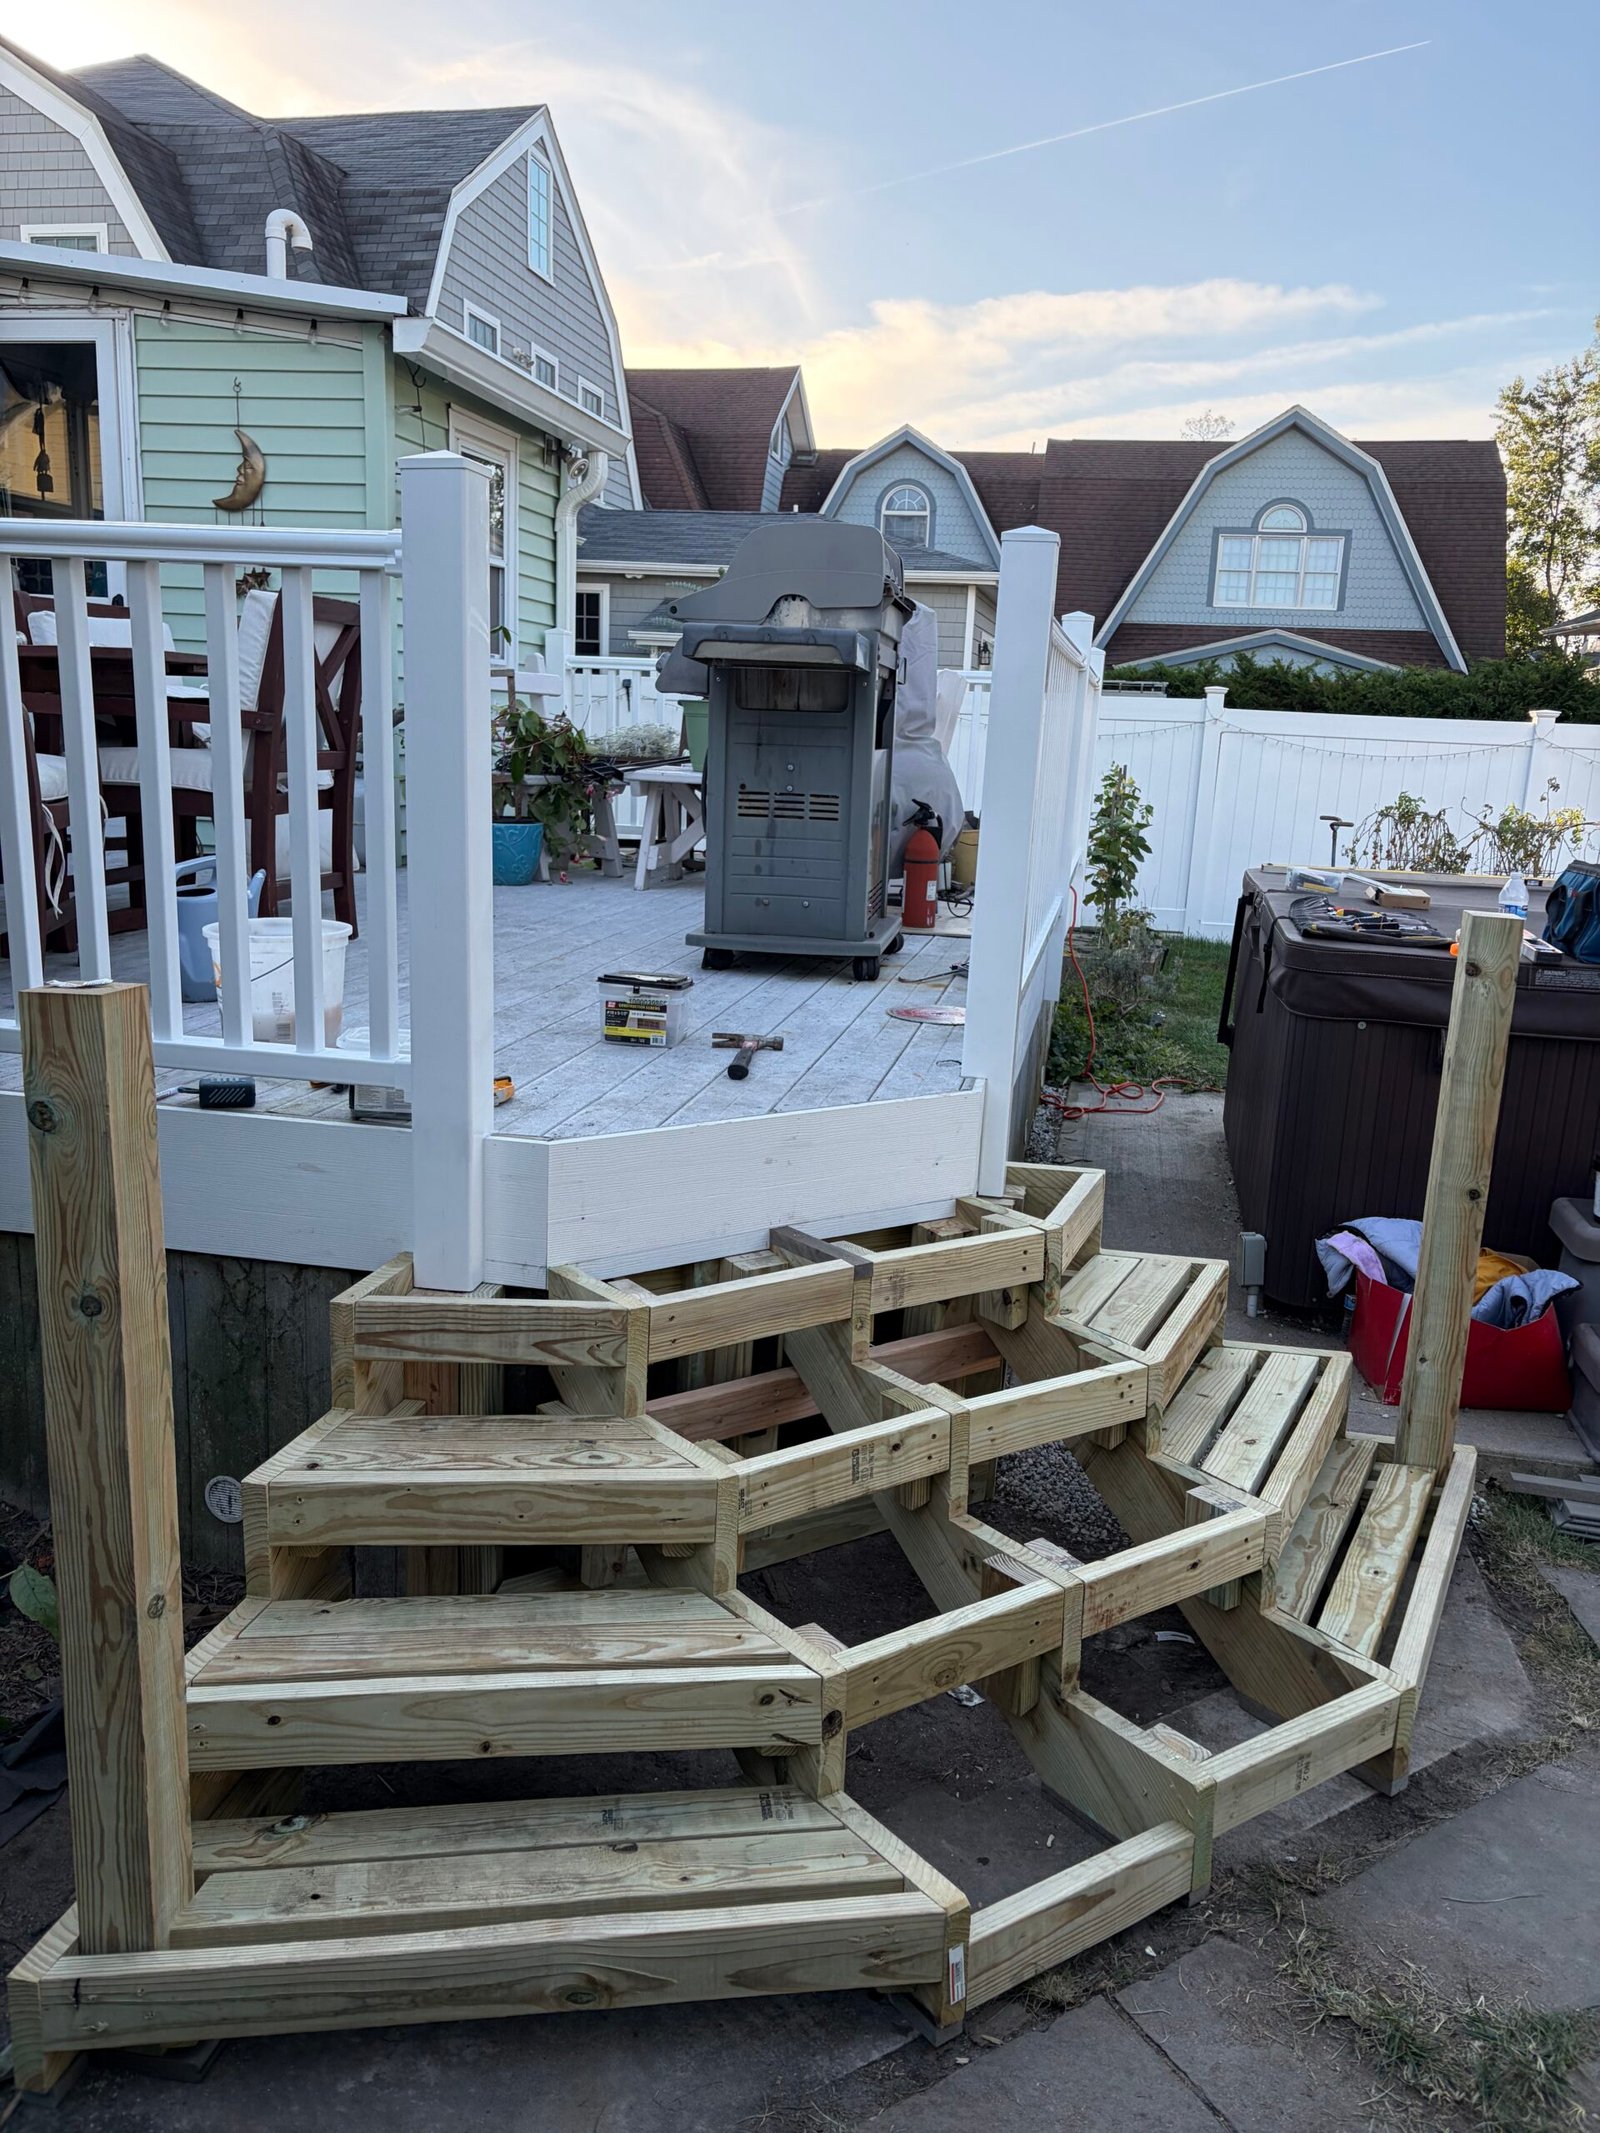
The stair structure was rebuilt with a broad central run and angled sections that return around its sides. New timber framing establishes the step positions and connects the deck opening with the existing garden path.
A close-up shows a post and the lower framing connection, while the wider photographs reveal the full stair outline before the tread boards cover the frame.
Stage 06
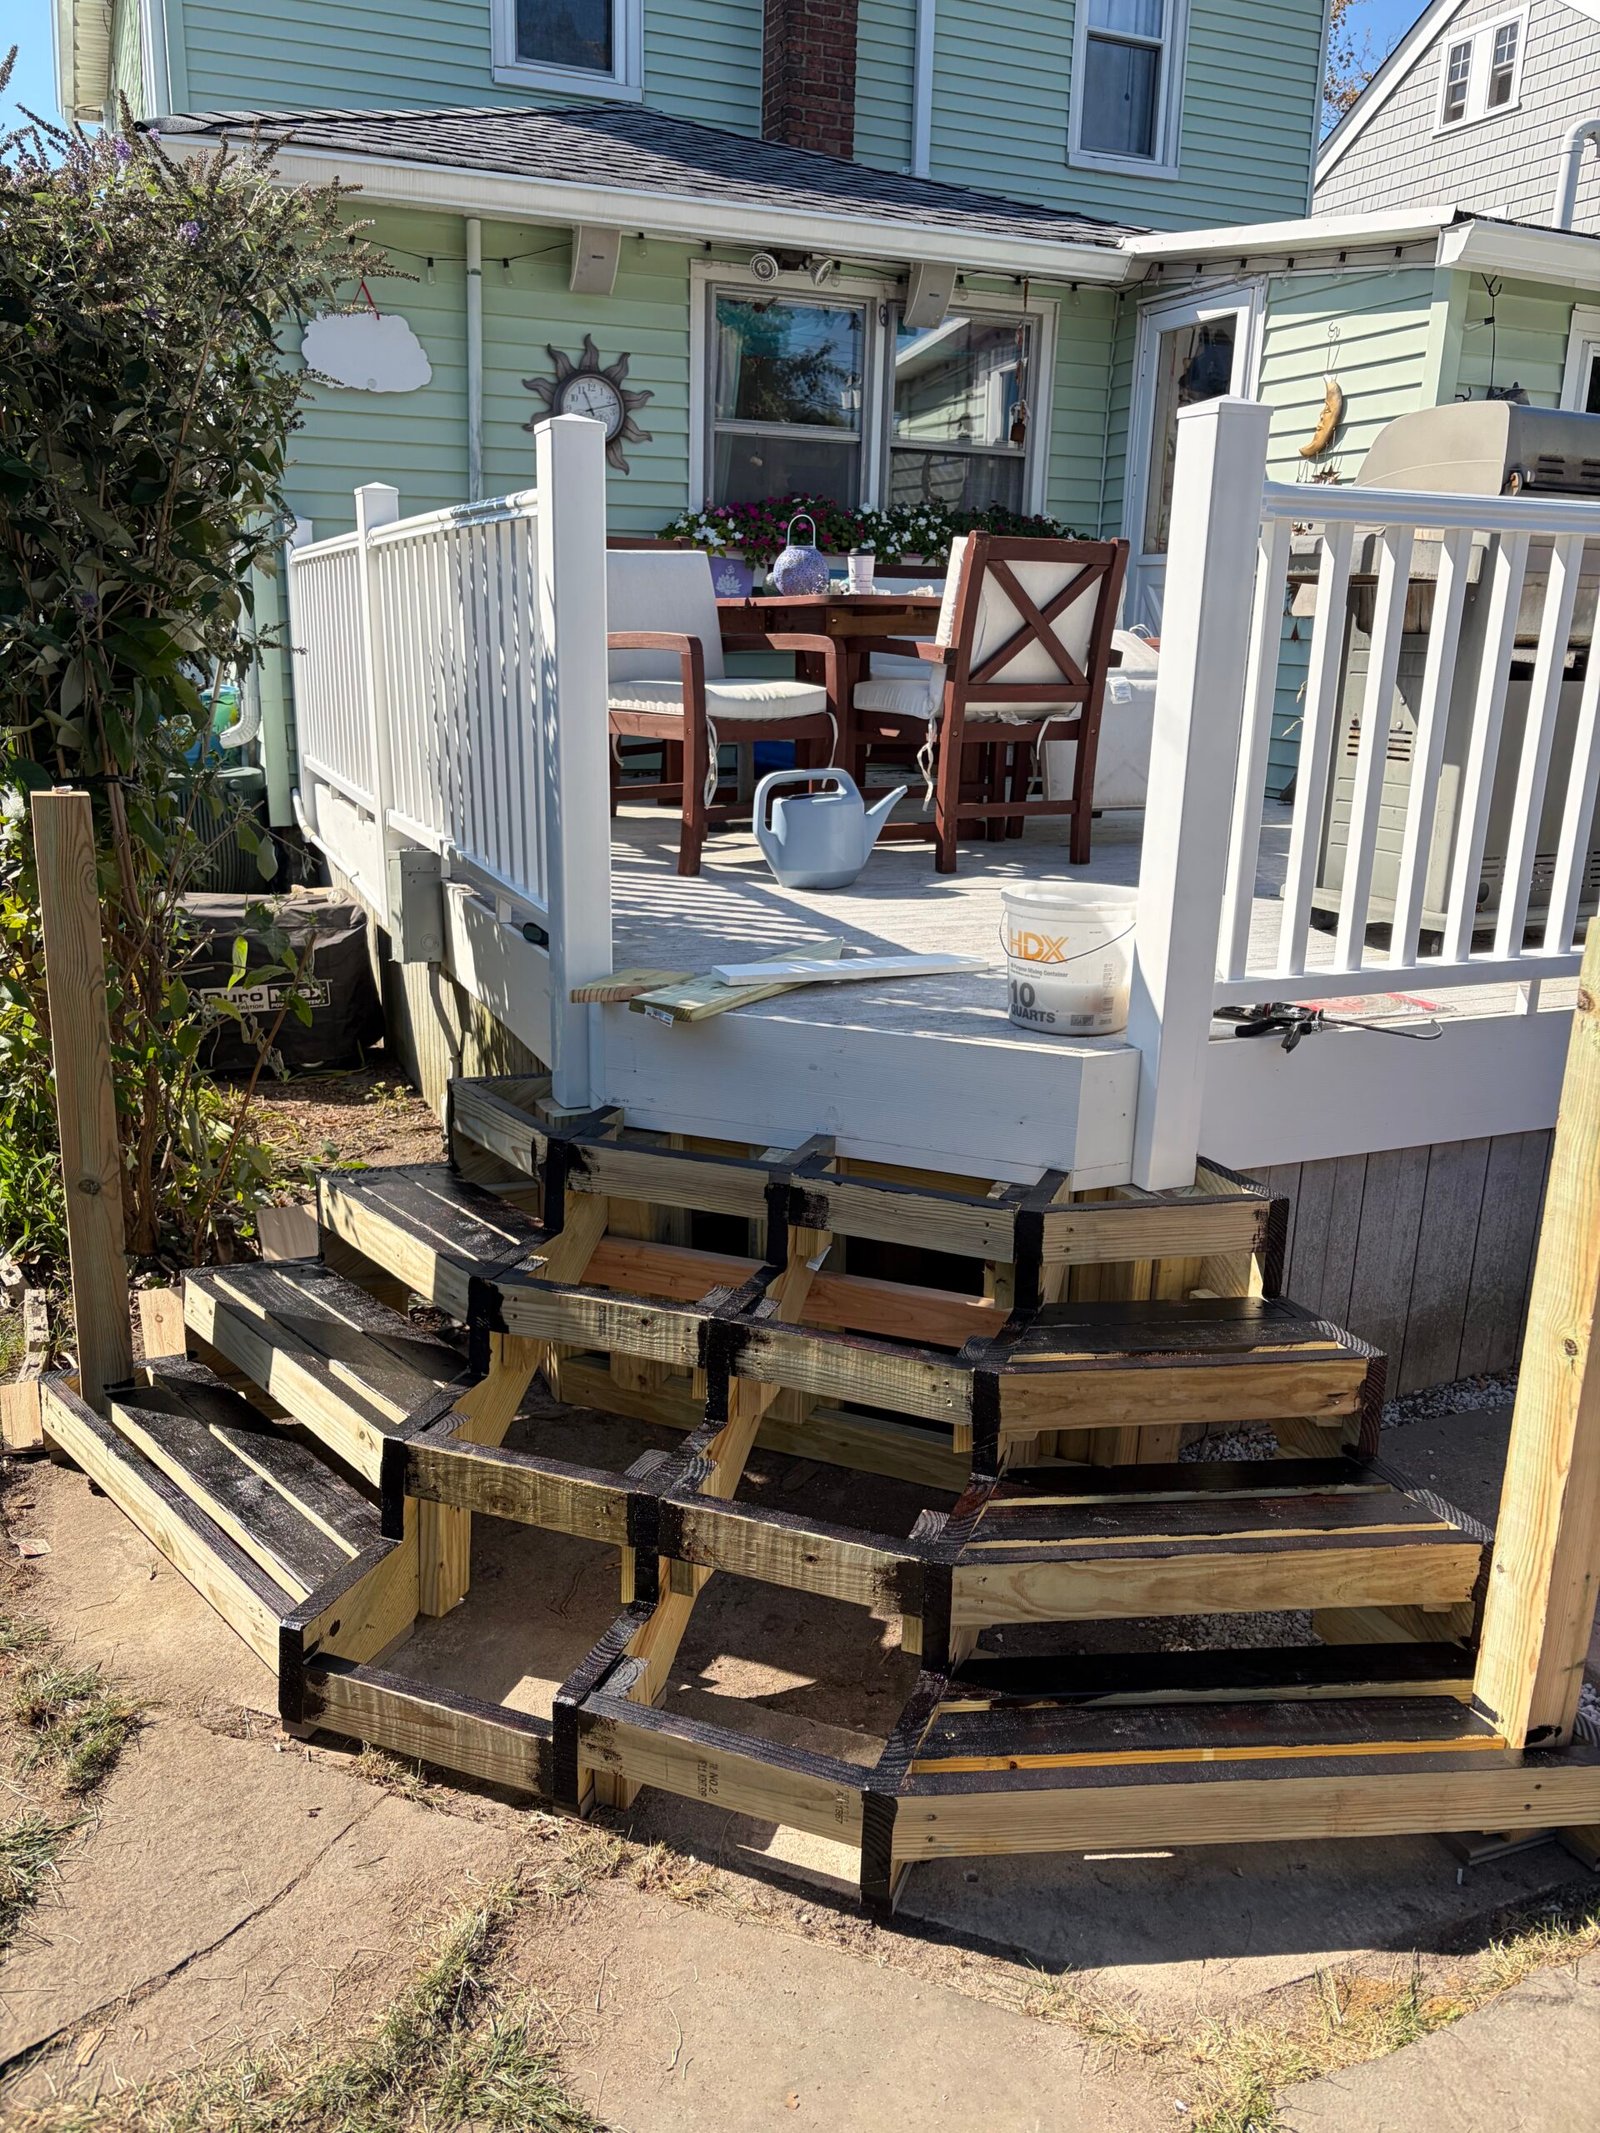
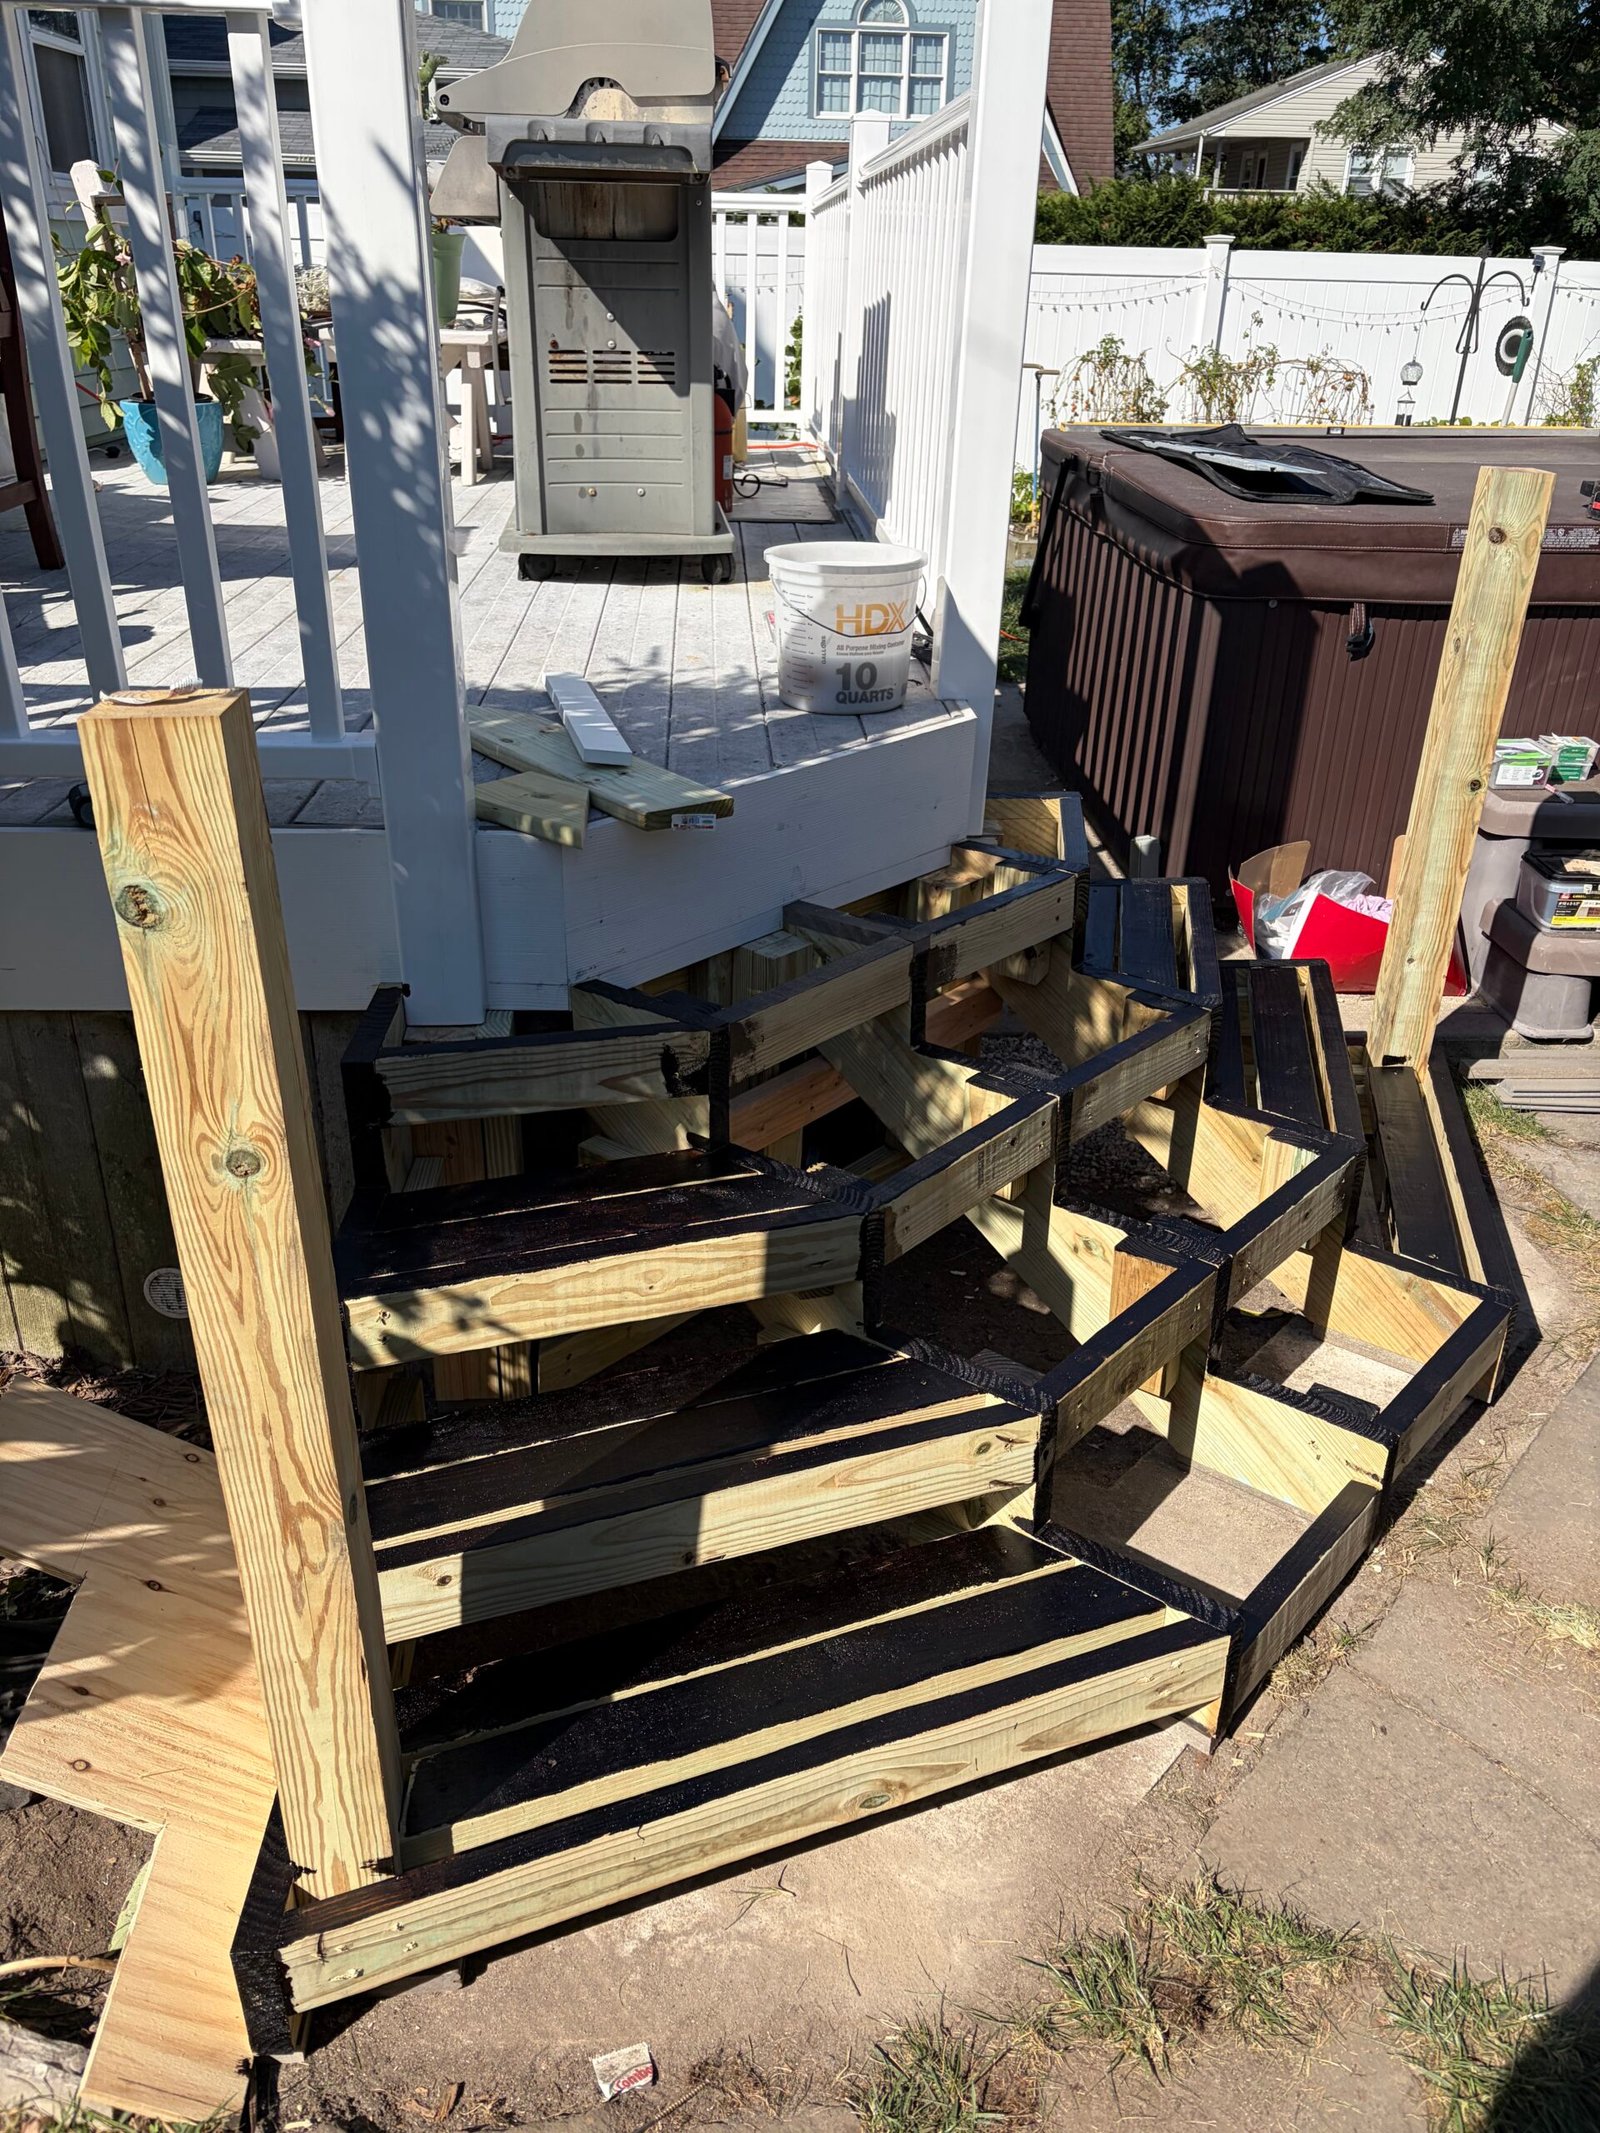
Tread boards were fitted across the rebuilt frame, following the wide center section and the angled returns. The photographed work shows the walking surfaces taking shape above the new timber stair construction.
The stair-side posts and railing details were completed around these surfaces. The final photographs show the finished tread arrangement and white stair railings together.
Stage 07
White stair railings complete both sides of the broad stair run and connect with the matching railings around the deck. The light tread surfaces and white perimeter details bring the renewed stairs and platform edge into one consistent finish.
The final views show the deck from the path, the garden and the hot-tub side. An evening walkthrough records the completed stair route and the white railing details at deck level.