Phone:
(701)814-6992
Physical address:
6296 Donnelly Plaza
Ratkeville, Bahamas.

Phone:
(701)814-6992
Physical address:
6296 Donnelly Plaza
Ratkeville, Bahamas.
Focused kitchen renovation · Project story
Room-side cabinet units gave way to a smooth painted wall beneath the kitchen peninsula counter. The work connects selective removal with local wall repairs, preparation, painting and final trim. Follow the change from the original storage face to the finished room-facing side.
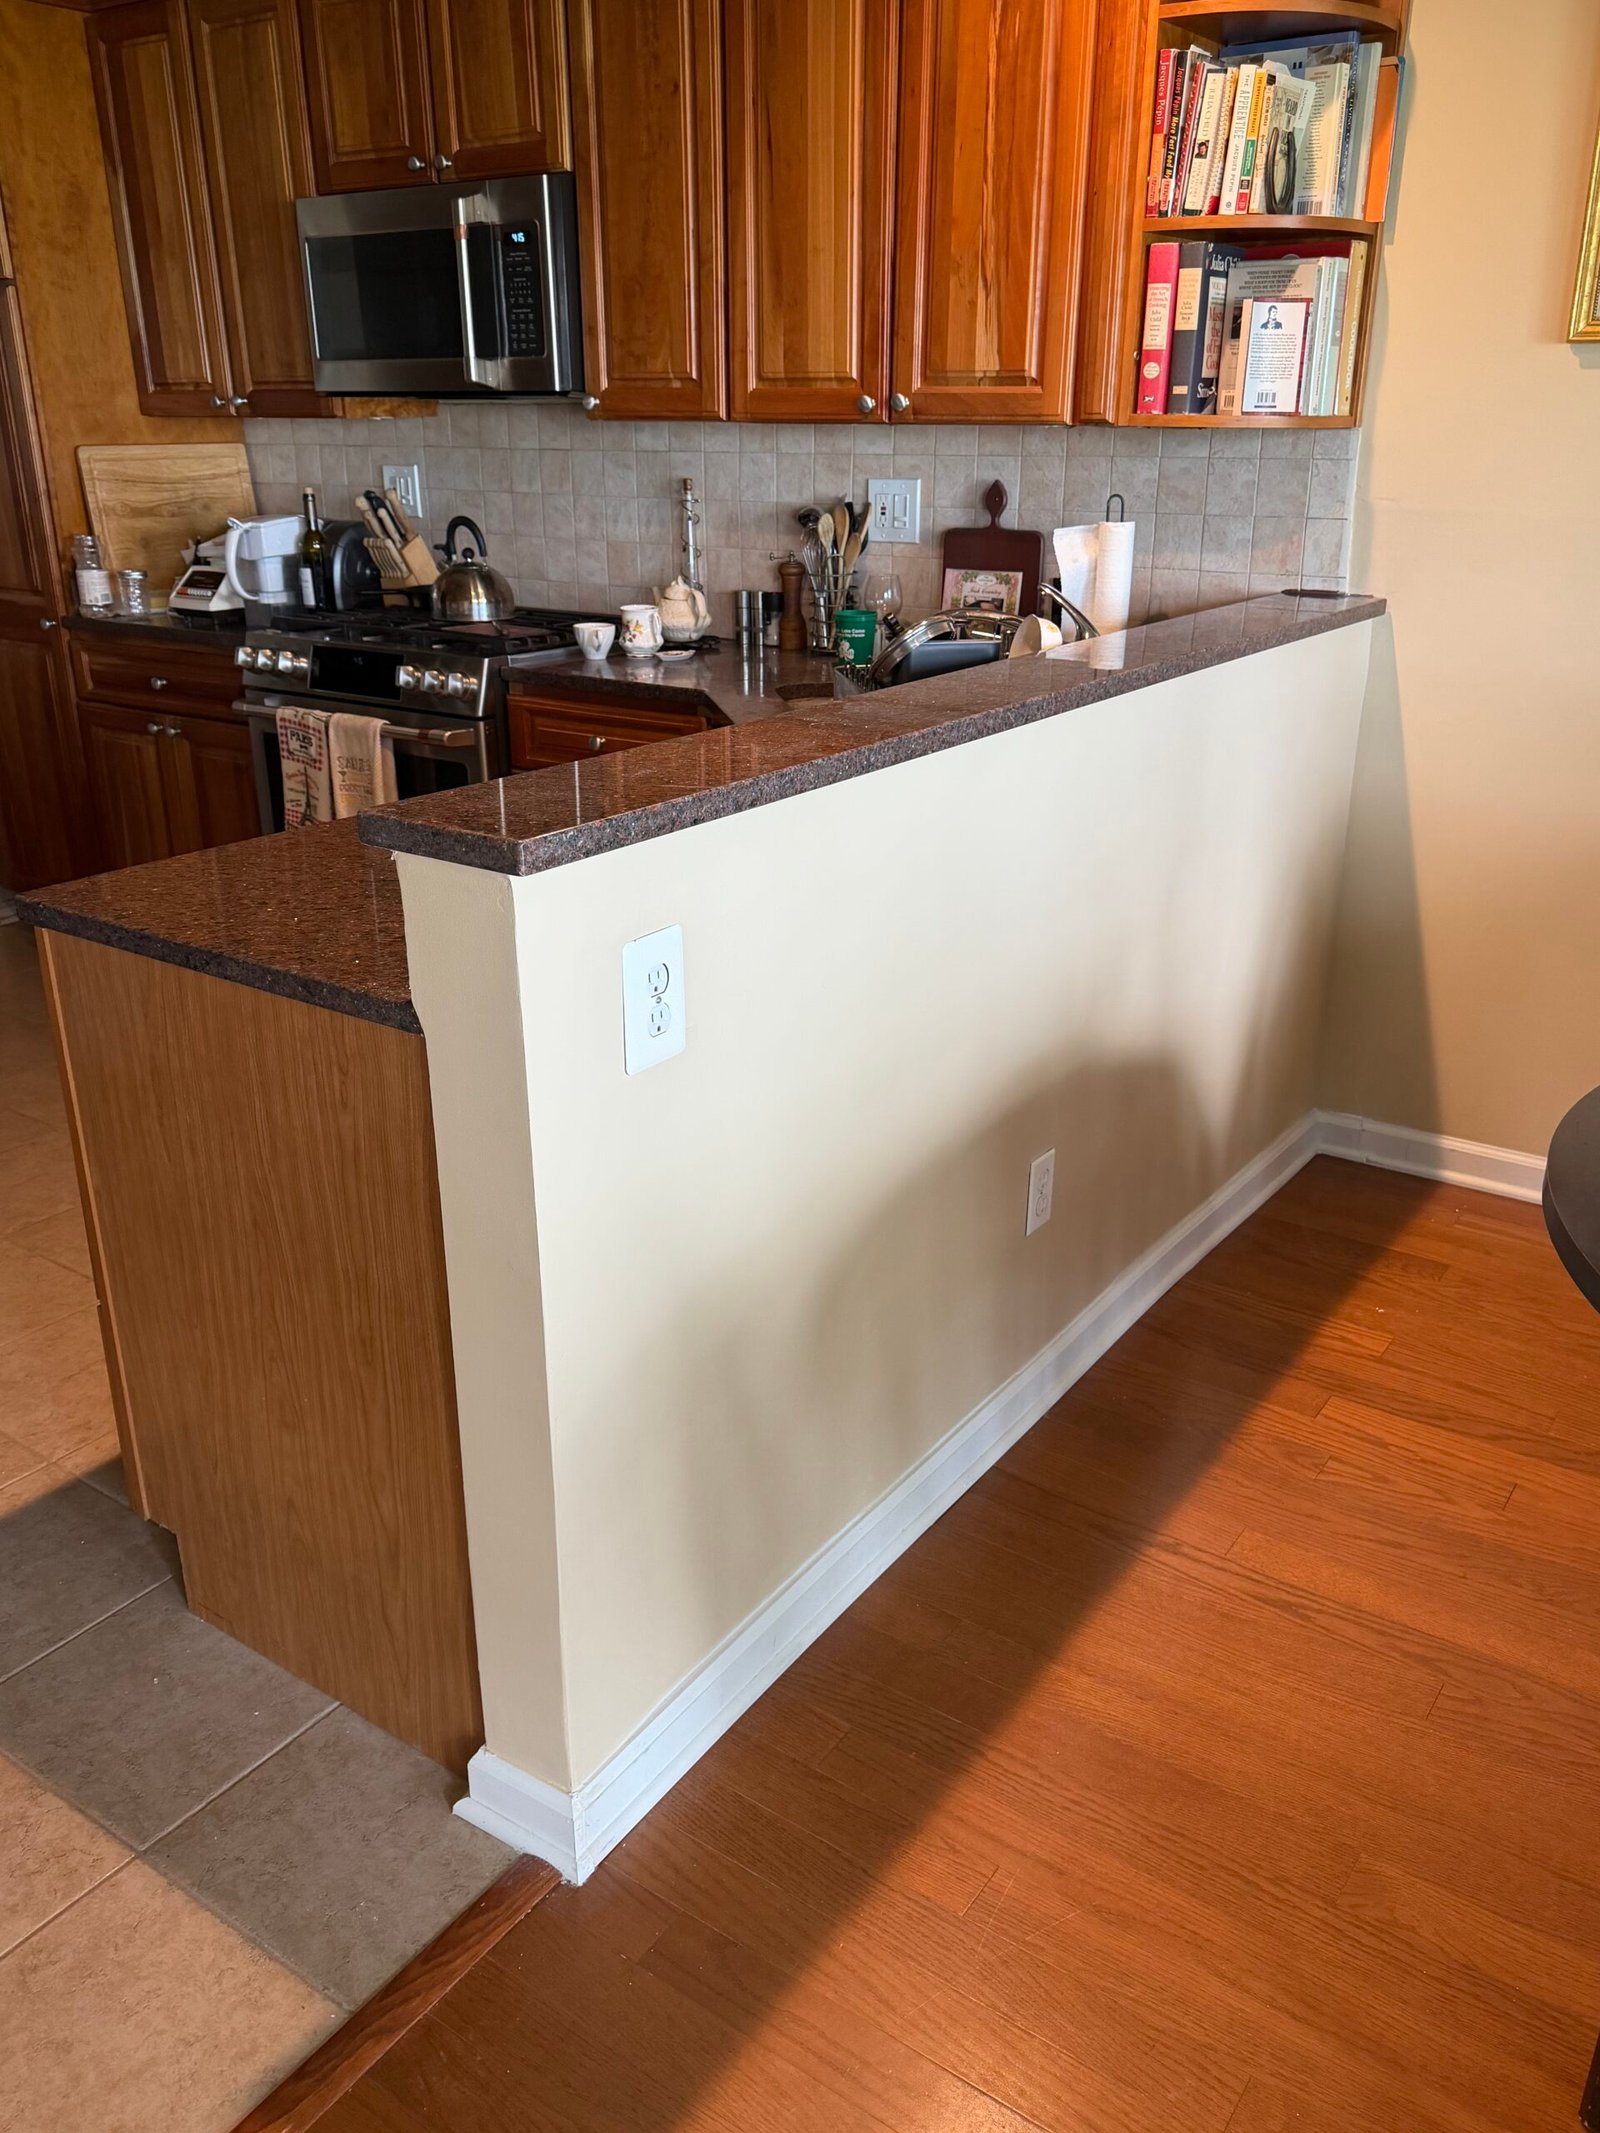 AFTER
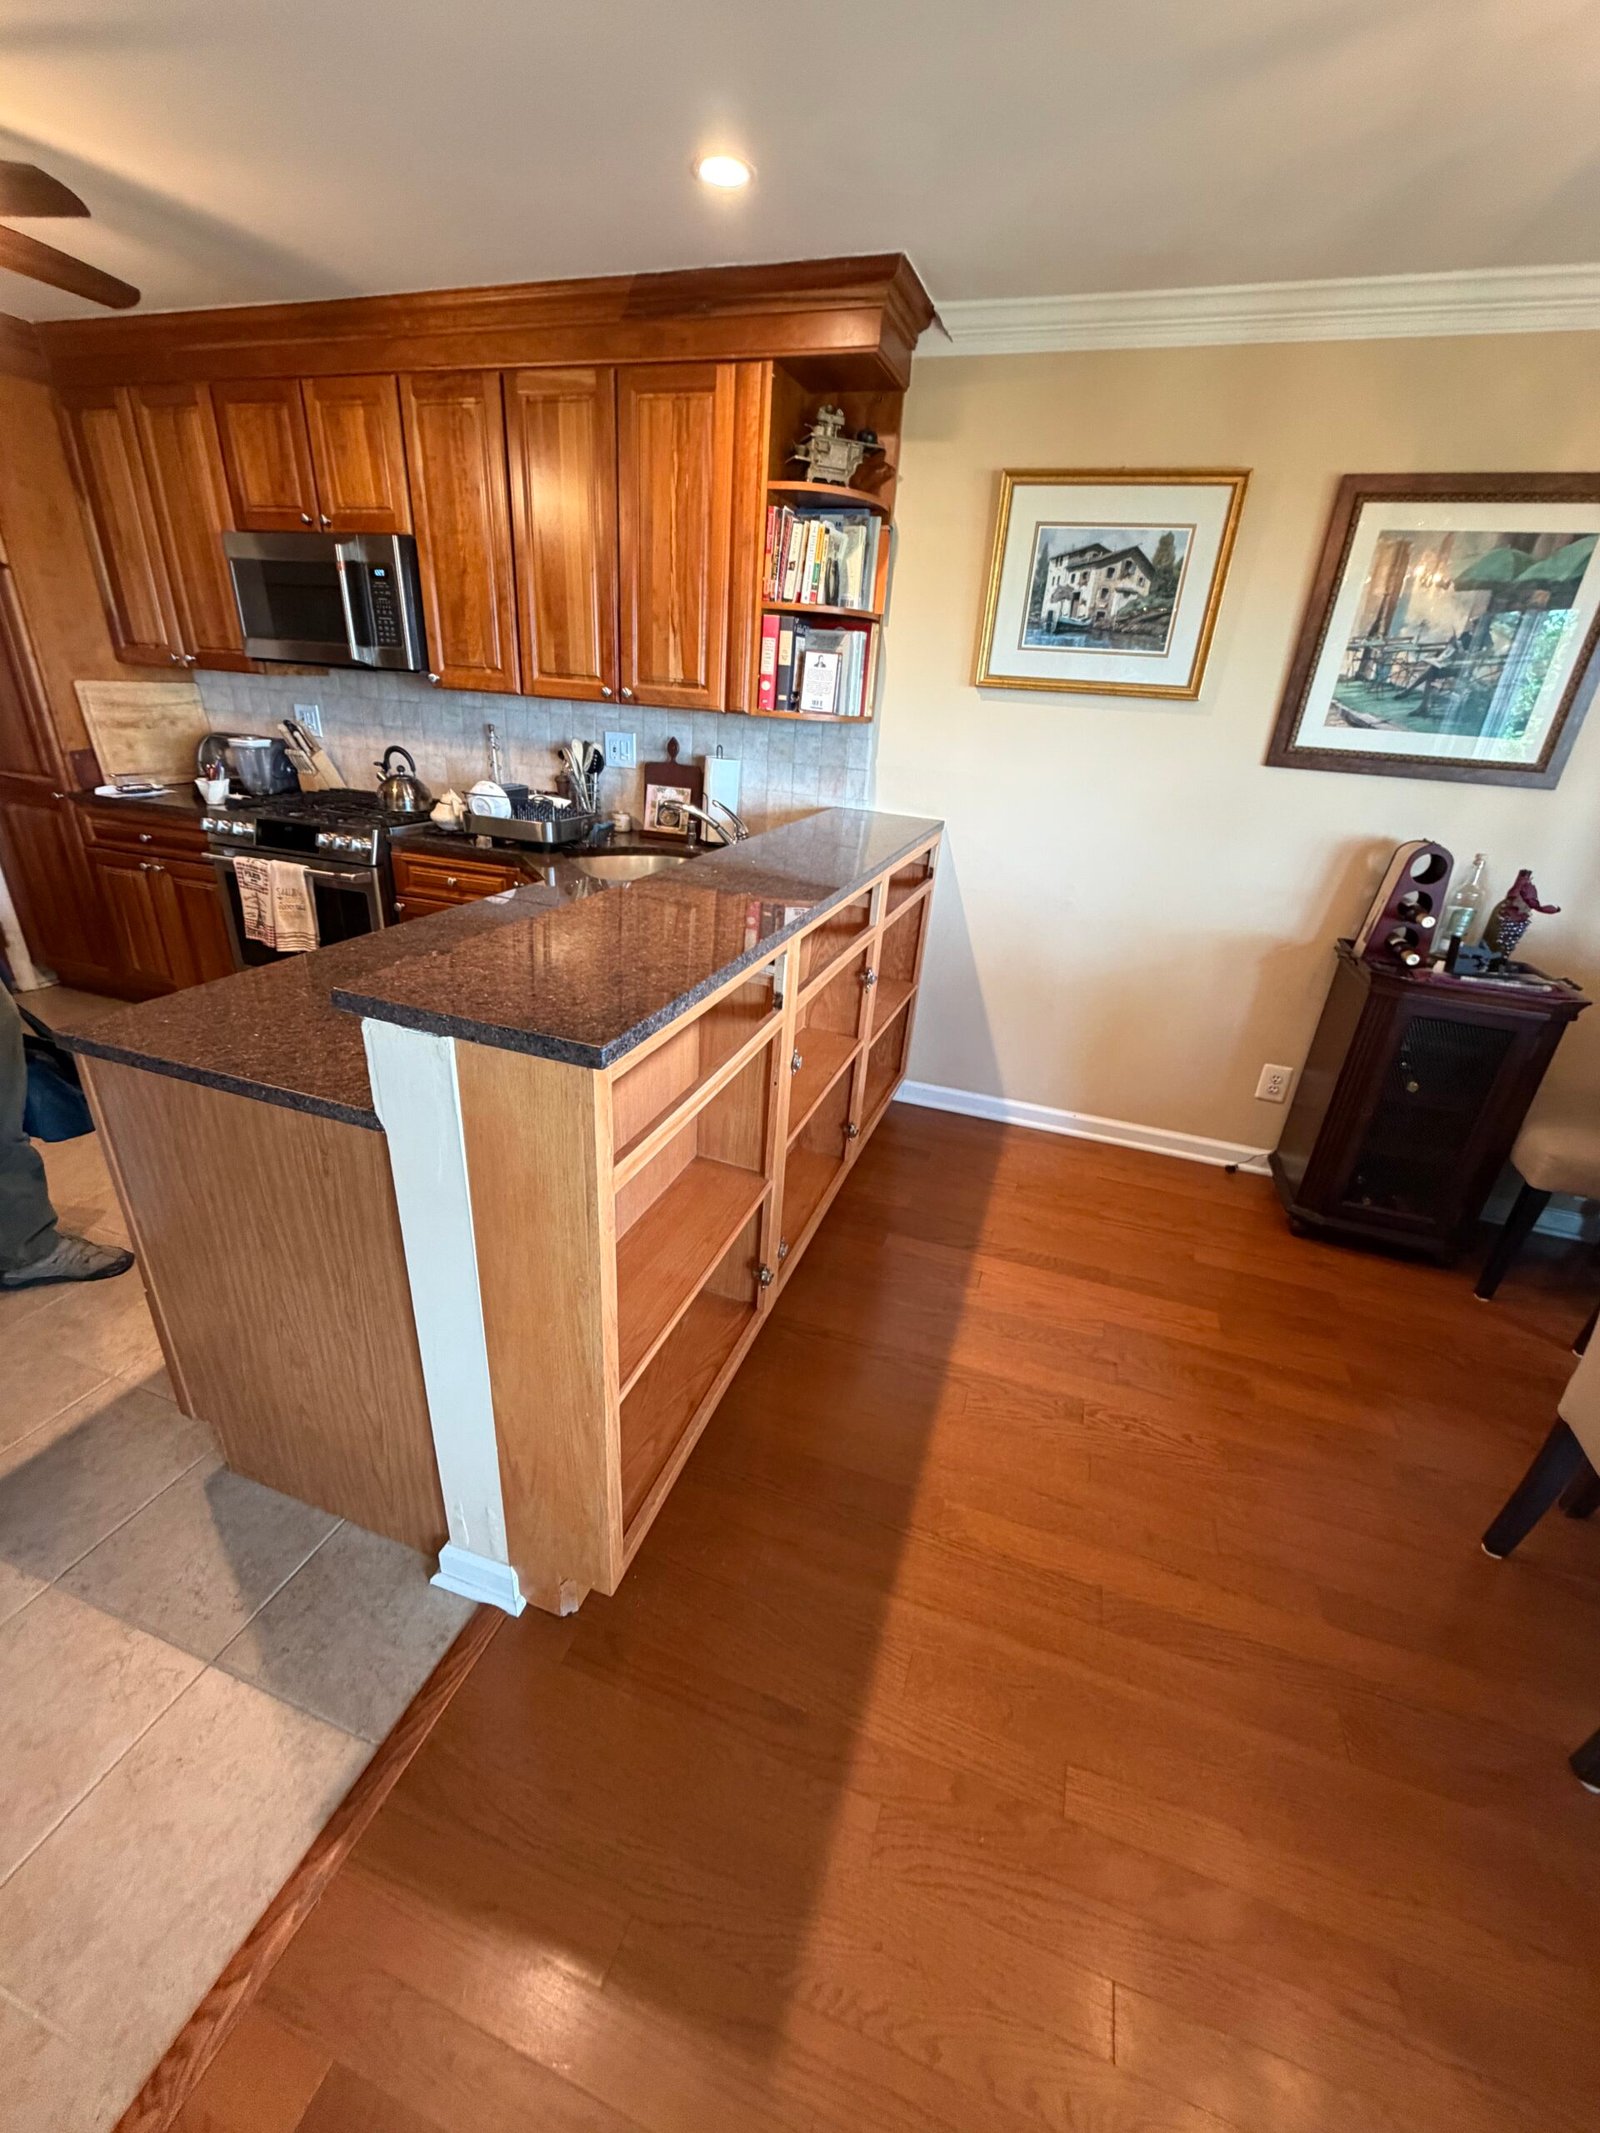 BEFORE
The starting photograph shows the cabinet units with their fronts already removed. Move the slider to compare those units before removal with the later painted wall and finished trim. Camera positions and lighting differ between photographs.
This focused update removed the cabinet units projecting from the dining-room side of the peninsula. The exposed wall was repaired and prepared, with attention to the attachment marks, upper edge, outlet openings and connection with the adjoining room wall.
The raised counter cap was temporarily removed during the work and refitted as finishing progressed. A smooth painted face, white baseboard and outlet cover plates complete the room-facing side, while the kitchen-side counter and cabinetry remain part of the existing arrangement.
Explore five stages in ten selected photographs, from the existing cabinet units to the finished peninsula. Select any stage photograph to open the gallery.
Stage 01
The peninsula connected the kitchen with the dining area through a raised counter and storage on the room-facing side. The starting photographs show the cabinet units with their fronts already removed, alongside the kitchen-side counter and sink area.
The requested change focused on removing those room-side units and finishing the wall behind them. These views establish the area being altered and its connection with the surrounding kitchen.
Stage 02
The room-side cabinet units were removed, revealing the wall beneath the raised counter. The exposed face shows attachment marks, the upper edge and the corner where it meets the adjoining wall.
The photographs show the work area during removal, with floor protection in place and the counter cap off the top of the wall. This opened the surfaces that needed local repair before finishing.
Stage 03
Local patches bring together the marks and edges left behind by the removed cabinetry. The repair follows the upper edge, the end of the peninsula, the outlet openings and the connection with the existing room wall.
The patched face is prepared as a continuous wall surface. Its perimeter and adjoining finishes are considered together so the later paint and trim can complete the area.
Stage 04
The repaired wall moves into preparation and coating, with the surrounding floor and dining furniture protected. The kitchen-side view shows the raised counter cap temporarily removed while this work is carried out.
A later photograph shows the cap refitted and the wall coating still in progress. The upper edge, outlet openings and adjoining corner remain part of the finishing work before the completed room is photographed.
Stage 05
The former cabinet face is now a smooth painted wall, finished with white baseboard and outlet cover plates. The raised counter cap completes the upper edge, connecting the local repair with the existing peninsula.
From the kitchen side, the counter, tiled inner face and base cabinets continue to define the working area. The final views show how the focused removal and wall finishing change the room-facing side of the kitchen.
Browse all ten stage photographs with the gallery arrows, your keyboard or a swipe on your phone.
Removing the room-side storage changed the appearance and projection of the peninsula. The repaired and painted wall now meets the existing counter cap, neighboring wall and floor through the finished edges and white baseboard.
Planning cabinet removal, a peninsula alteration or a wider kitchen renovation? Share photographs, your property location and the changes you have in mind. Nashkov Group can help define the removal, repairs, installations and finishing scope.
Discuss your kitchen project