Phone:
(848)318-7679
Physical address:
954 Vaughn Ave, Toms River 08753

Phone:
(848)318-7679
Physical address:
954 Vaughn Ave, Toms River 08753
Accent walls, white tile and mosaic details
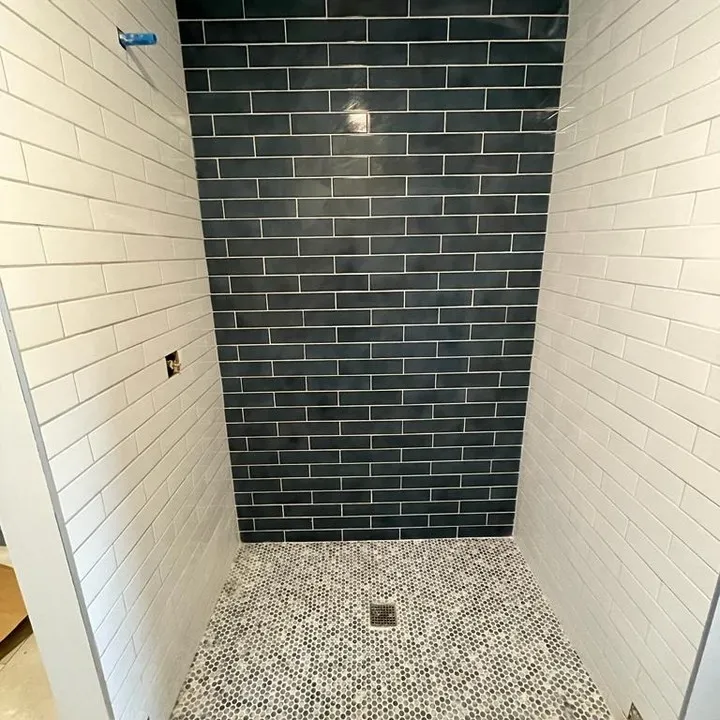
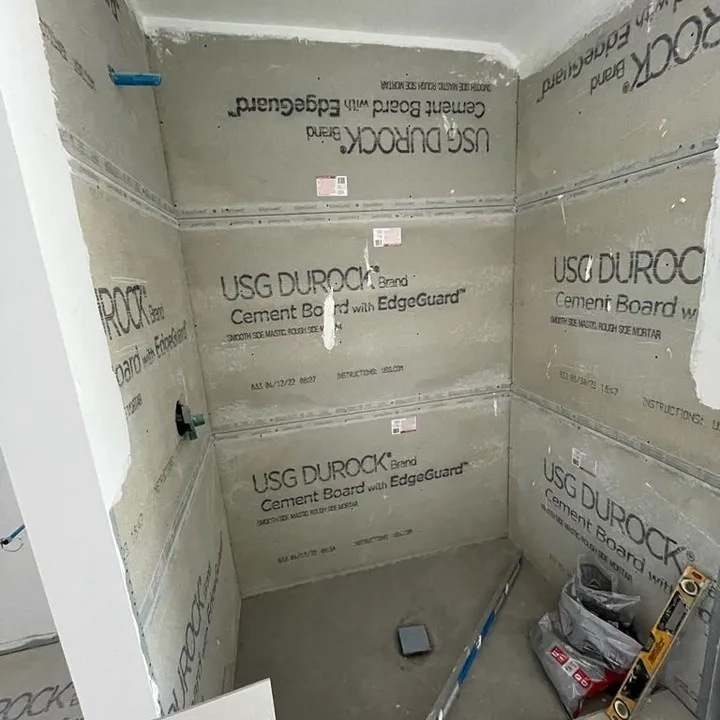
Nashkov Group Construction LLC installed tile in the shower and sink area, combining dark blue accents, white shower walls and a light mosaic shower floor. Follow the work from the prepared backing to the wall-tile installation and completed shower tilework.
Move the slider to compare the exposed shower backing with the completed wall and floor tile.
 AFTER
 BEFORE
The shower and sink-area wall share a blue-toned accent finish, while the white shower walls and light floor materials keep the surrounding surfaces bright. The photographs show the wall pattern, the transitions around the partition and the smaller mosaic scale used at the shower floor.
Explore the prepared surfaces, tile installation and finished shower tilework. Select a photograph to view the full image, then use the arrows, your keyboard or a swipe to browse the gallery.
Stage 01
The photograph sequence begins with cement-board backing already in place. The wider view shows the shower opening, the adjoining floor area and the partition that separates the shower from the future sink position.
Inside the shower, the board layout, treated seams, base and openings for the fittings are visible before the tile covers them. These views record the starting surfaces for the photographed tile installation.
Stage 02
Blue-toned rectangular tile was installed at the sink-area wall, with a matching dark accent surface visible inside the shower. The staggered horizontal layout gives the wall a consistent pattern around the future sink connections.
Spacers remain between the tiles in this progress view, while the shower sidewall is still exposed. The light rectangular floor tile and white partition provide context for how the wall finishes meet the surrounding room.
Stage 03
The shower tilework brings a dark blue back wall together with white rectangular tile along the sidewalls. Light joint lines define the horizontal pattern and the changes in direction at the corners.
A light, small-scale mosaic covers the shower floor around the square drain. This final view records the completed tile surfaces, with the openings and connections for the remaining shower fittings still visible.